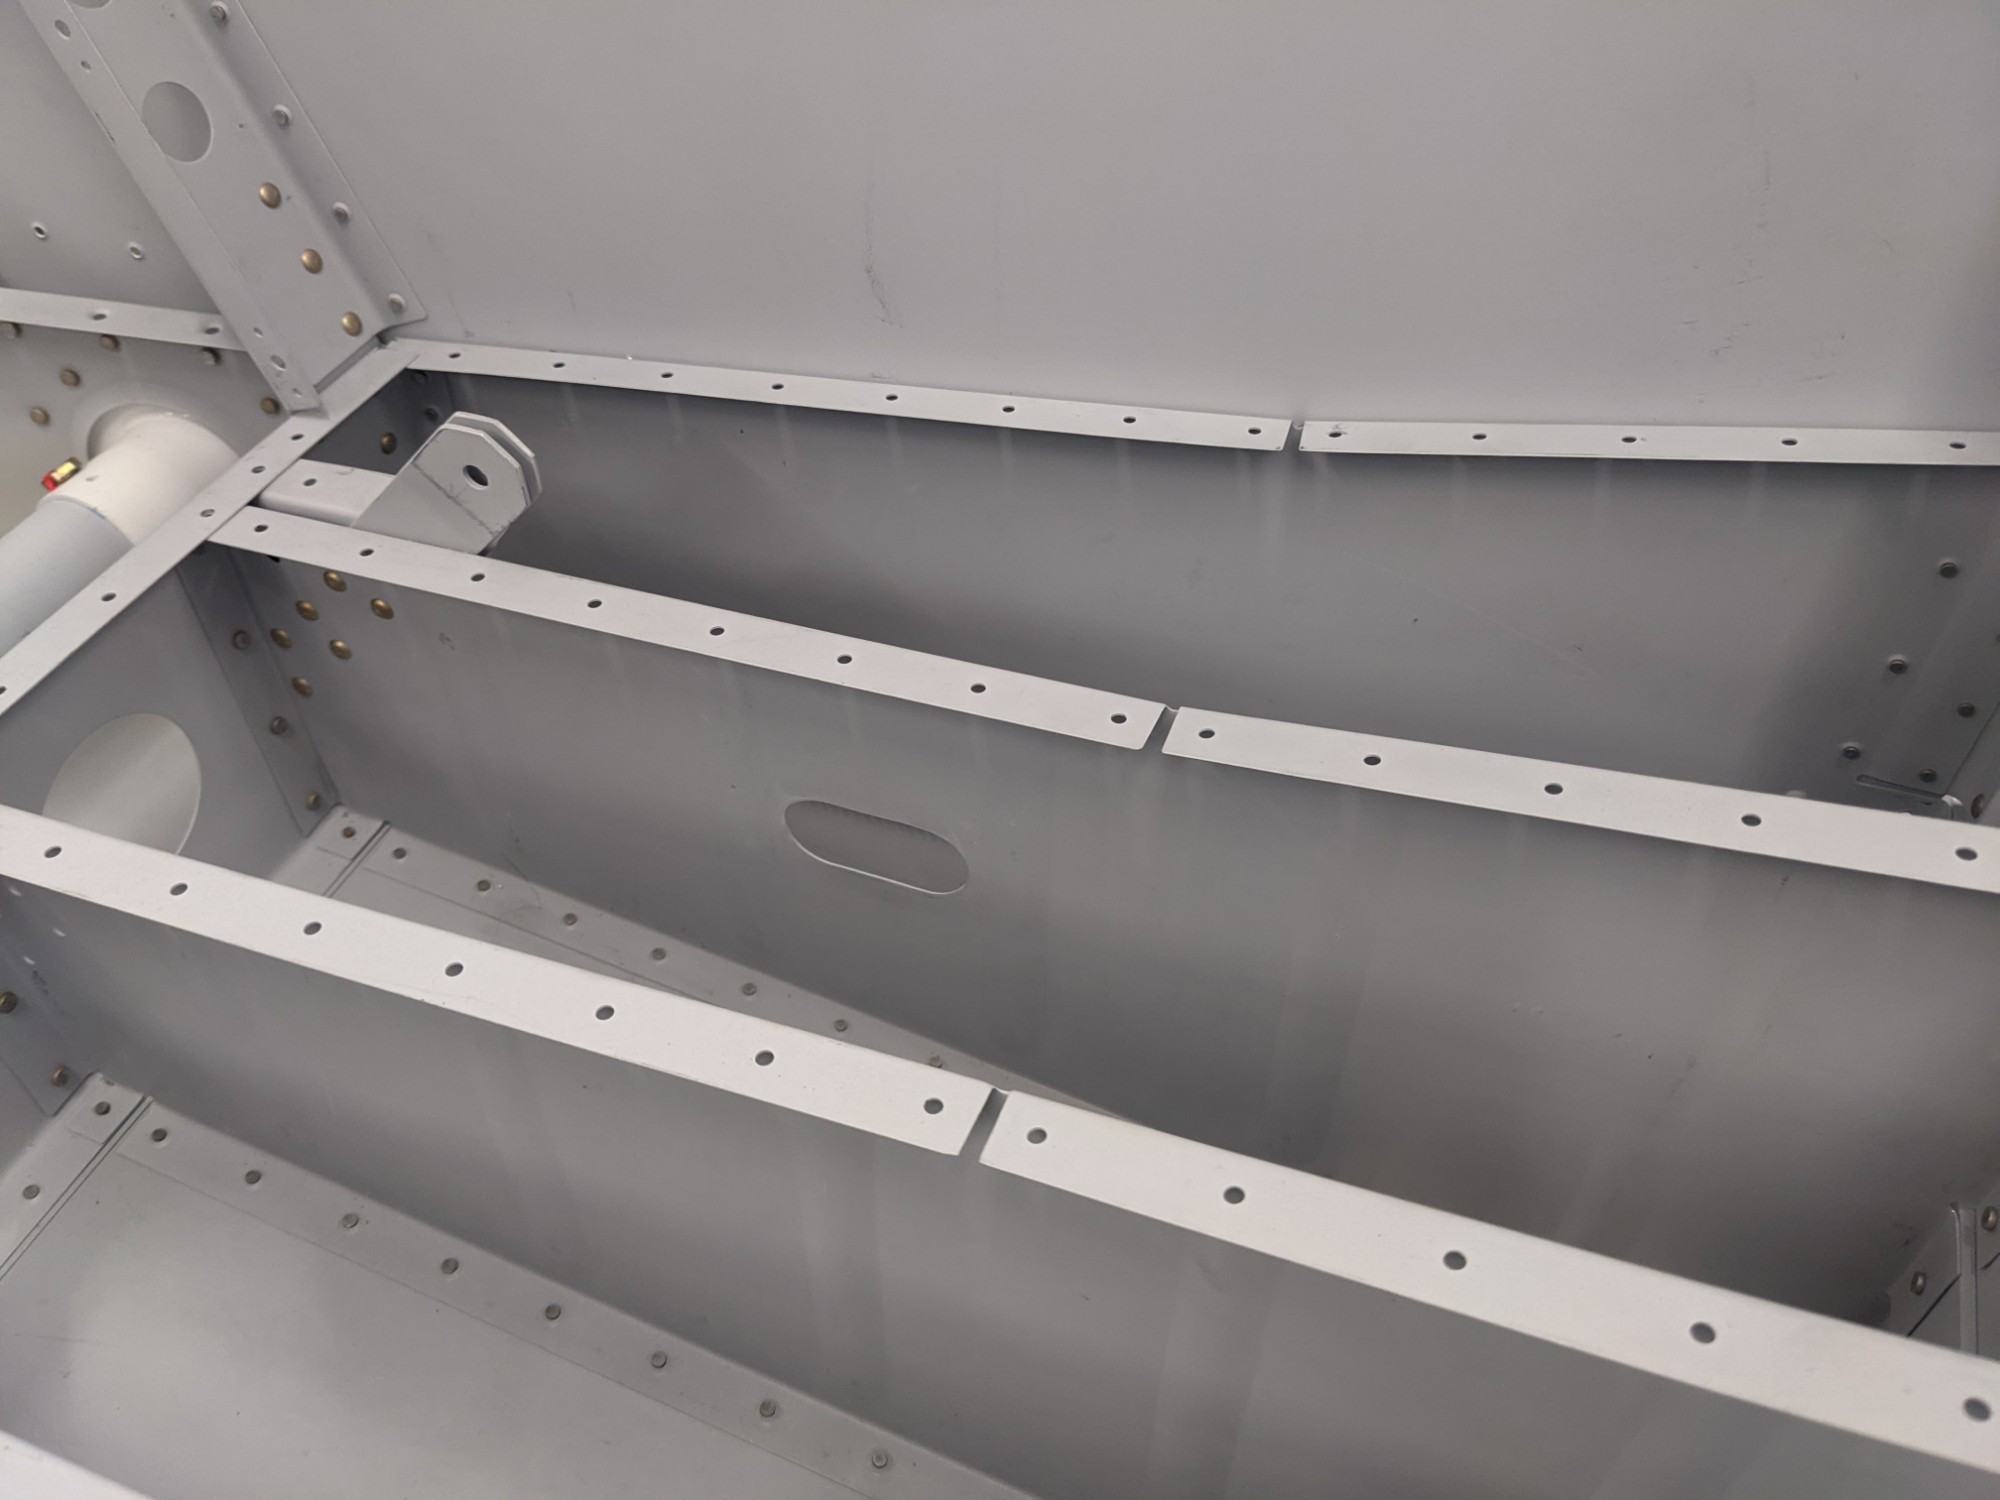
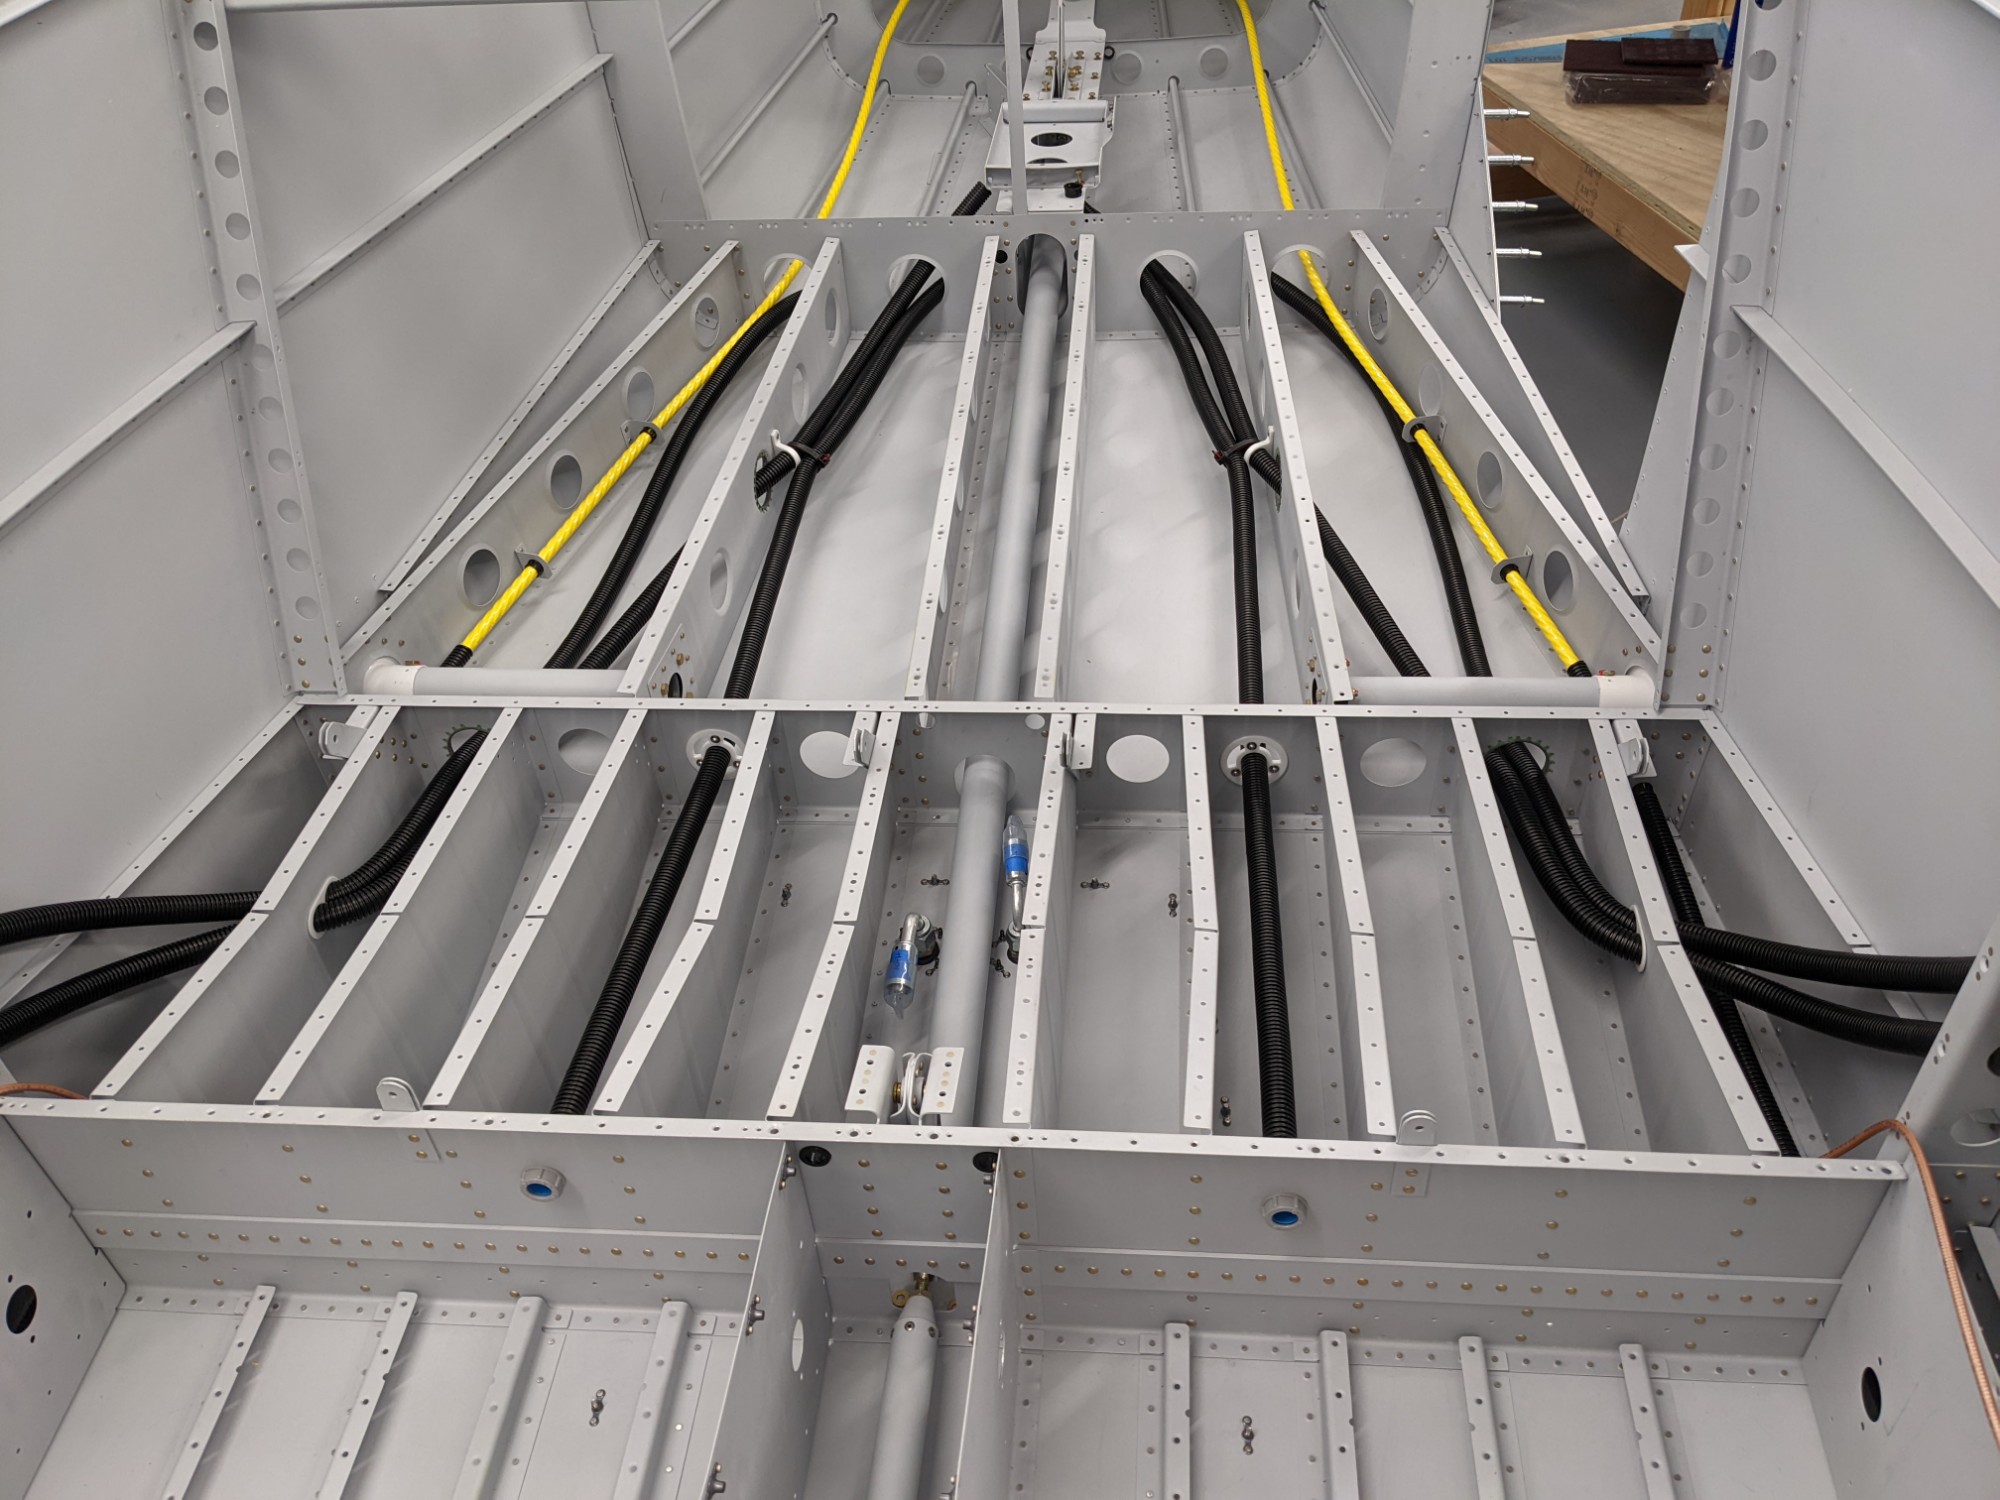
Before closing up the seat and baggage area floors it is necessary to install conduit for the wiring that will pass through this area.
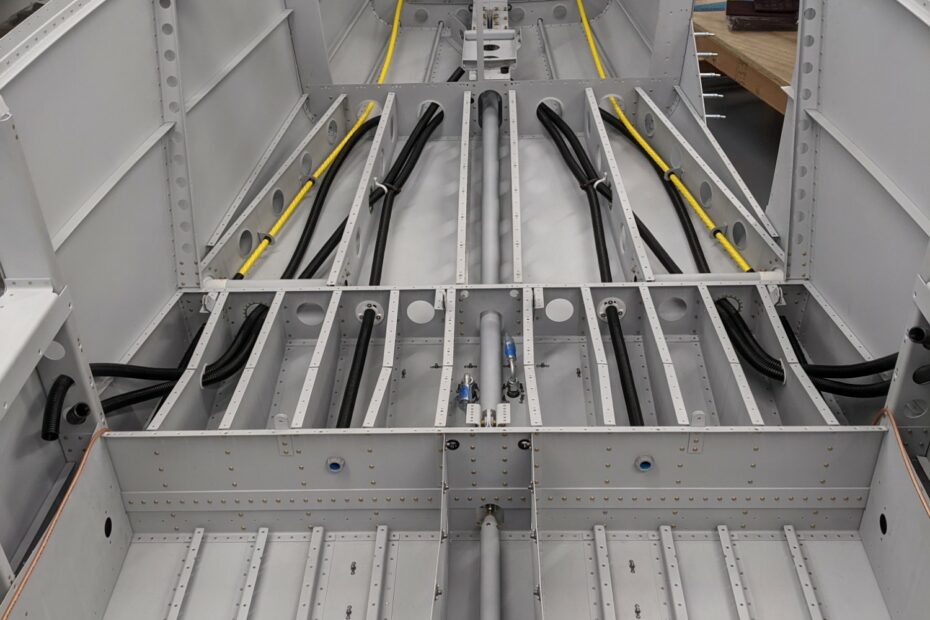
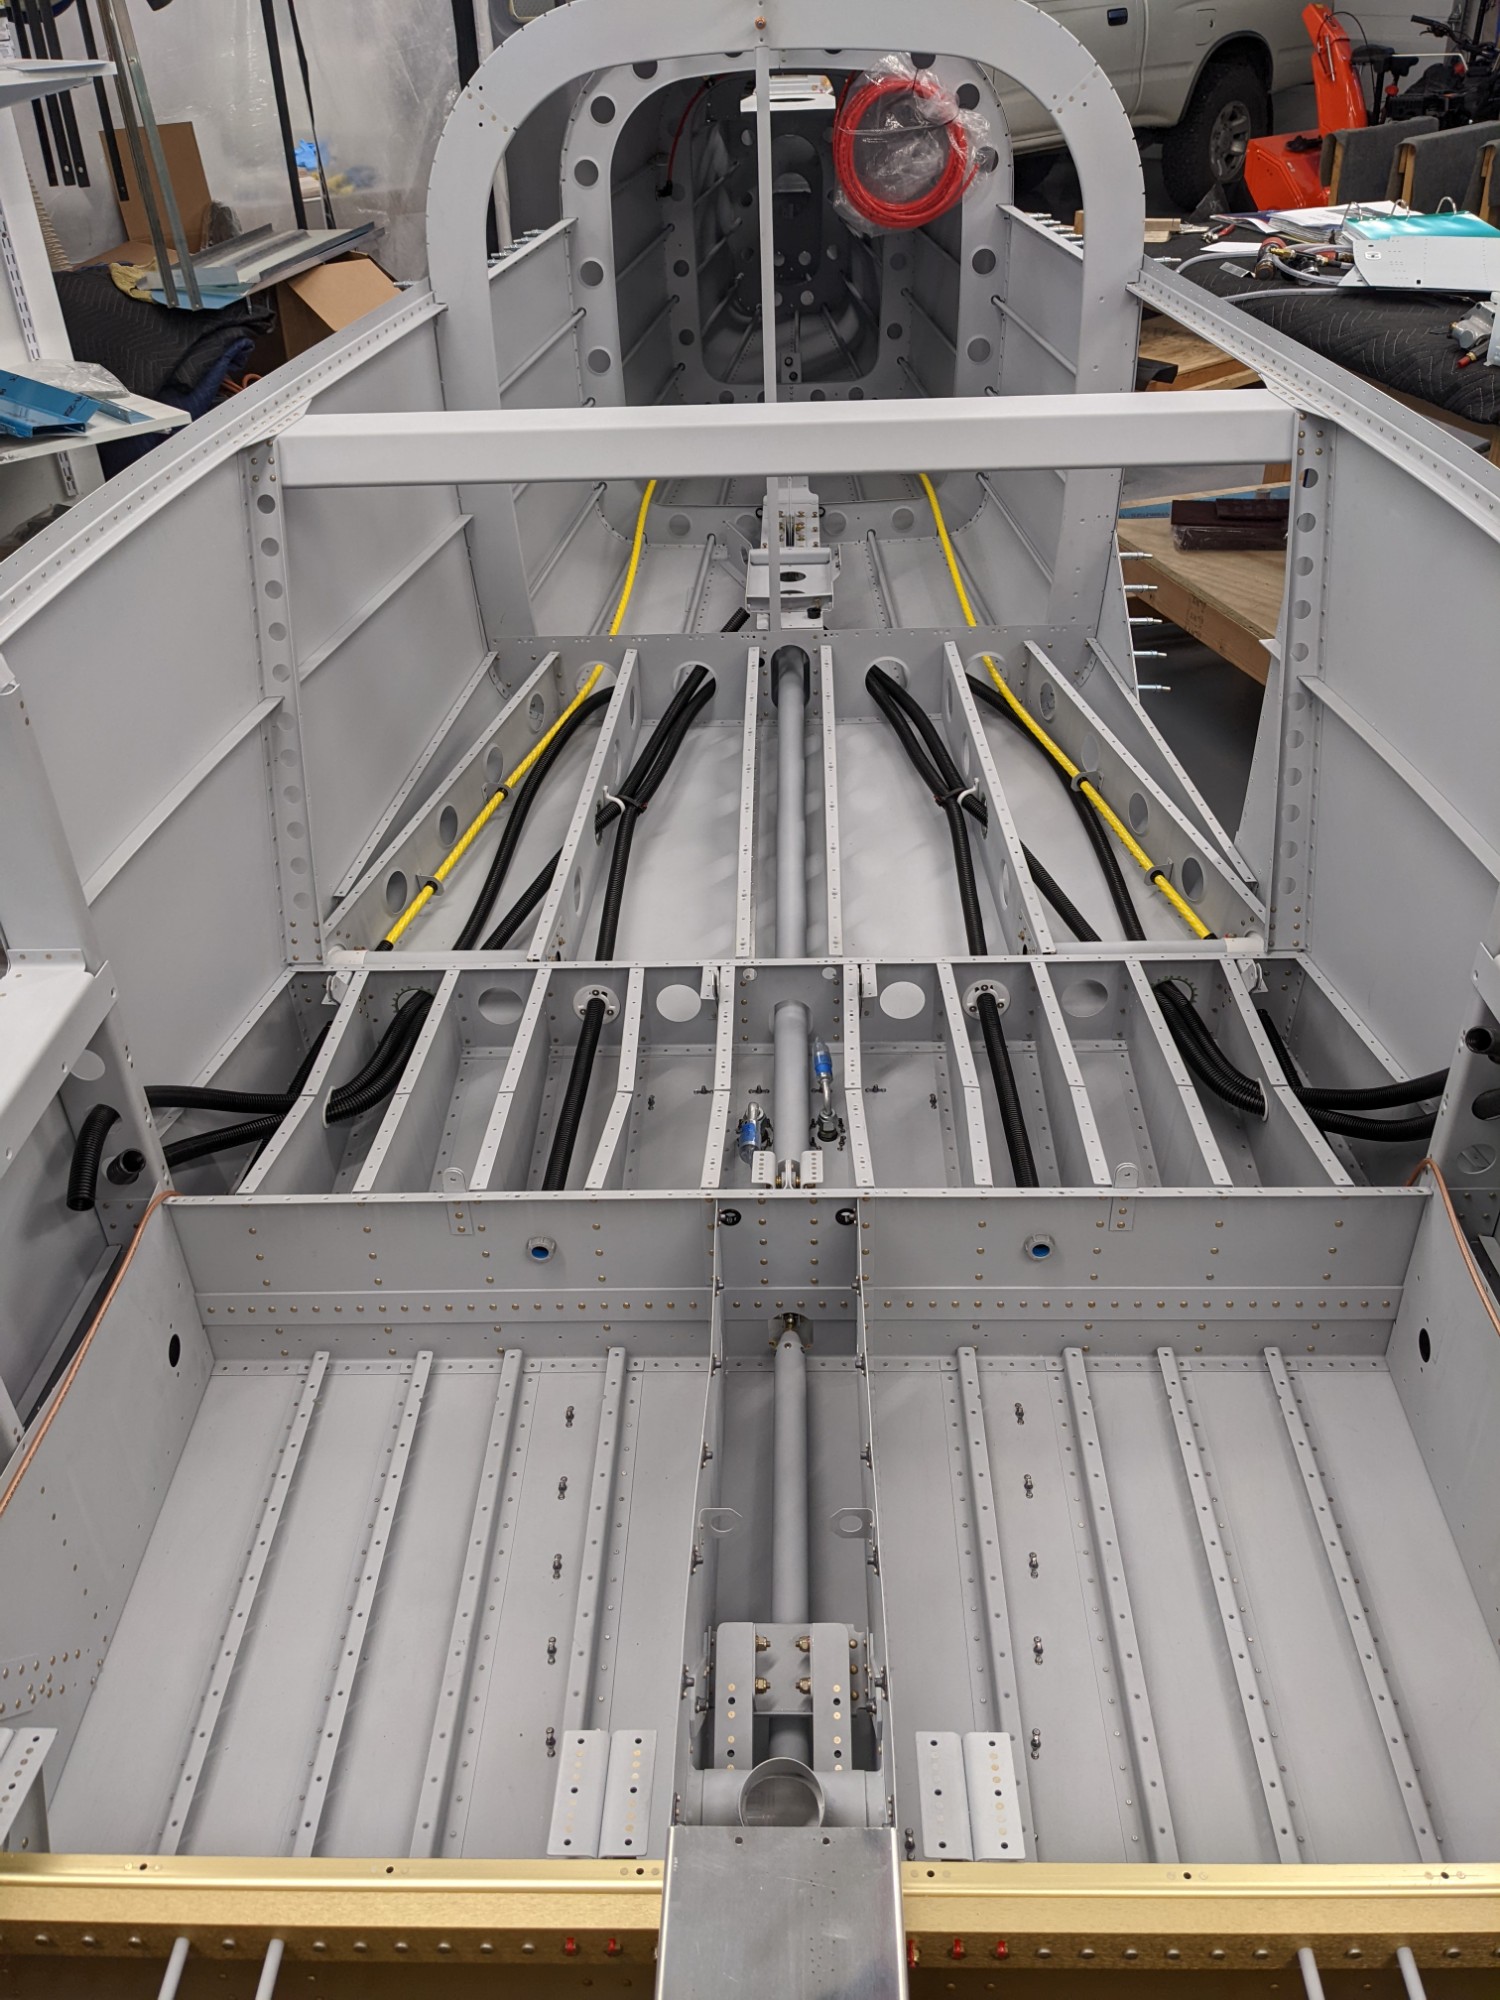
After a lot of research on the topic I settled on the following arrangement for a total of 6 conduit runs:
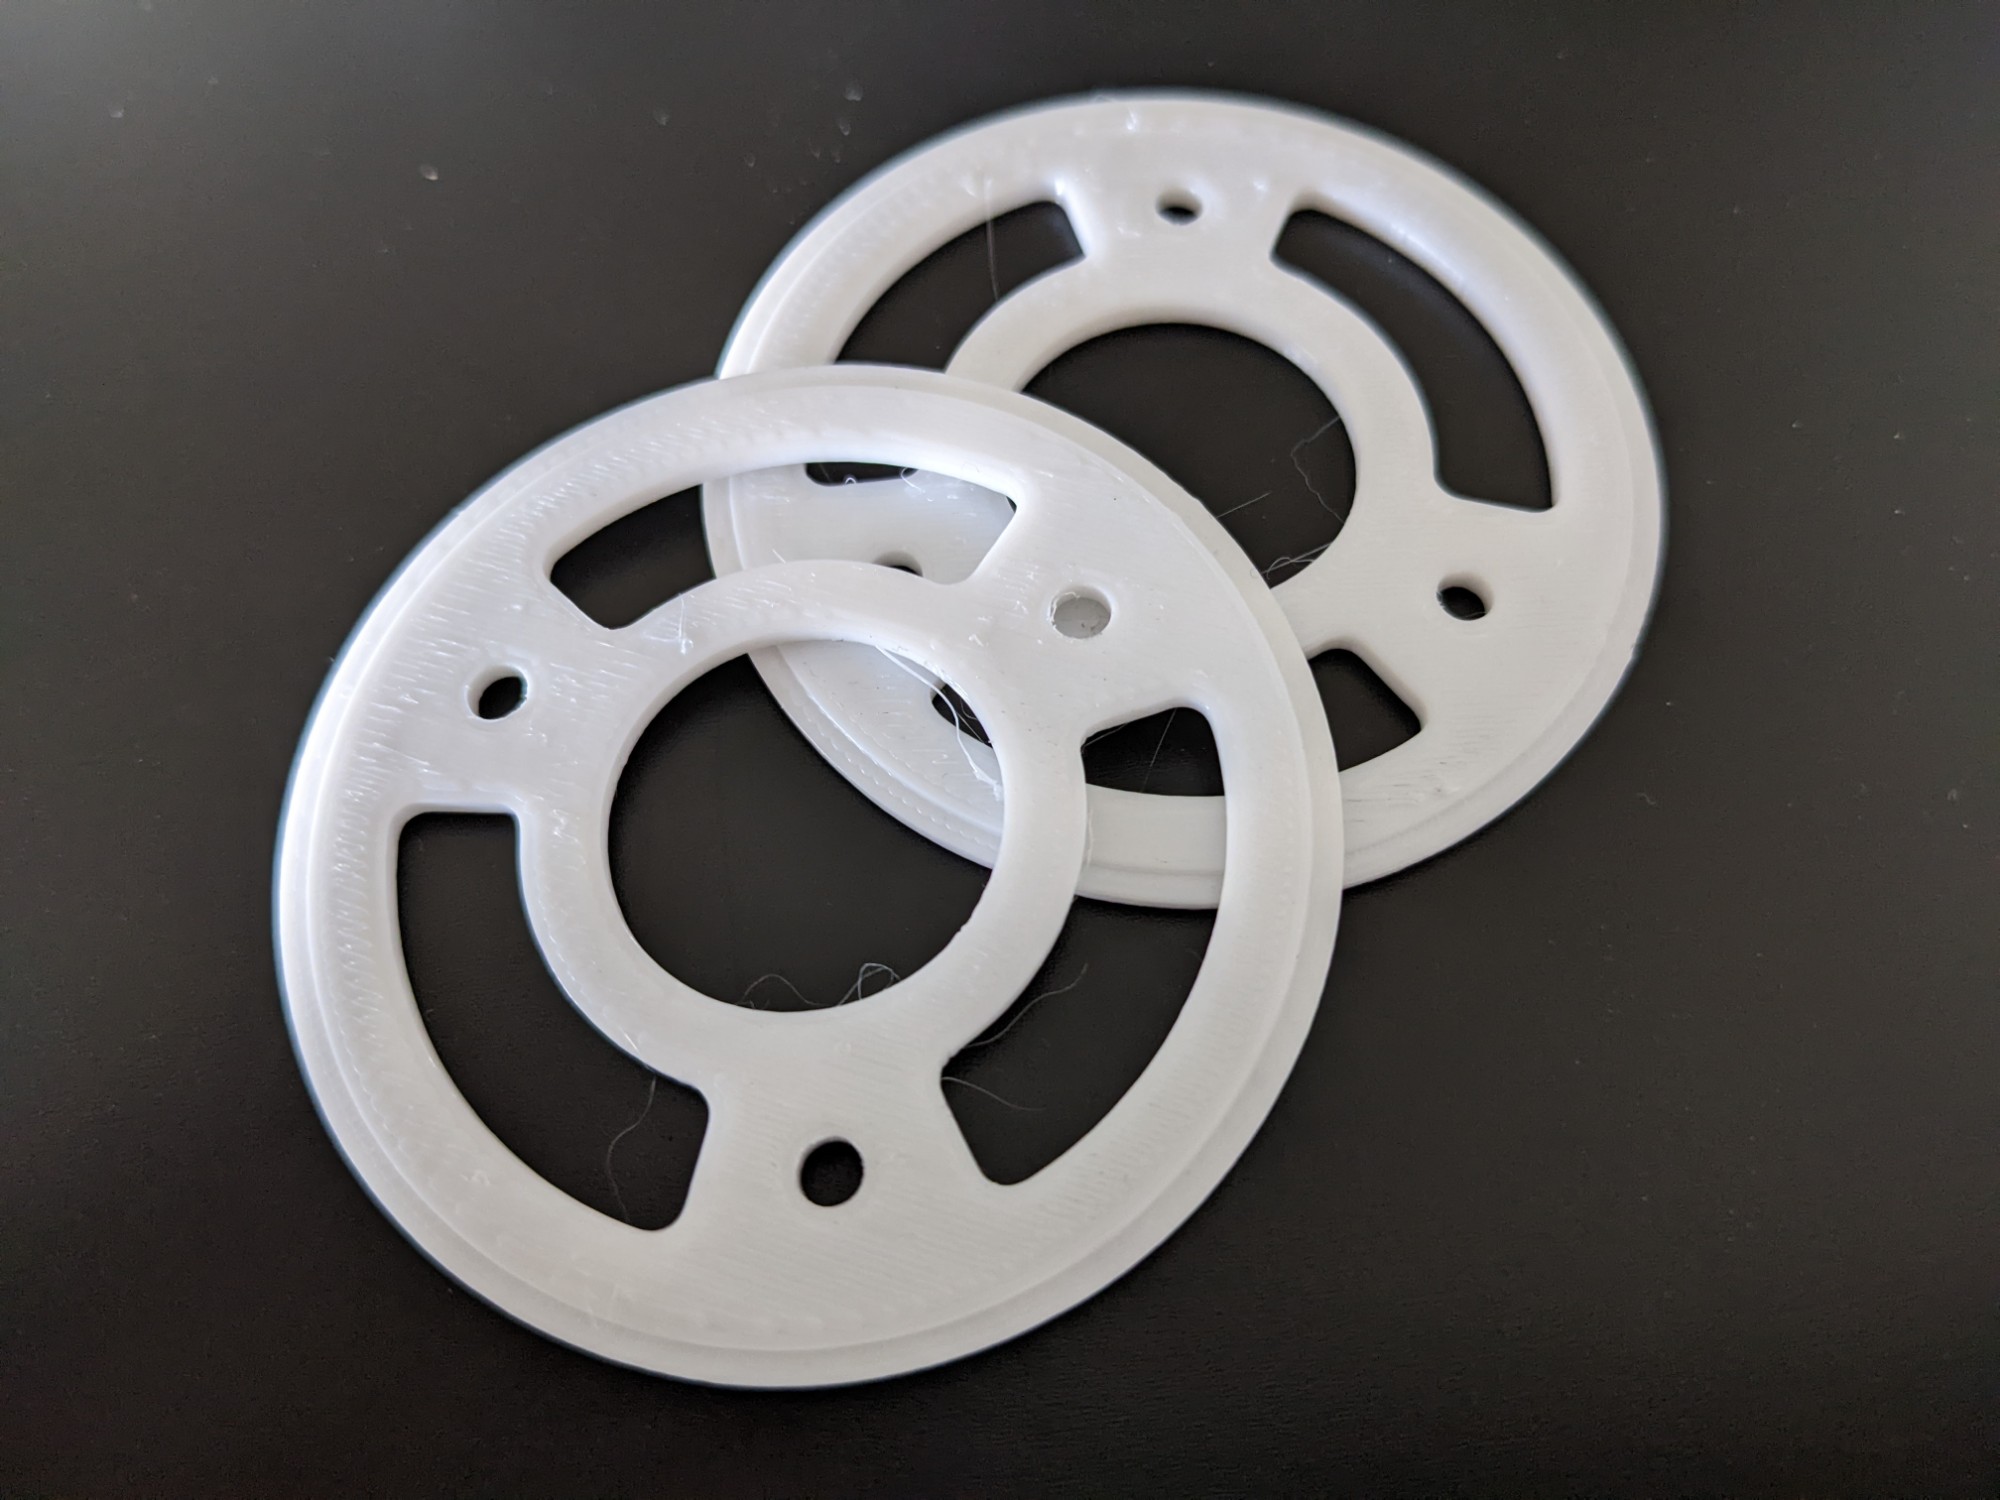
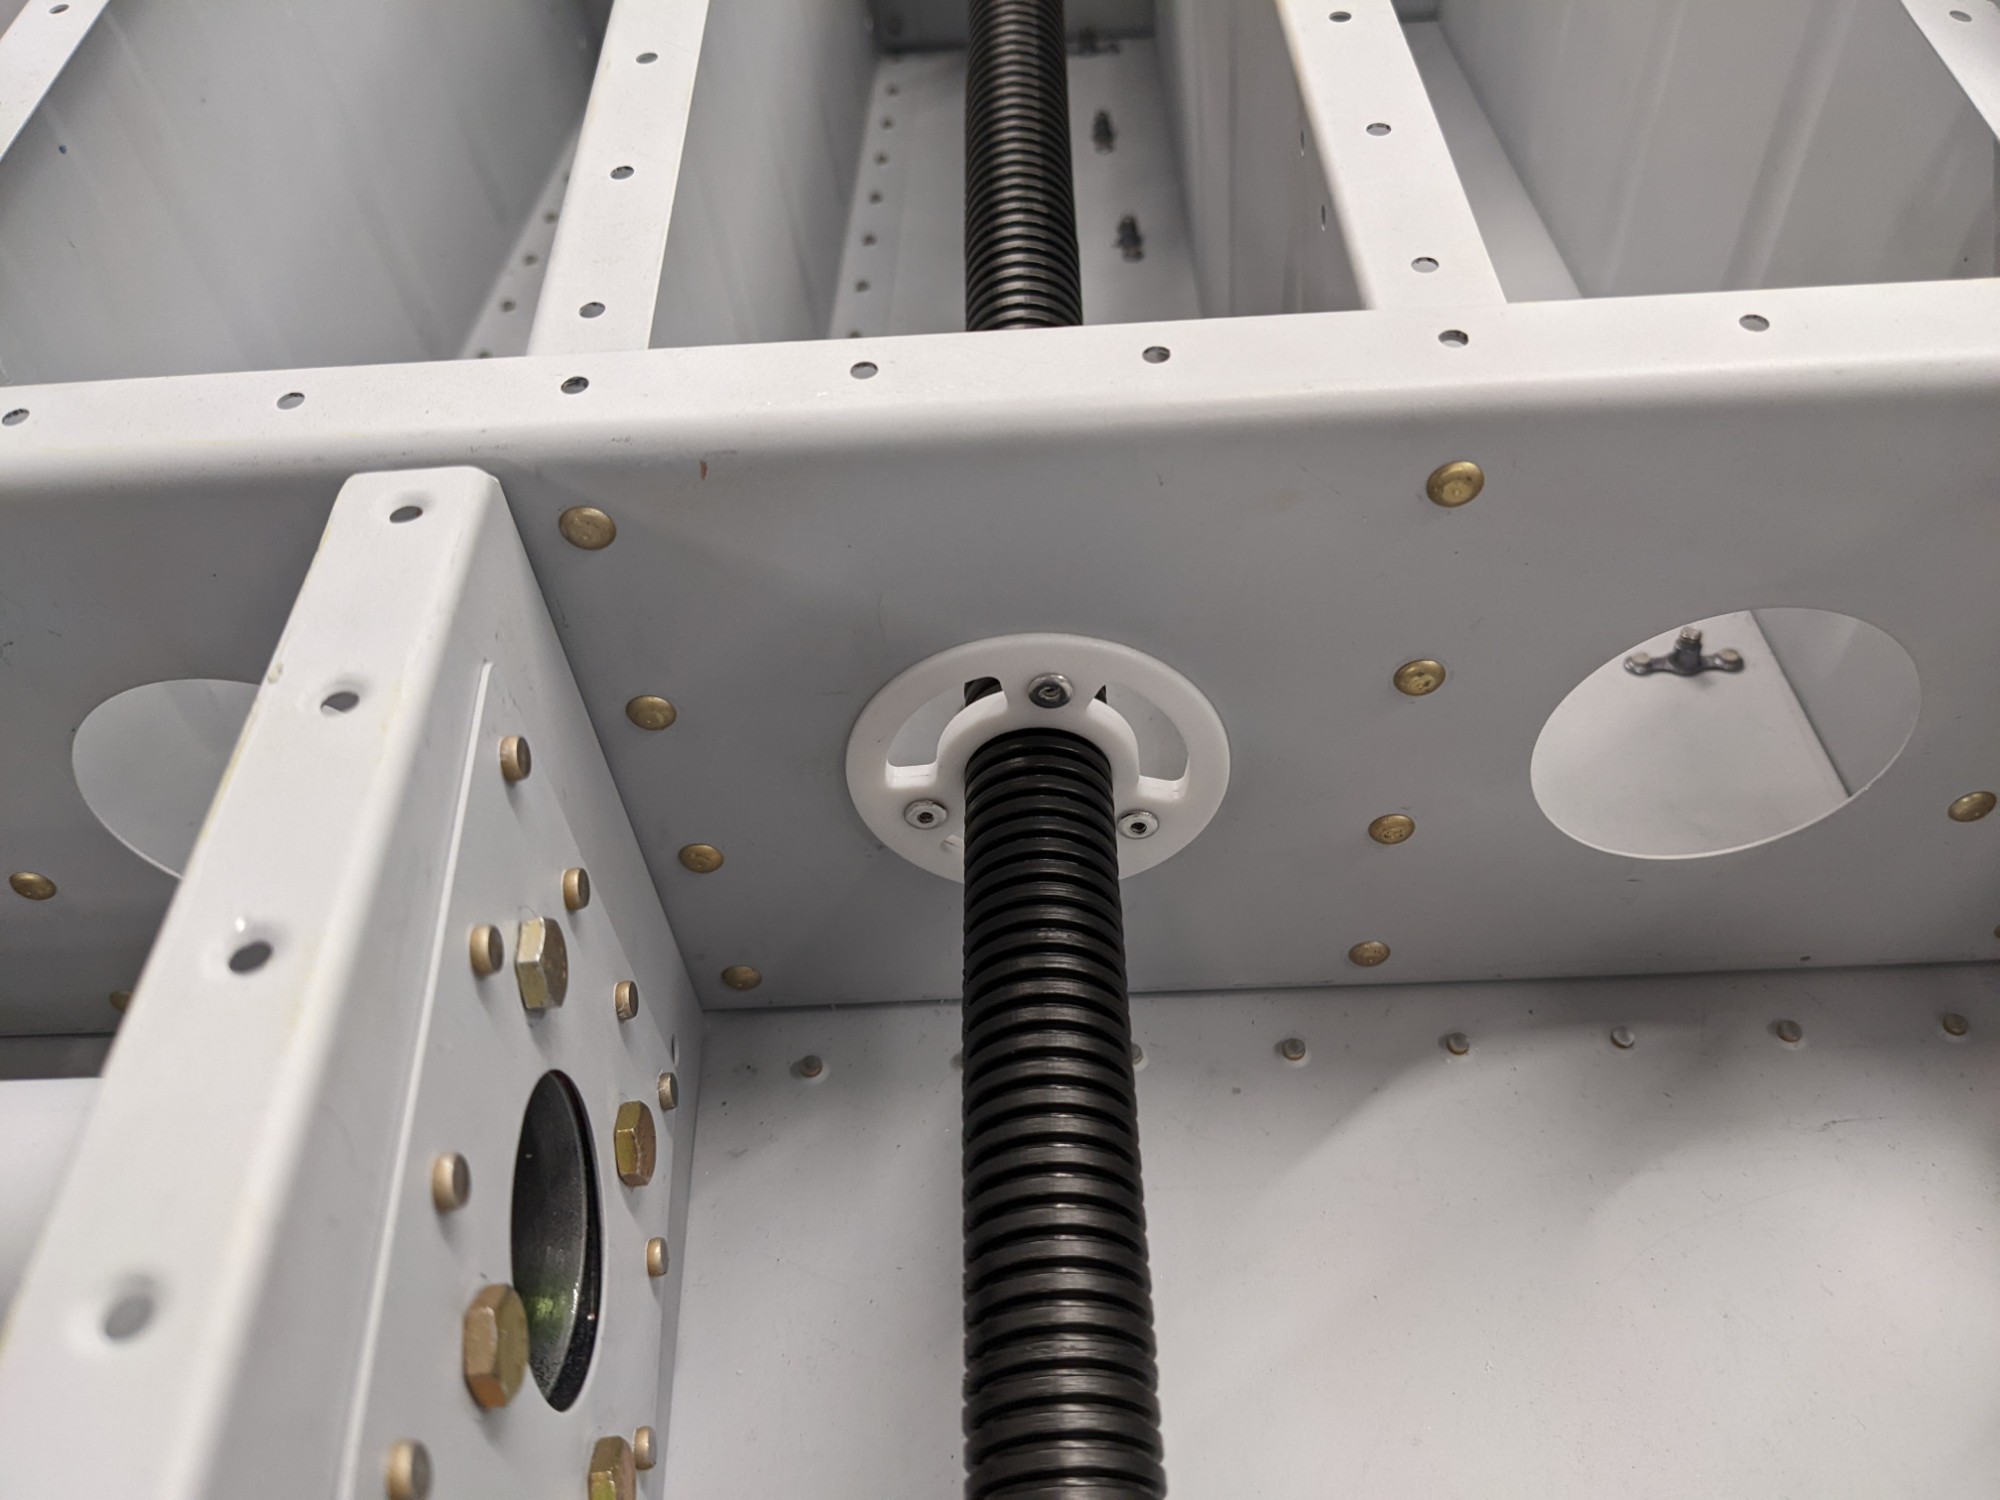
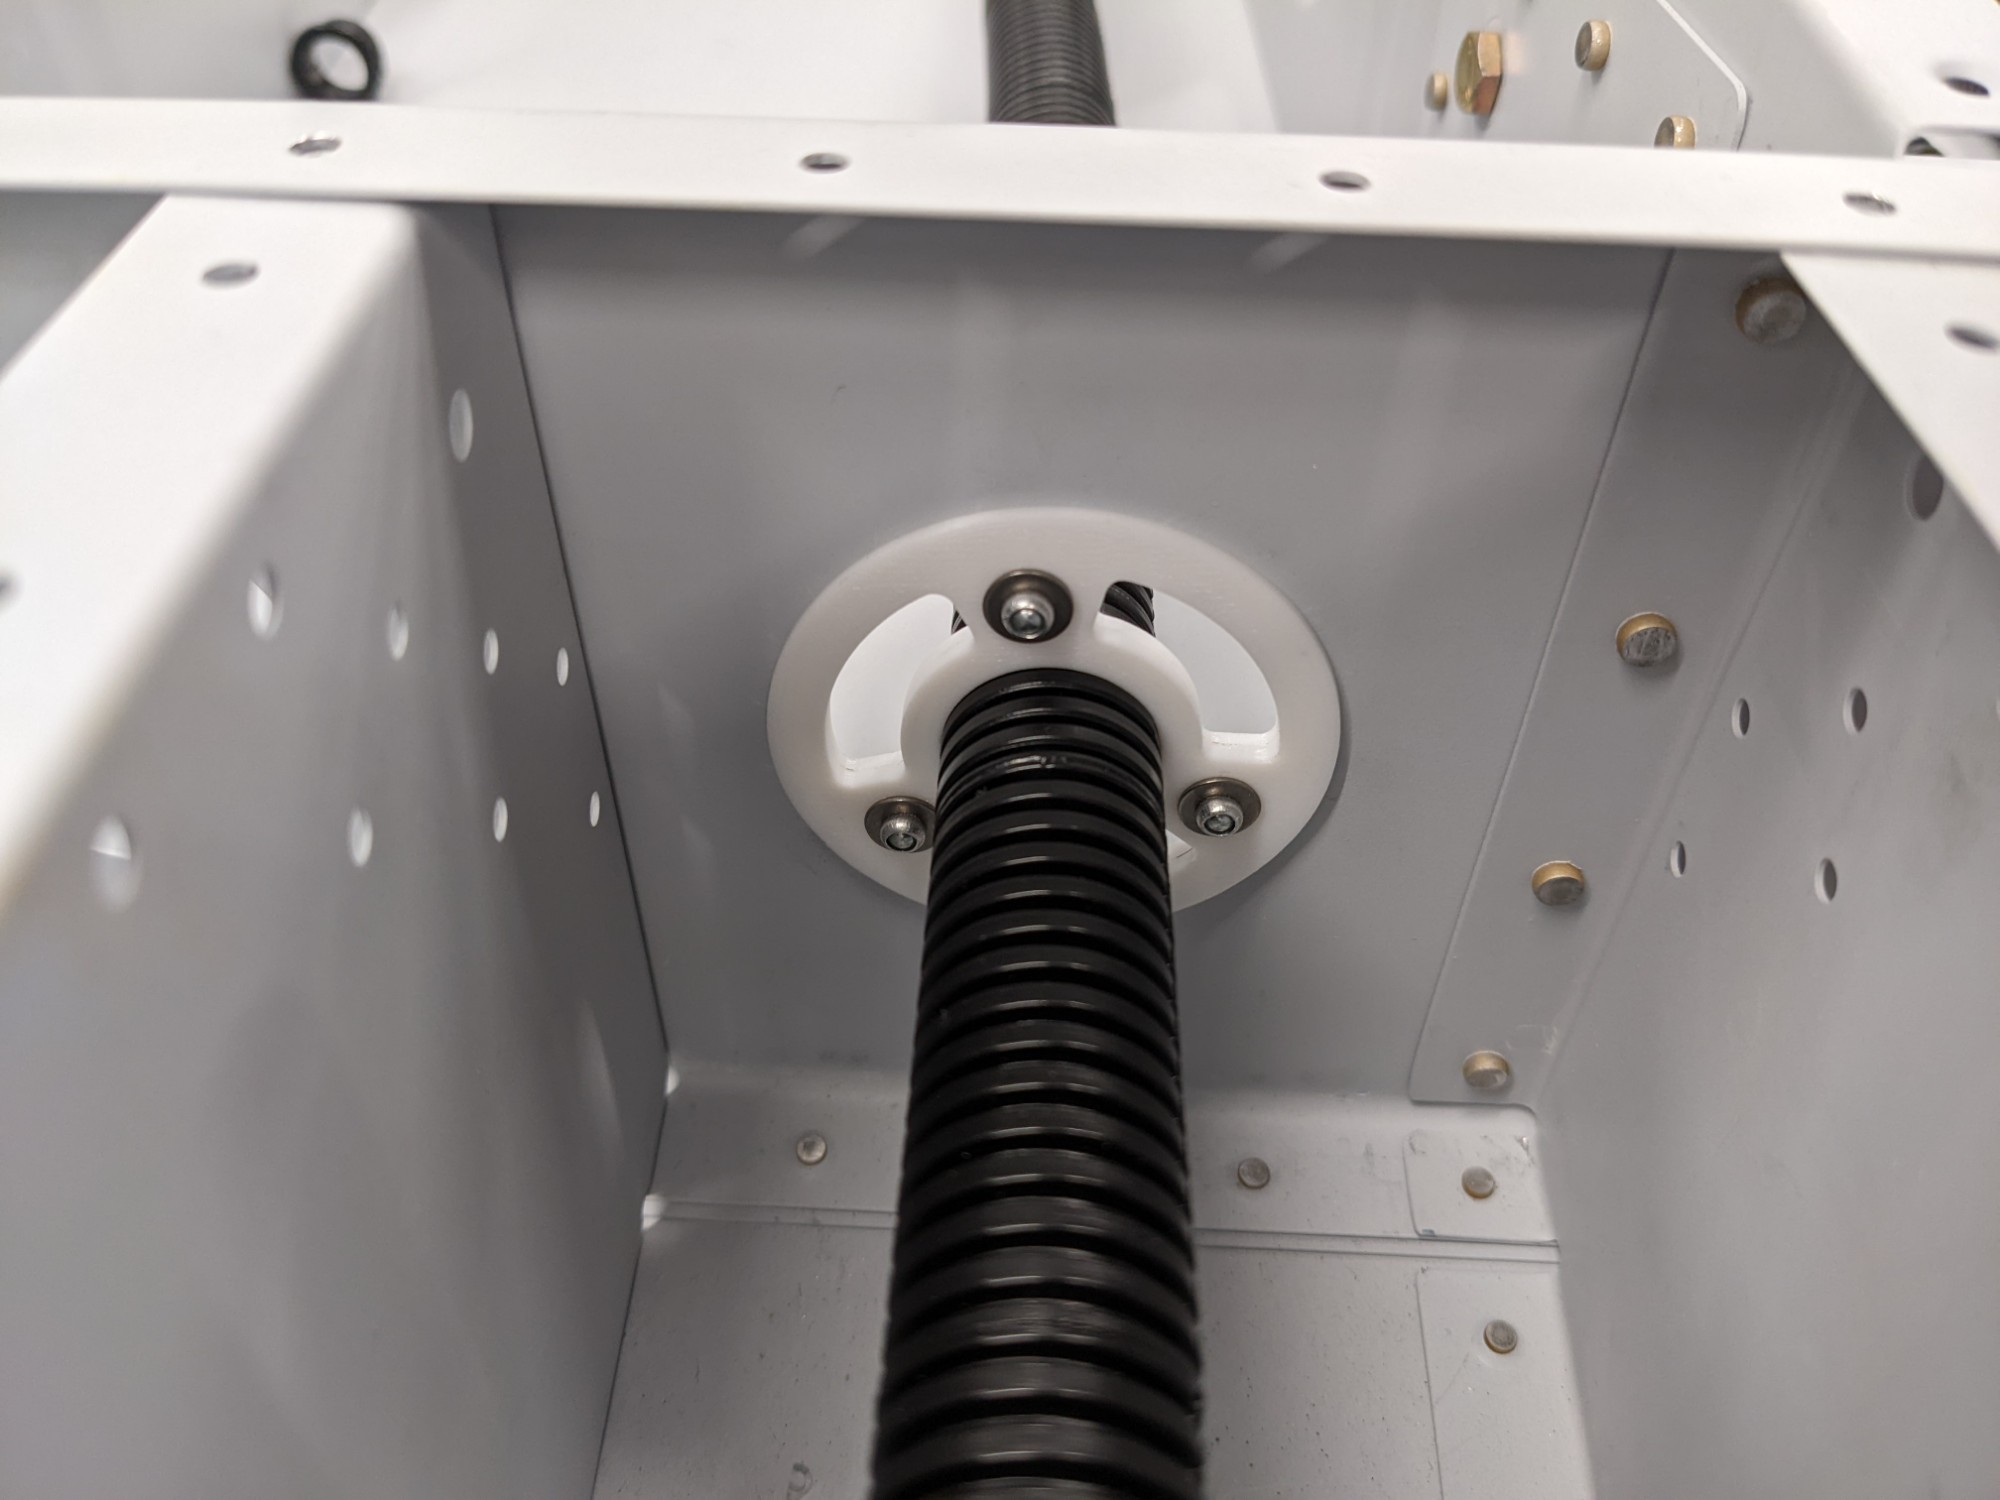
- Two conduits run up into each sidewall through the floors of rear seats. I designed and 3d printed polycarbonate bushings (Onshape model) to hold the conduit securely and hold it at an angle to minimize the radius of the bends.
- One conduit run into each rear passenger foot well (under the flap torque tube cover). Having access here gives me a more direct route back into the tunnel if needed. It also gives me some straight conduit runs in the event that I have trouble getting wires through the bends. I discussed this with Van’s builder support before drilling through the bulkhead. They mentioned that others had done this without issues and recommended making the holes as small as possible and to ensure edge distance for all rivet holes.
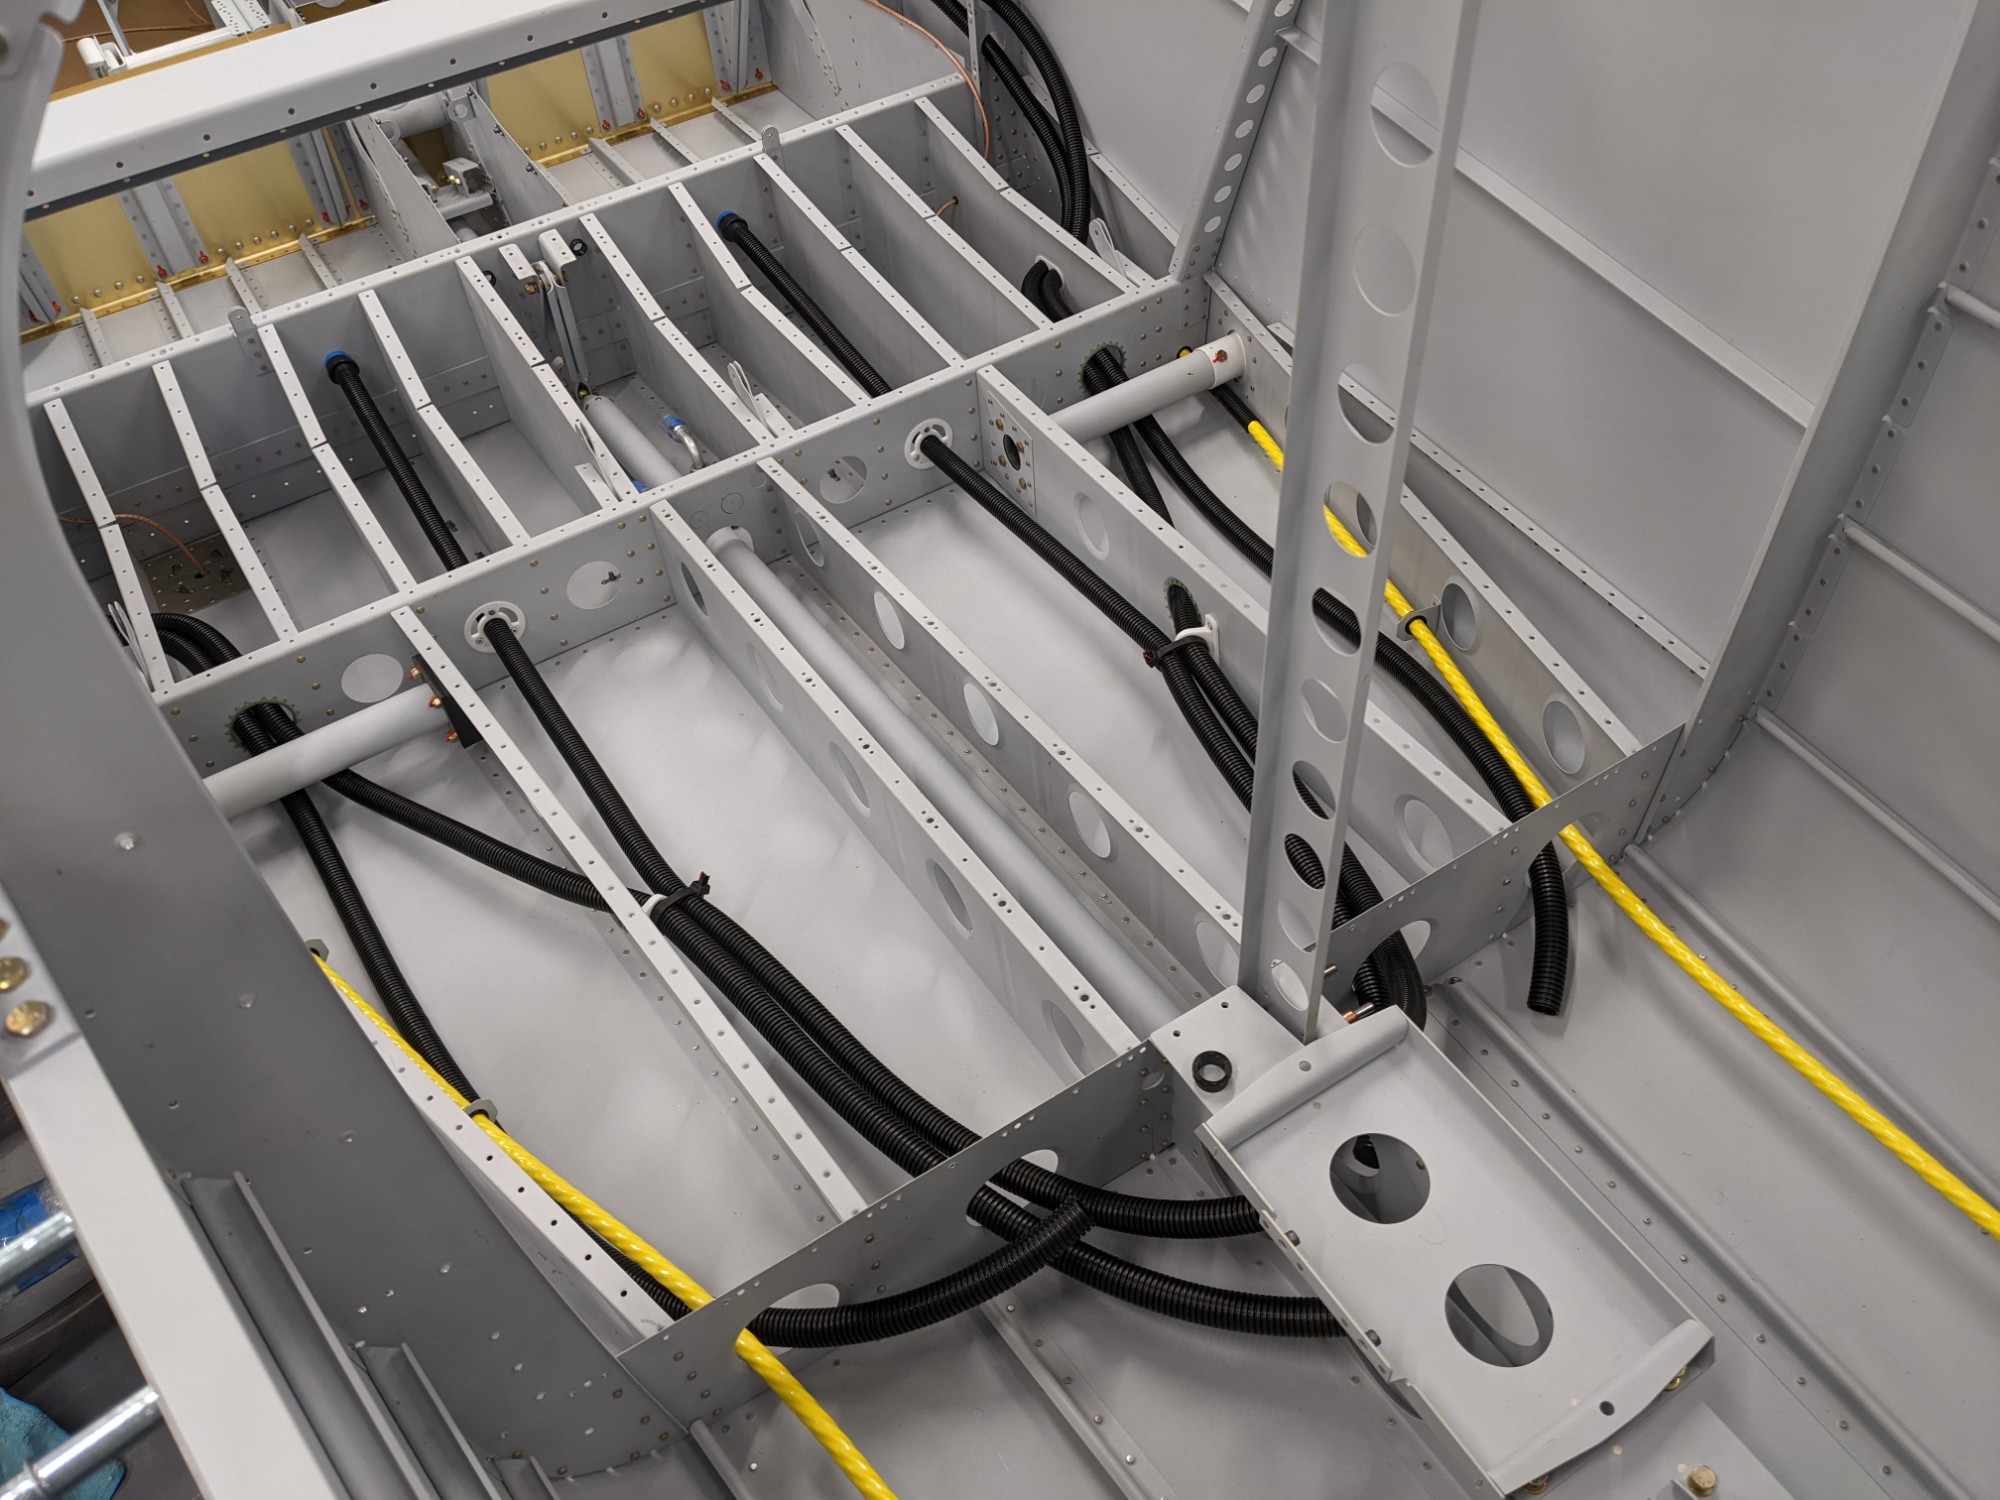
I tested the routing of wires (and the static line) into the sidewall conduit runs and had no problem gettings things through. I also tested the ability to blow a pull-string through the conduits with a string and a cotton ball. I’ll install double-length nylon pull strings before installing any wires in case I need them.
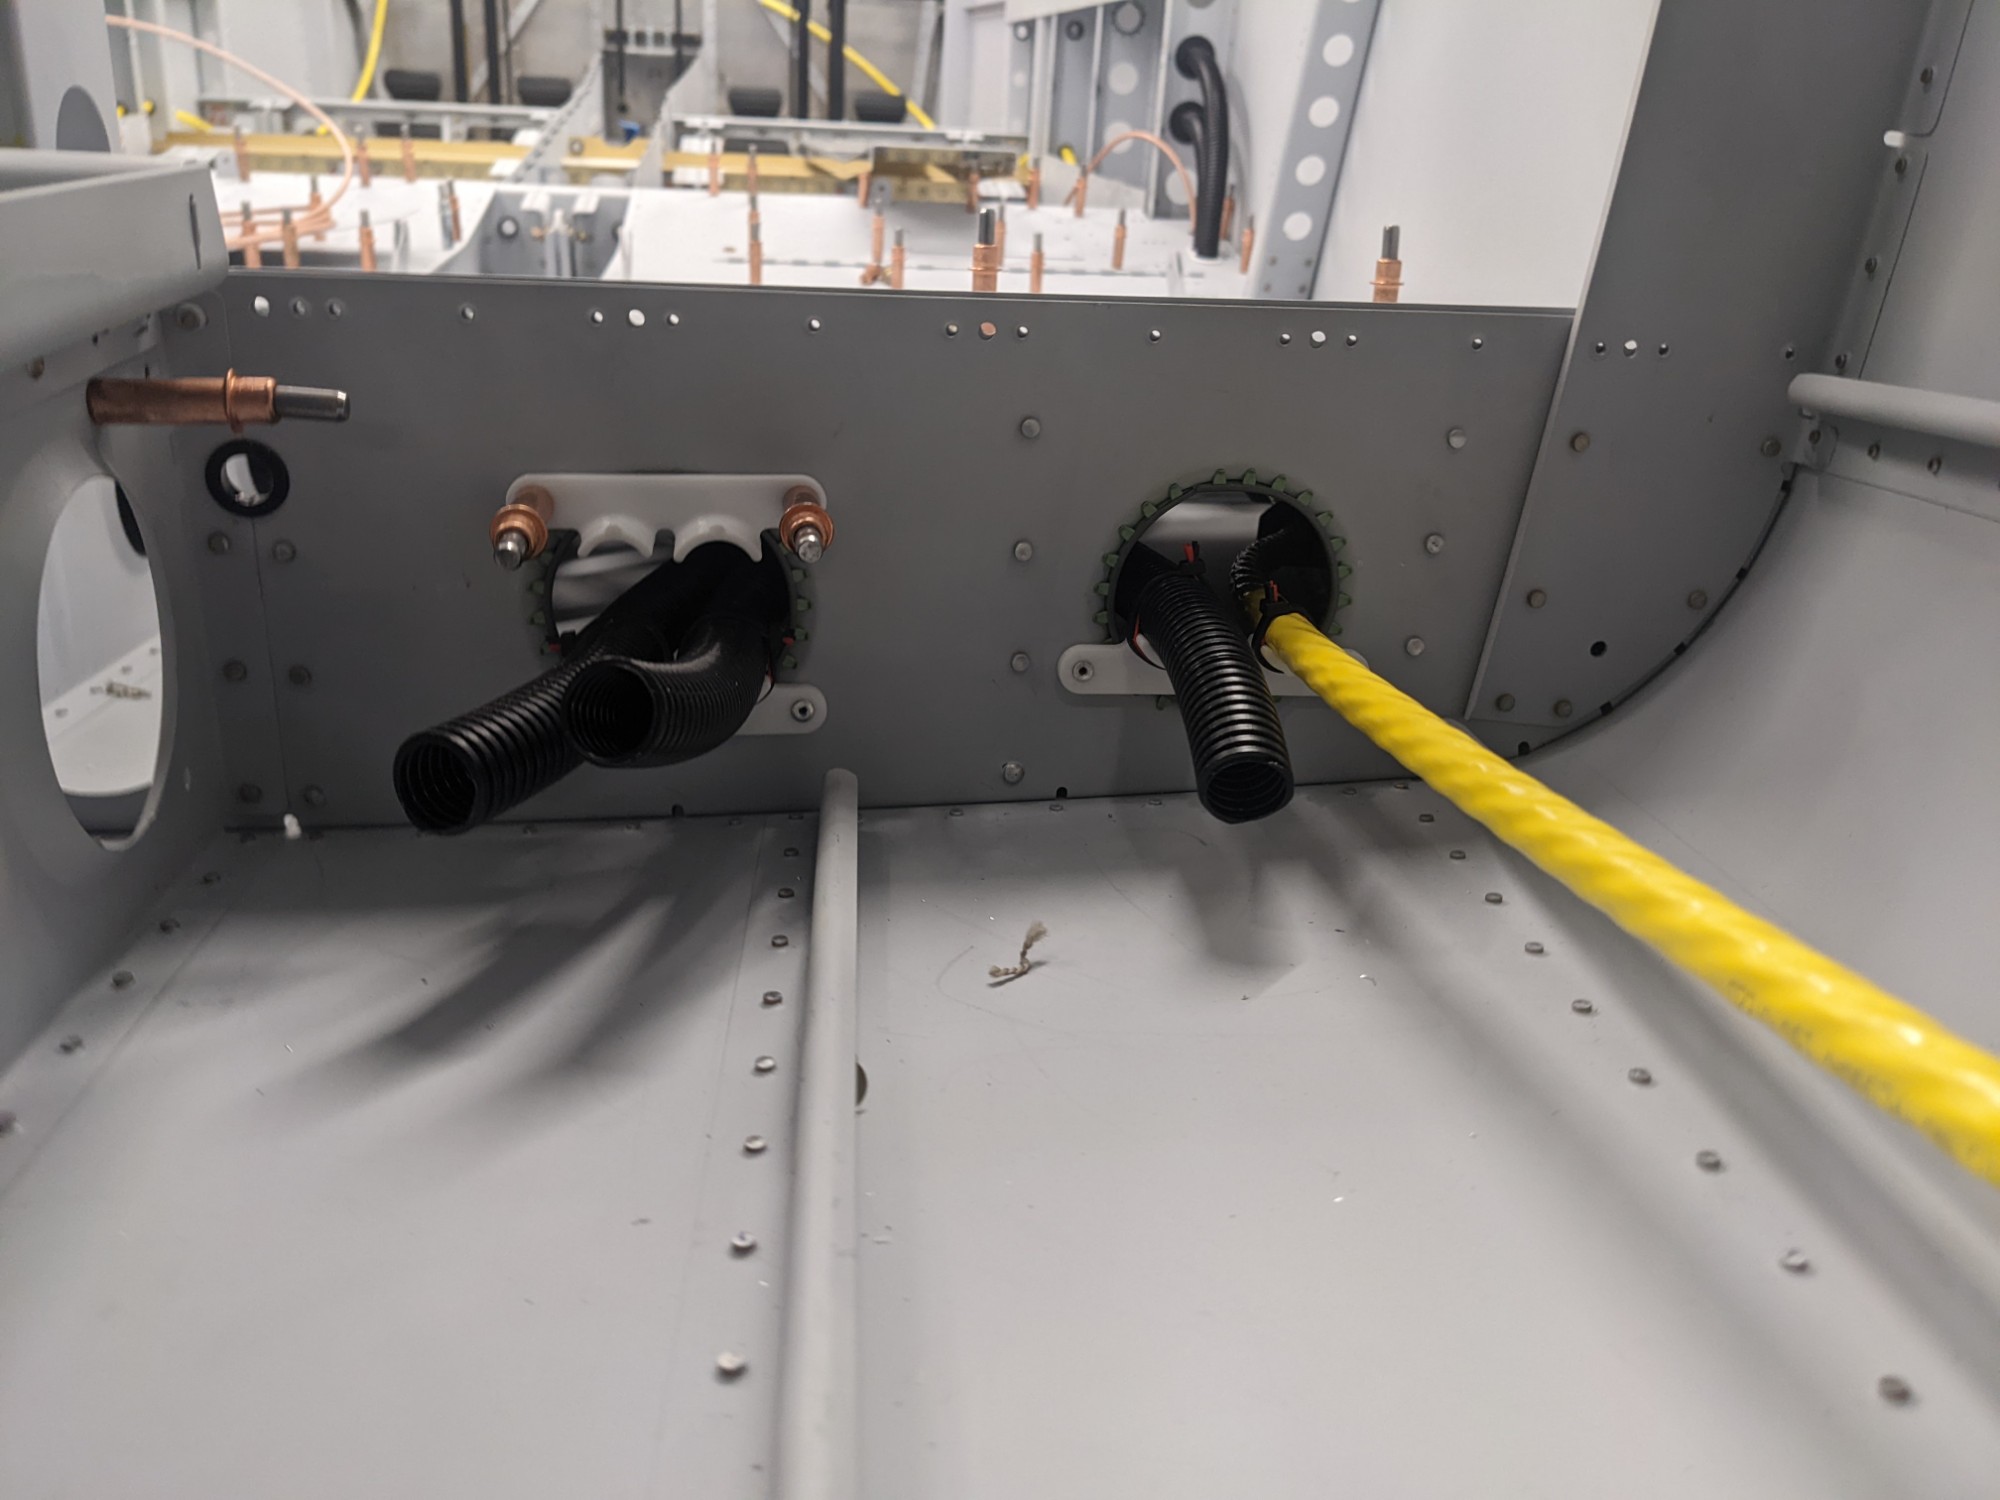
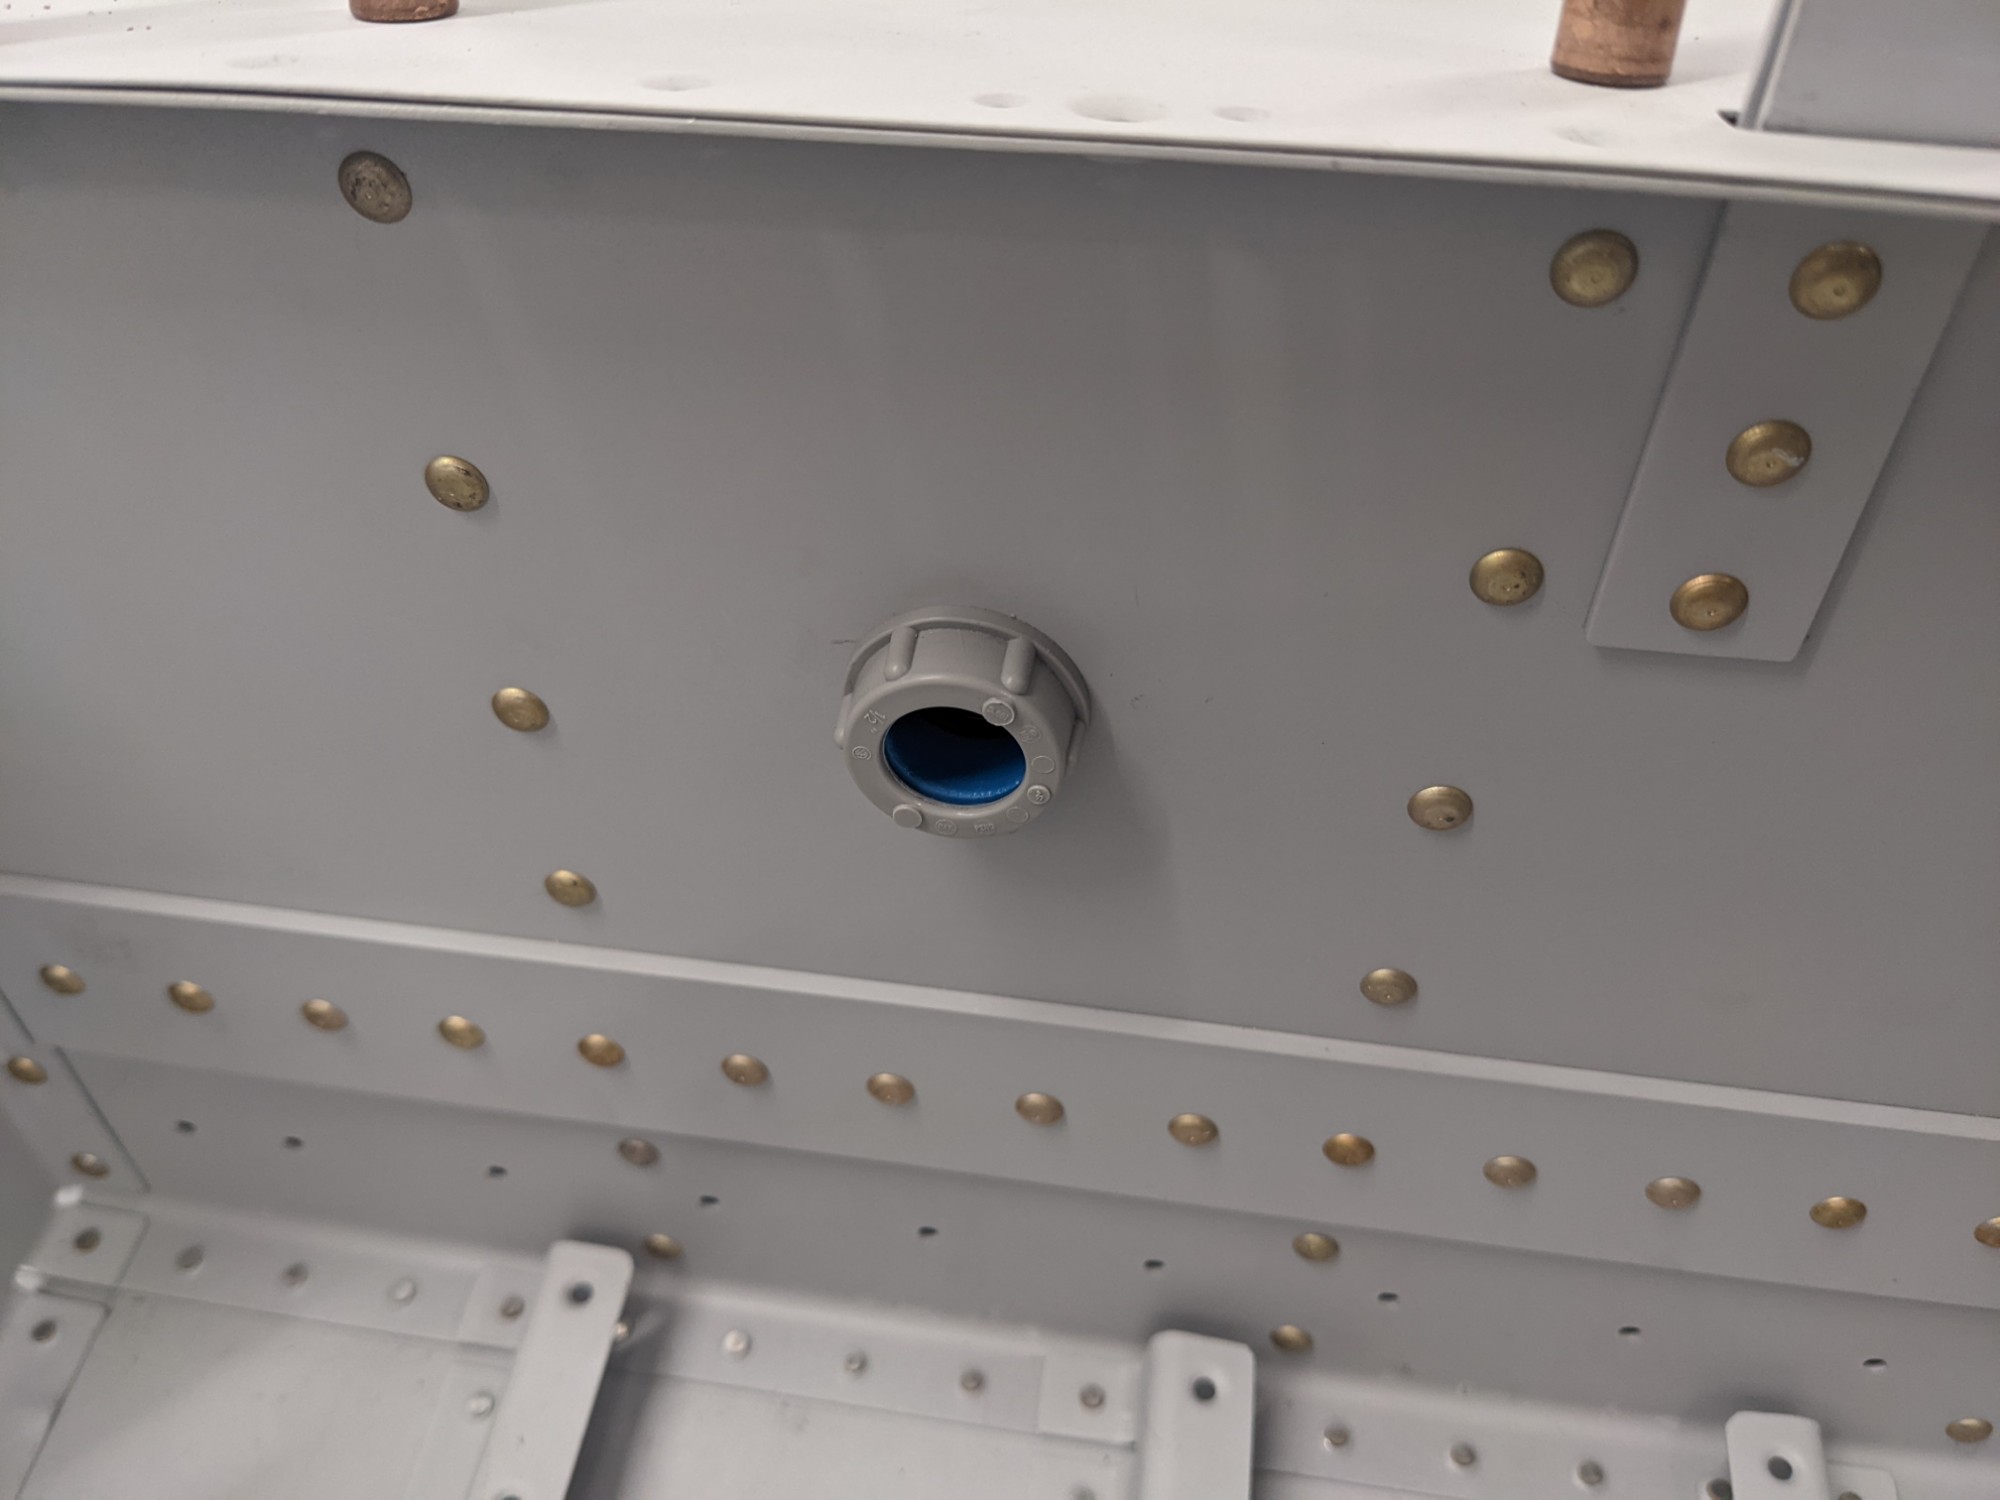
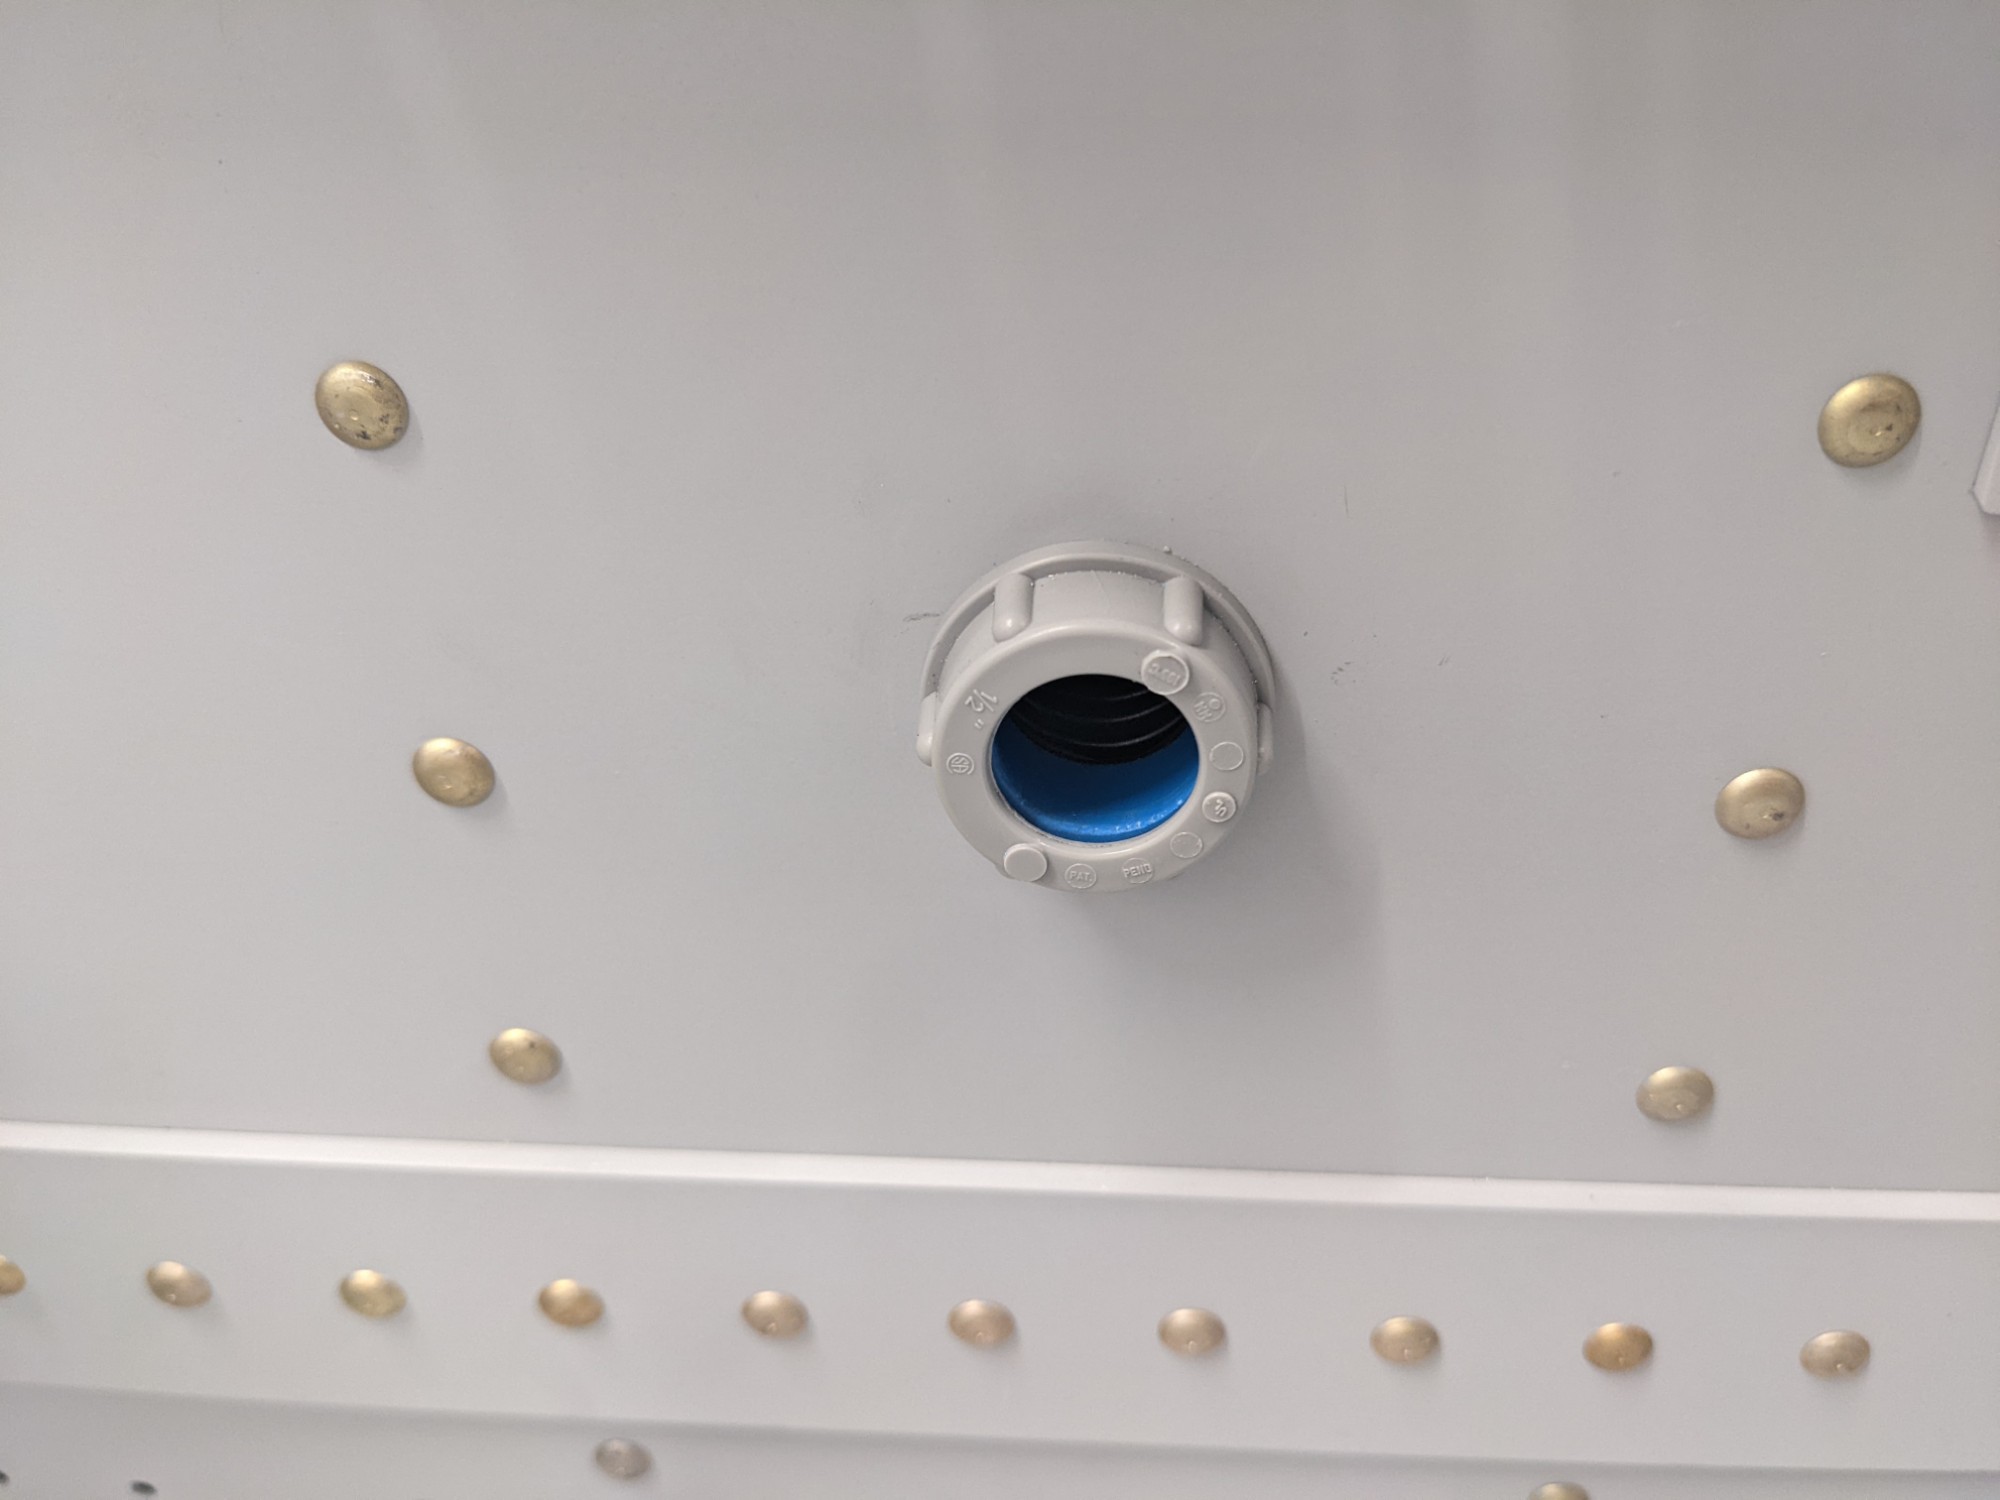
For each conduit running into the flap cover area, I used male ENT adapters that are used for conduits in electrical boxes. The Van’s conduit snaps tightly into these and I additionally secured the joint by wrapping it with self-fusing silicone tape. I shortened the adaptor threaded area so that I could secure the fittings tightly with threaded bushings.
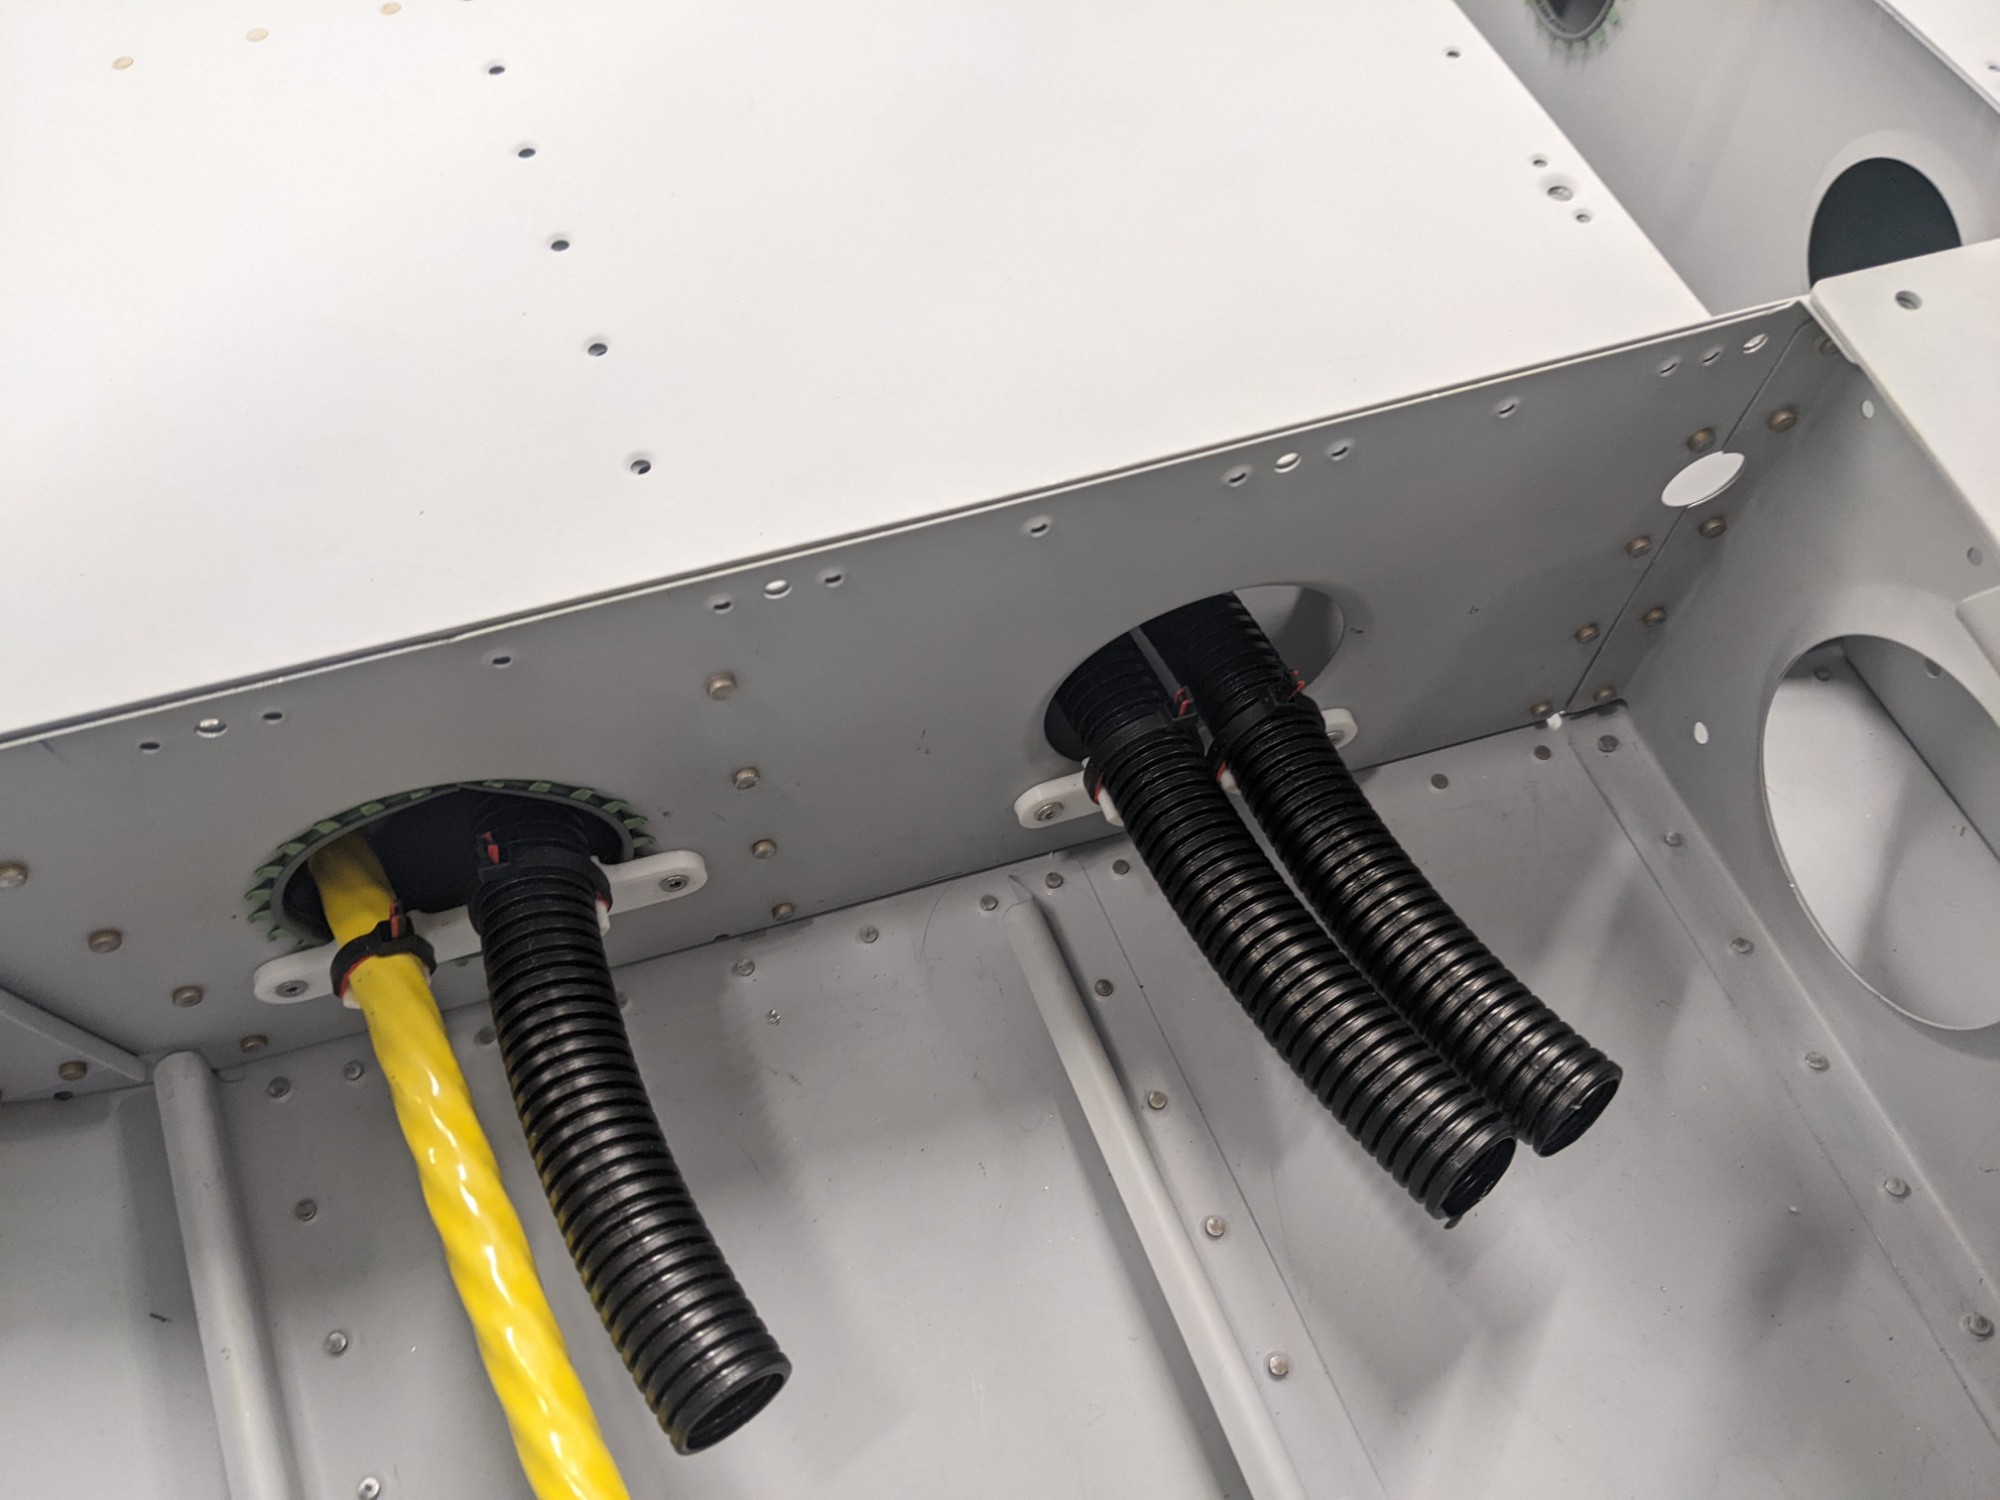
I 3d printed two-piece polycarbonate bushings to secure the conduit through the lightening holes in the fuselage bulkhead (Onshape model). These install securely by inserting them into the hole and riveting the two halves together with blind rivets. This avoided having to drill any additional holes. I used thin washers on the shop-head side of the blind rivet where it compresses against the plastic.
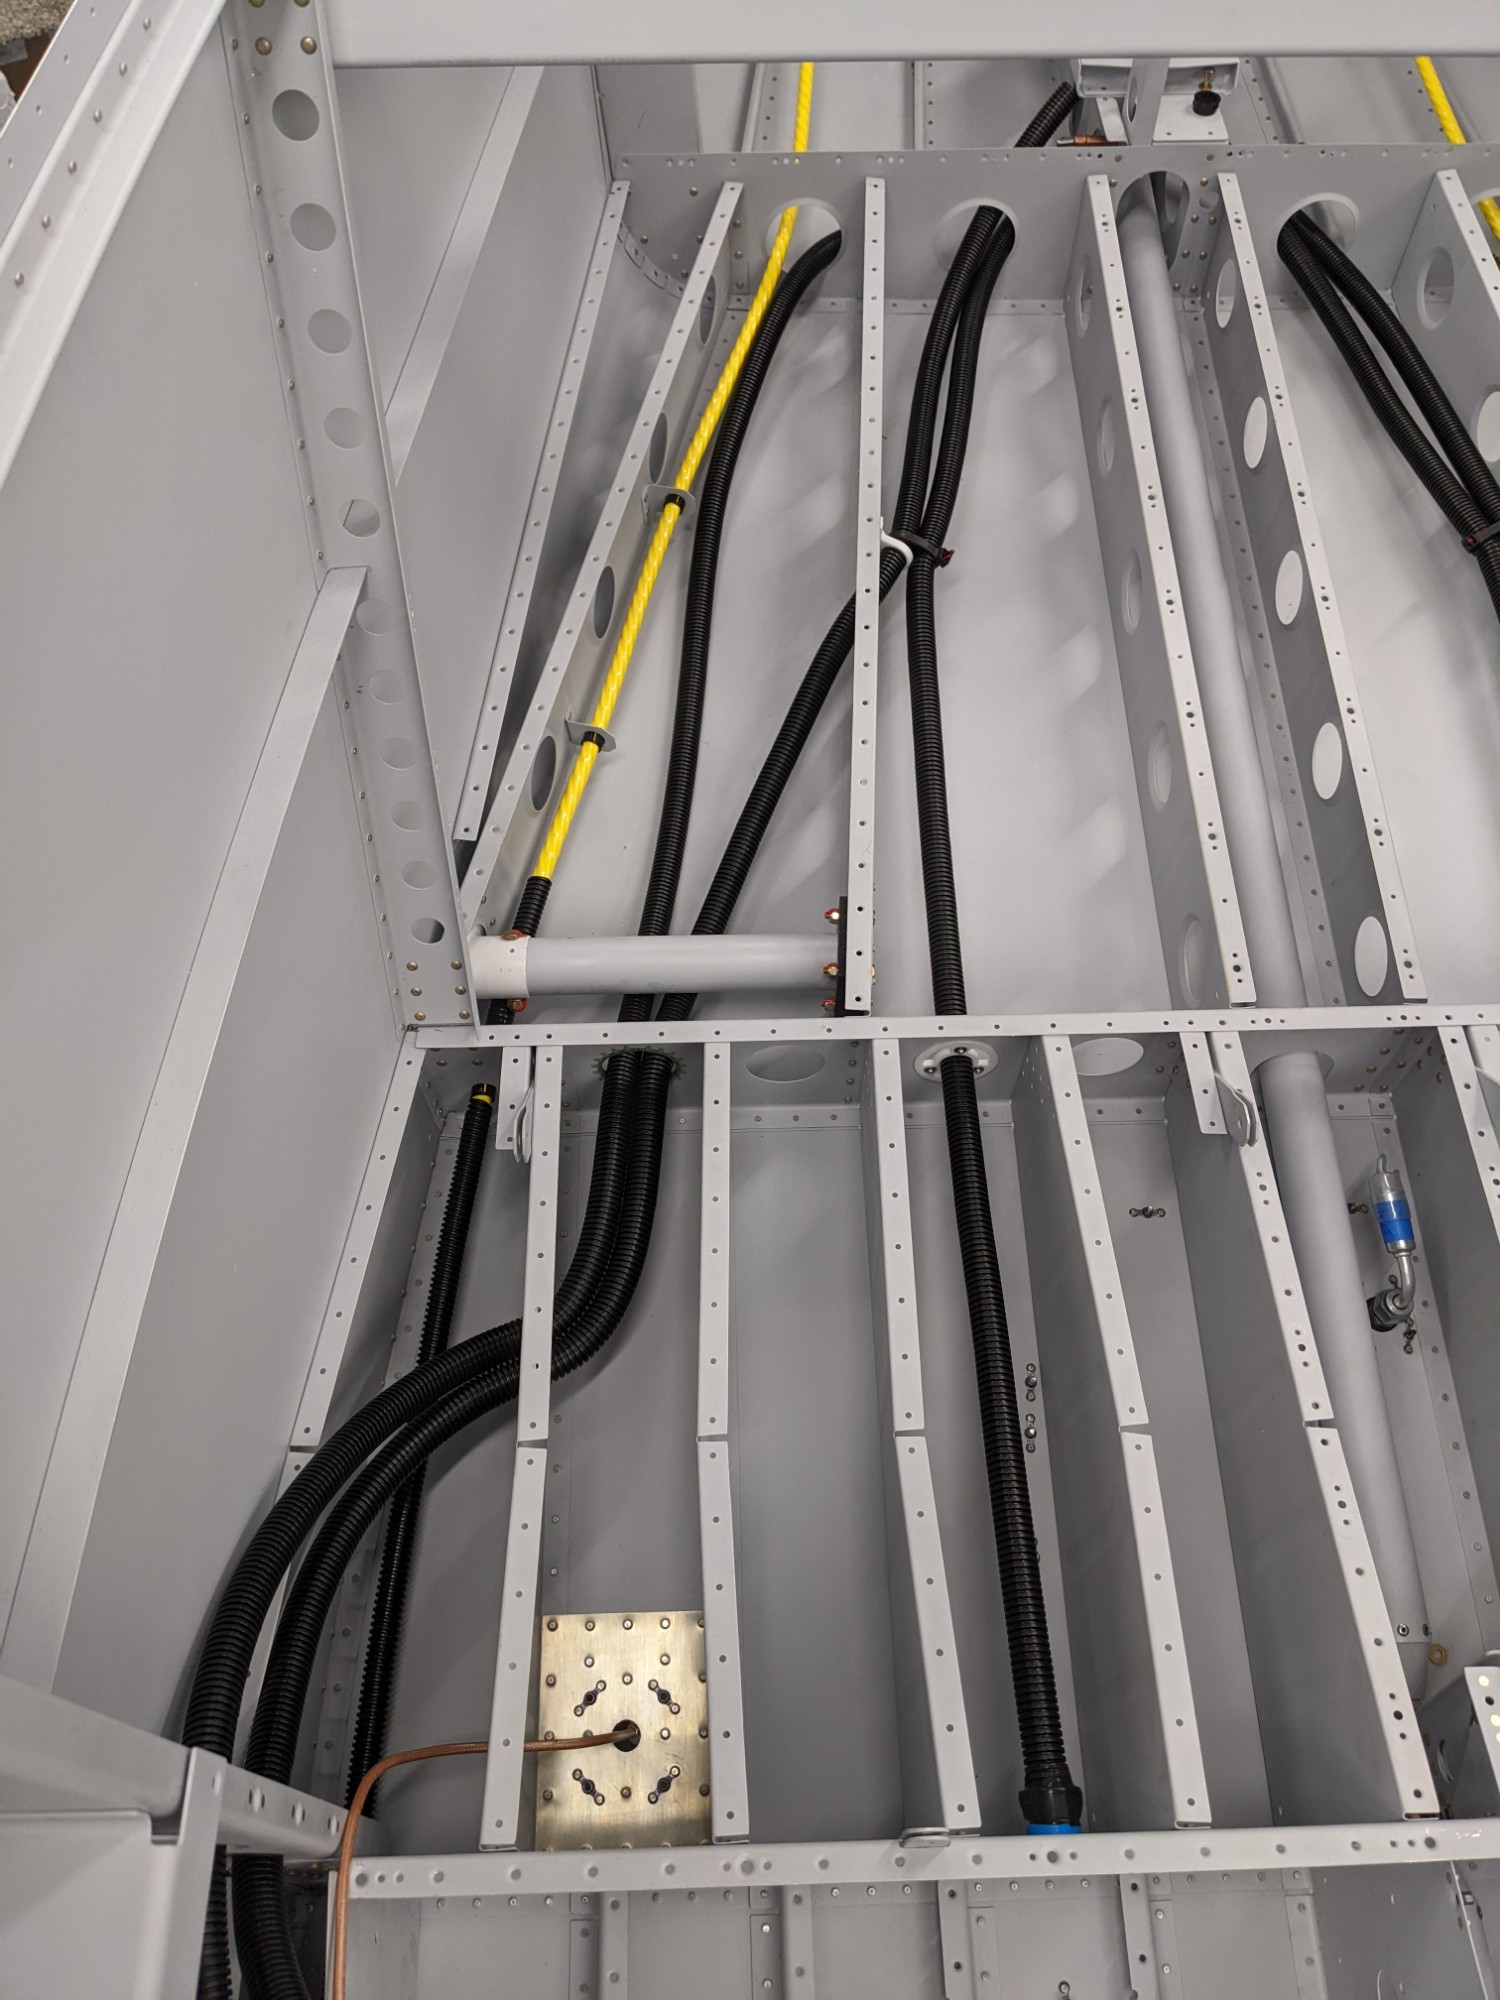
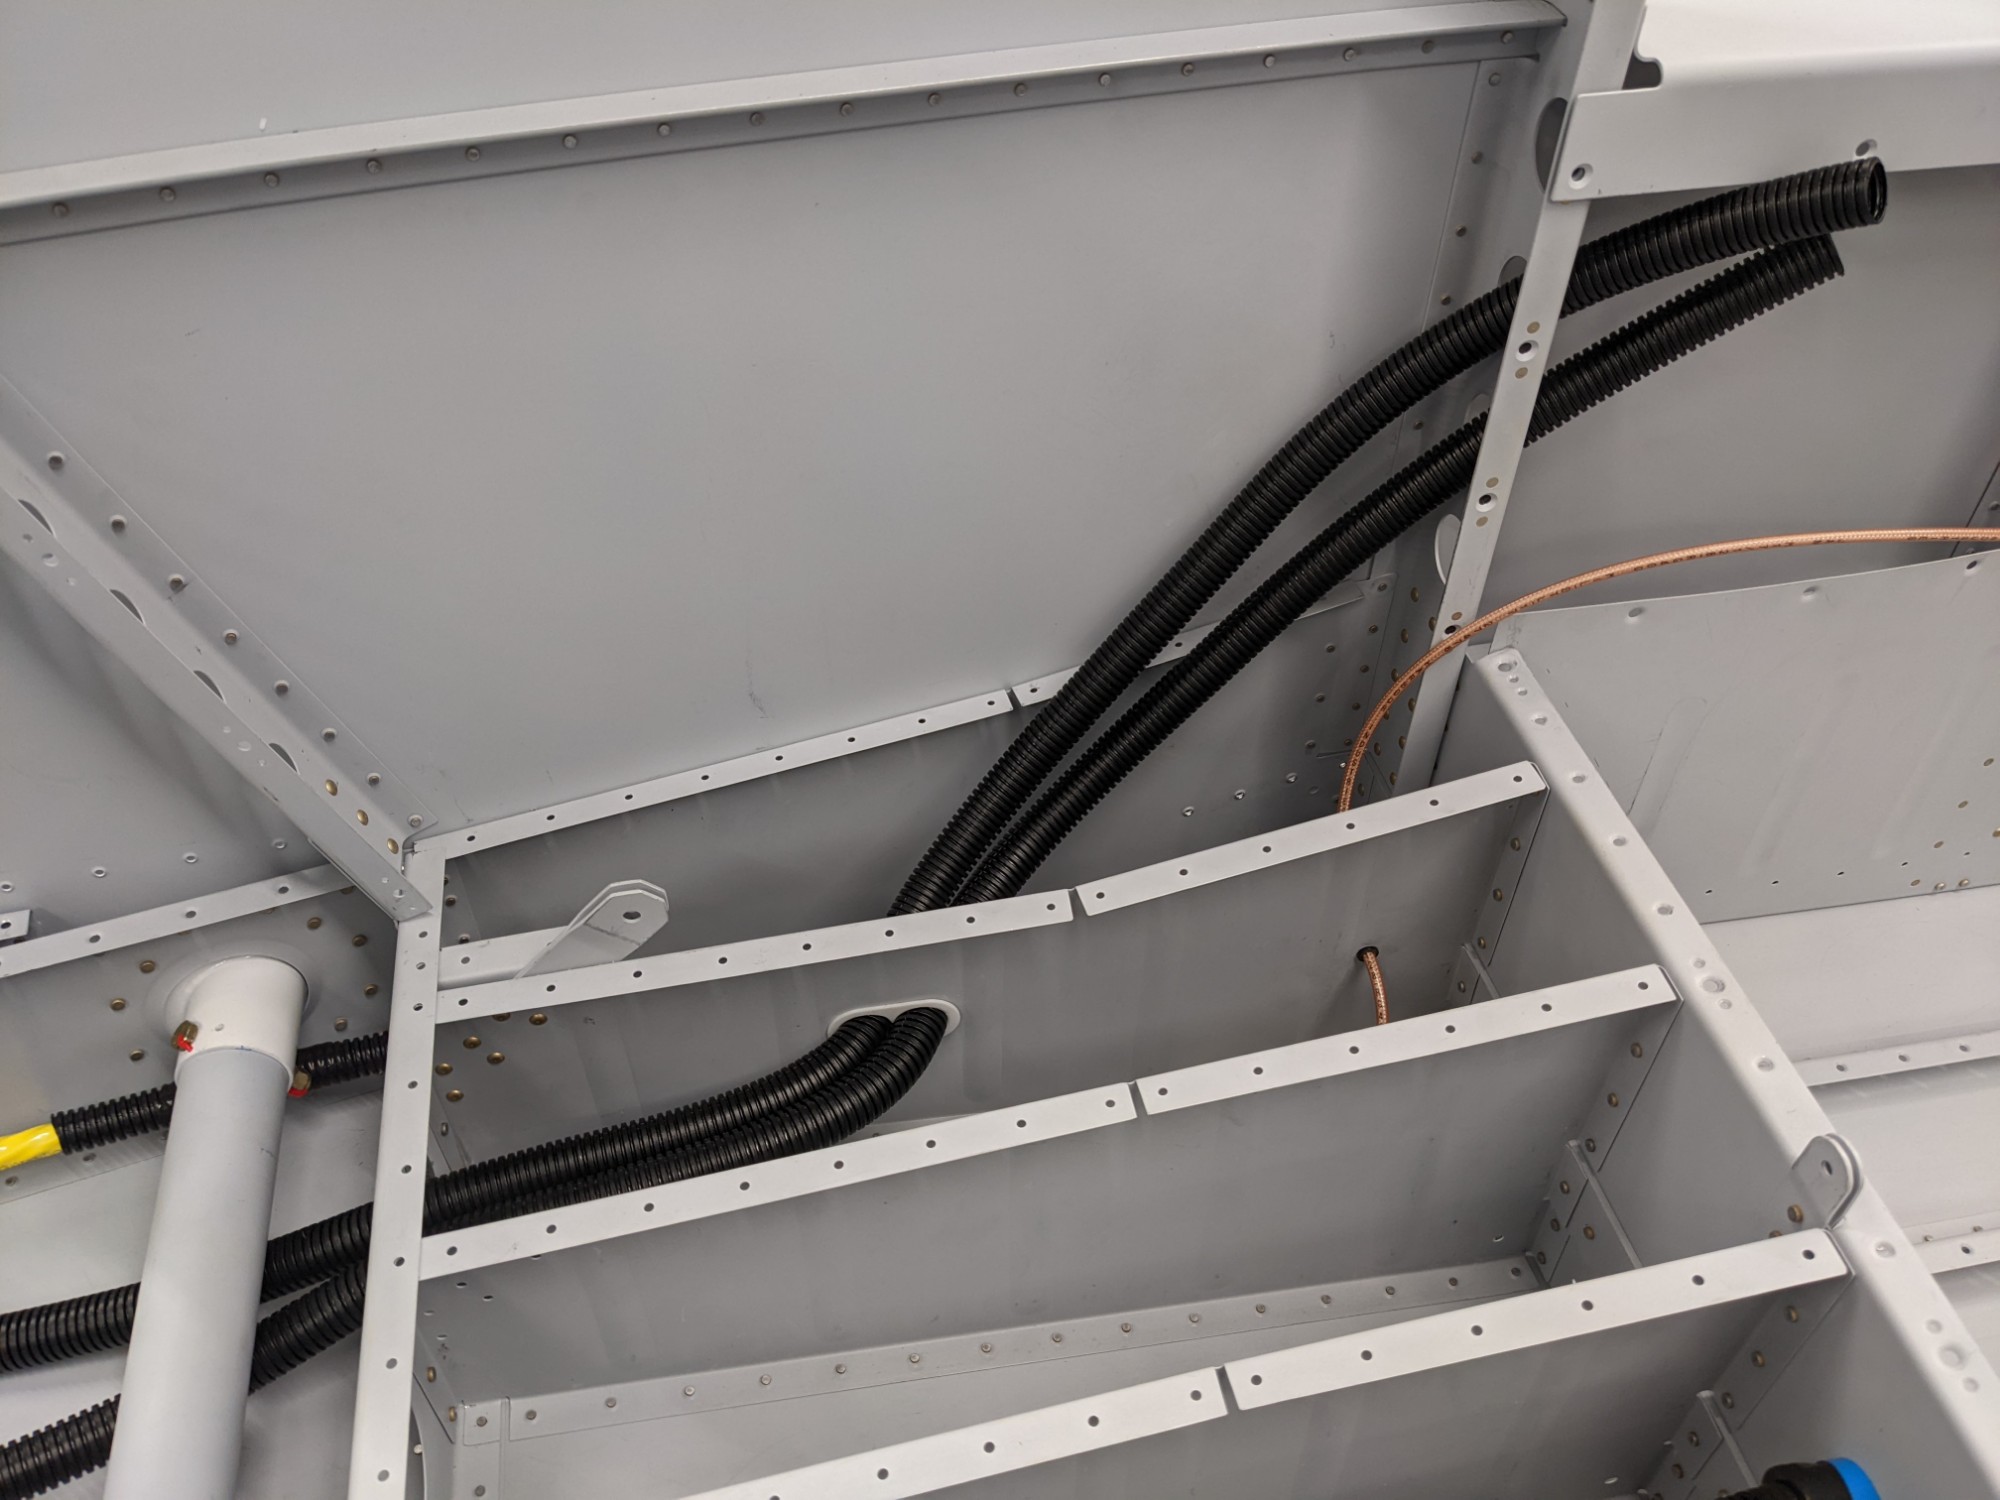
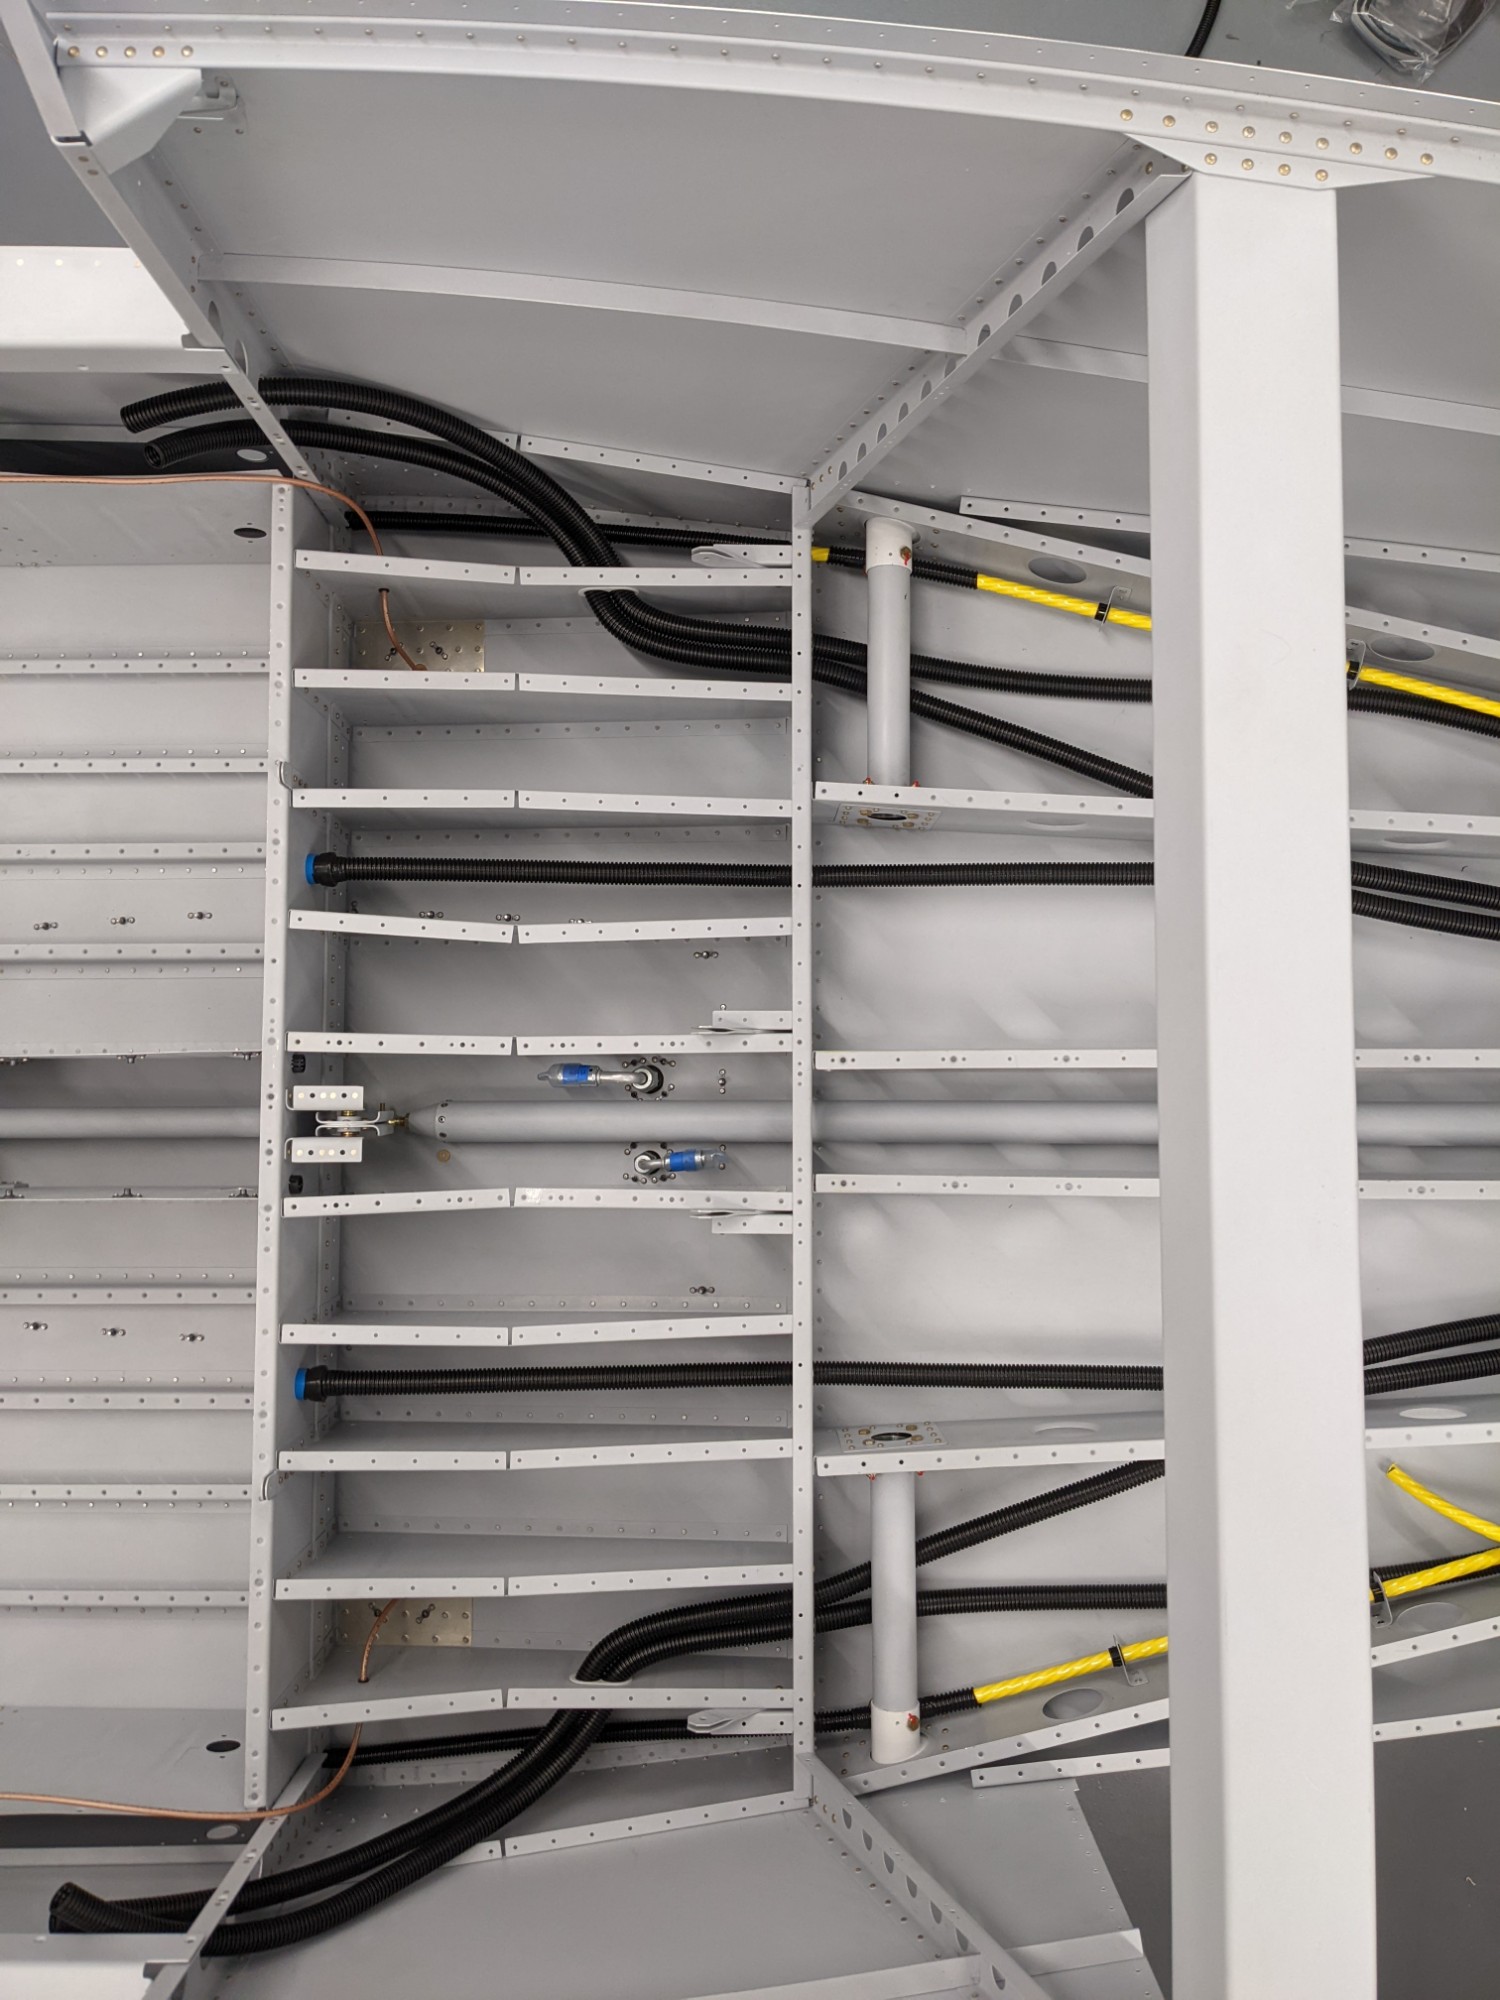
I created some 3d printed polycarbonate brackets to hold the conduit securely (Onshape model). I additionally installed caterpillar grommets in the lightening holes.
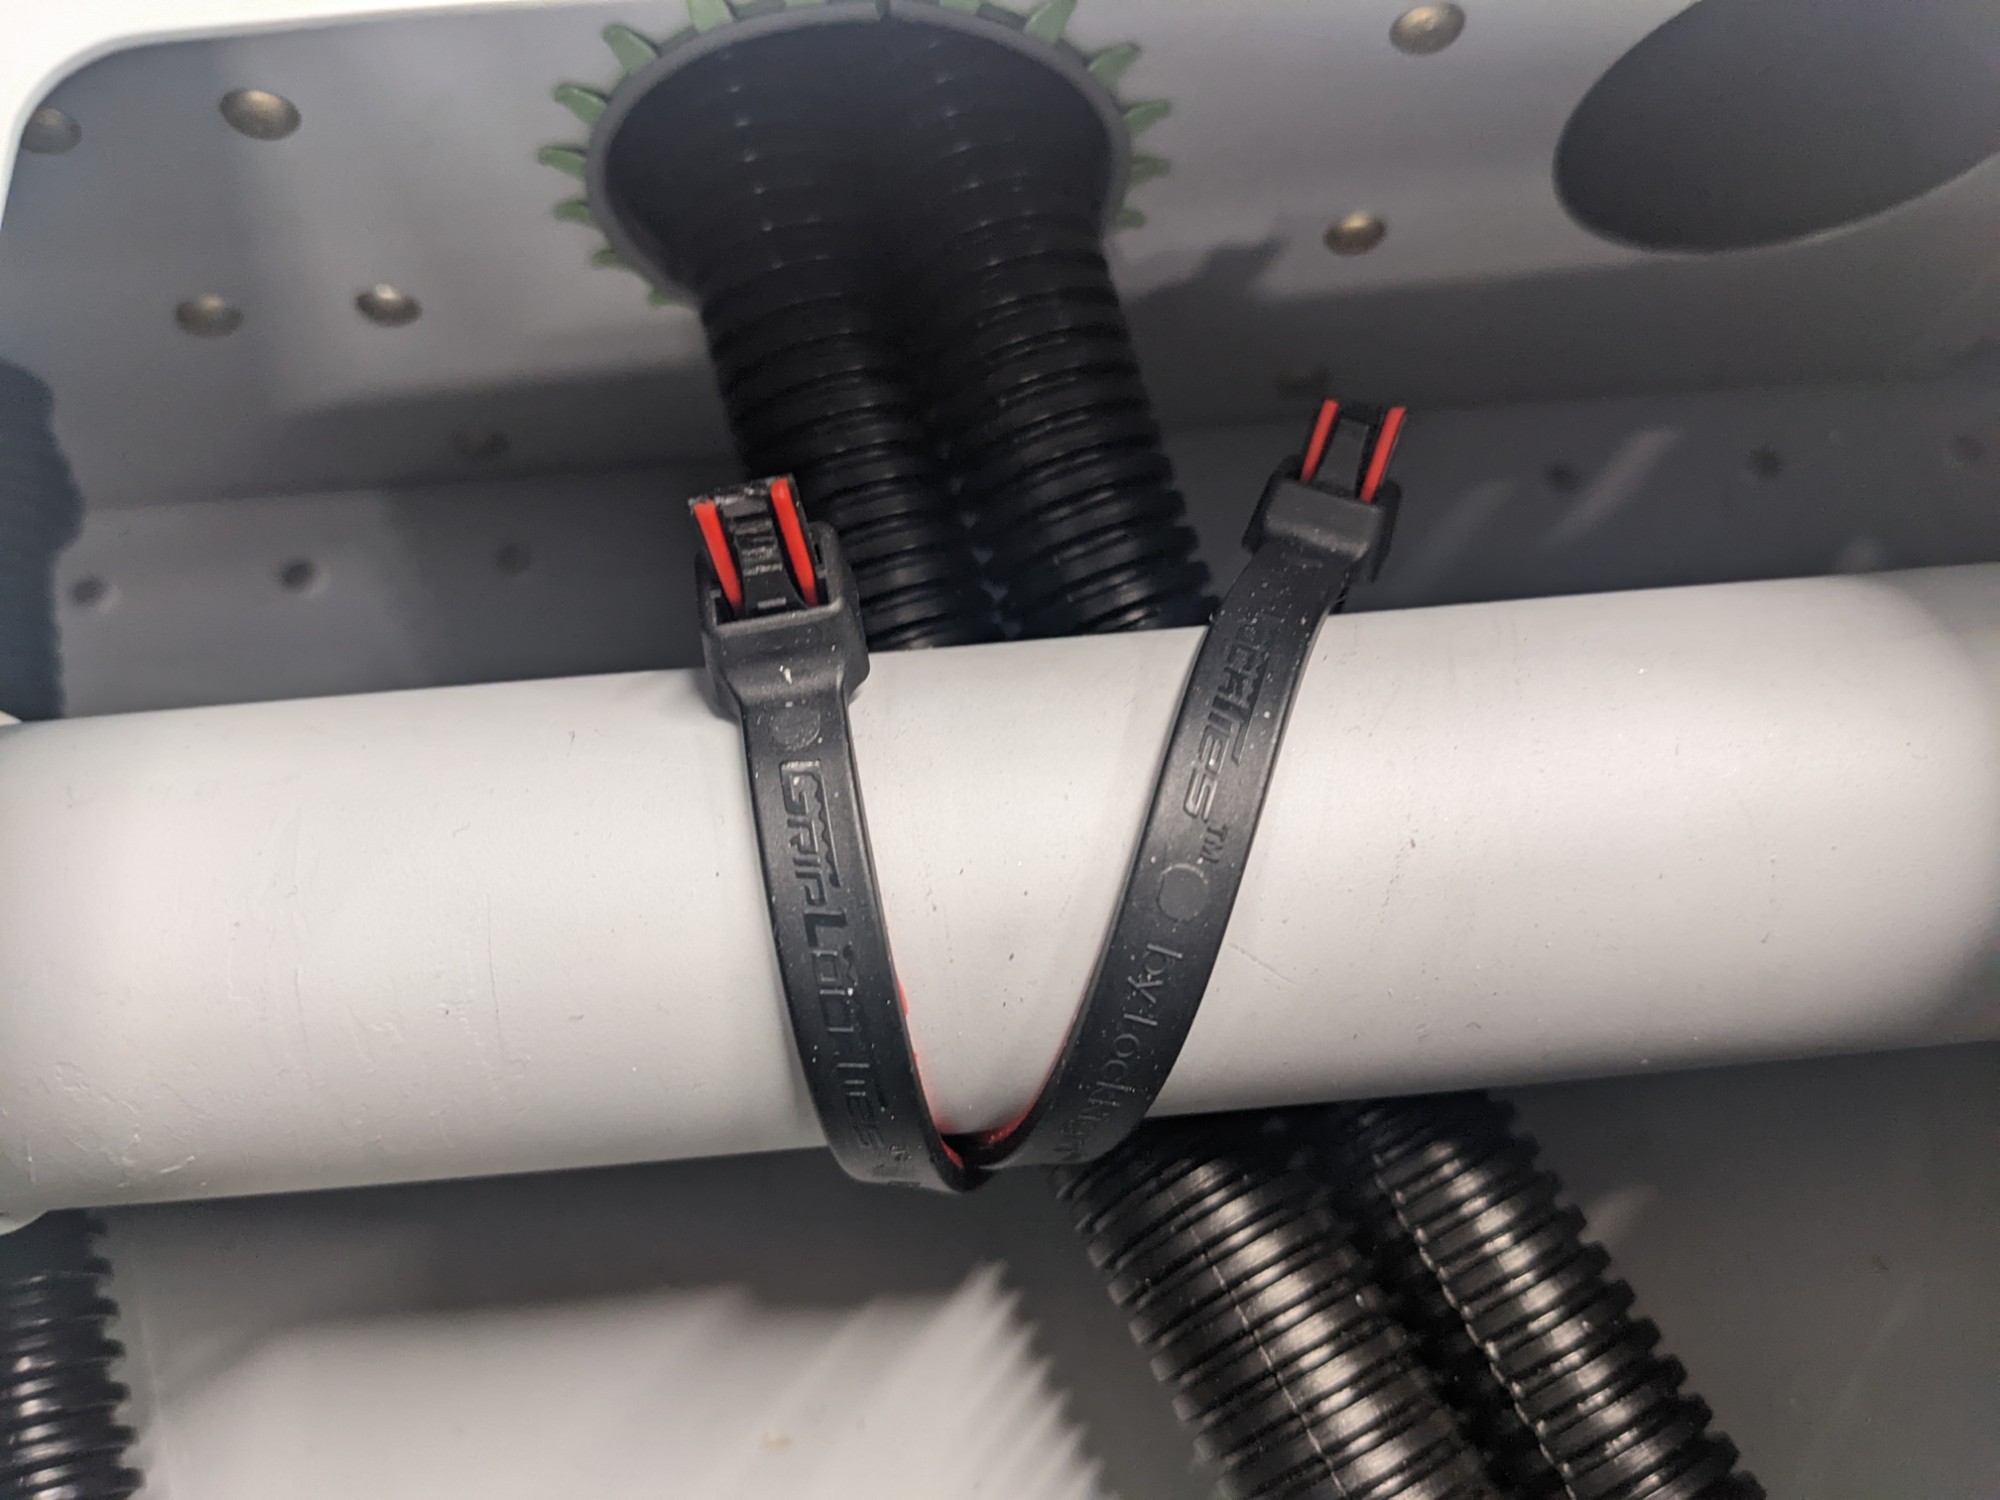
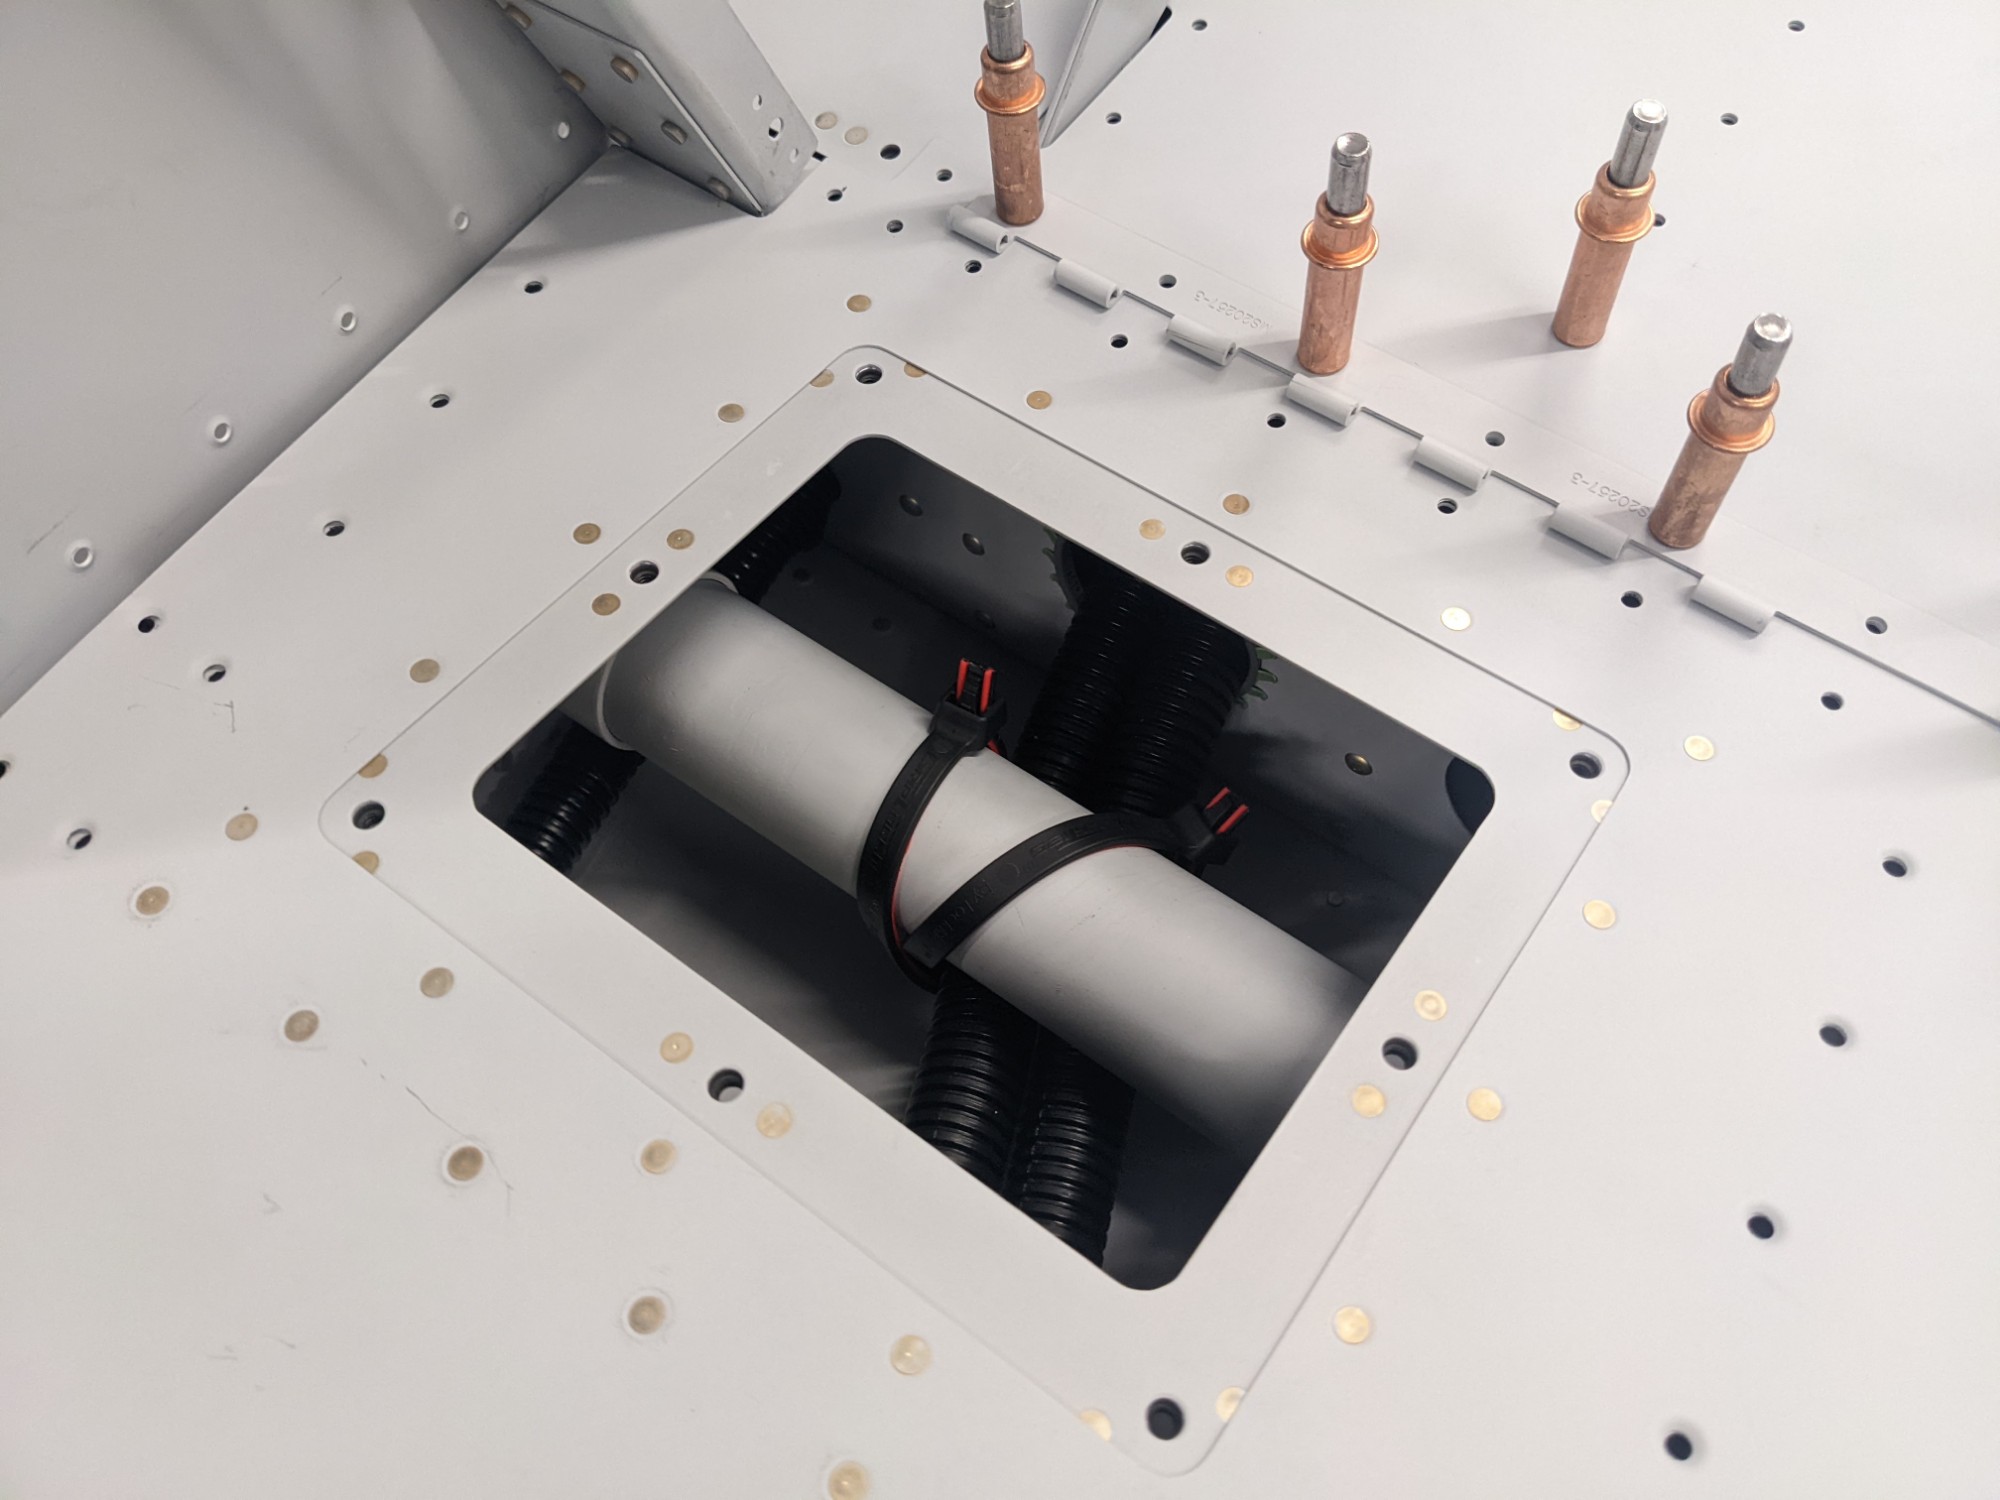
I installed caterpillar grommet and secured the conduits to the step with Grip Lock Ties. I have an access panel here so I’ll also be able to inspect this area later.
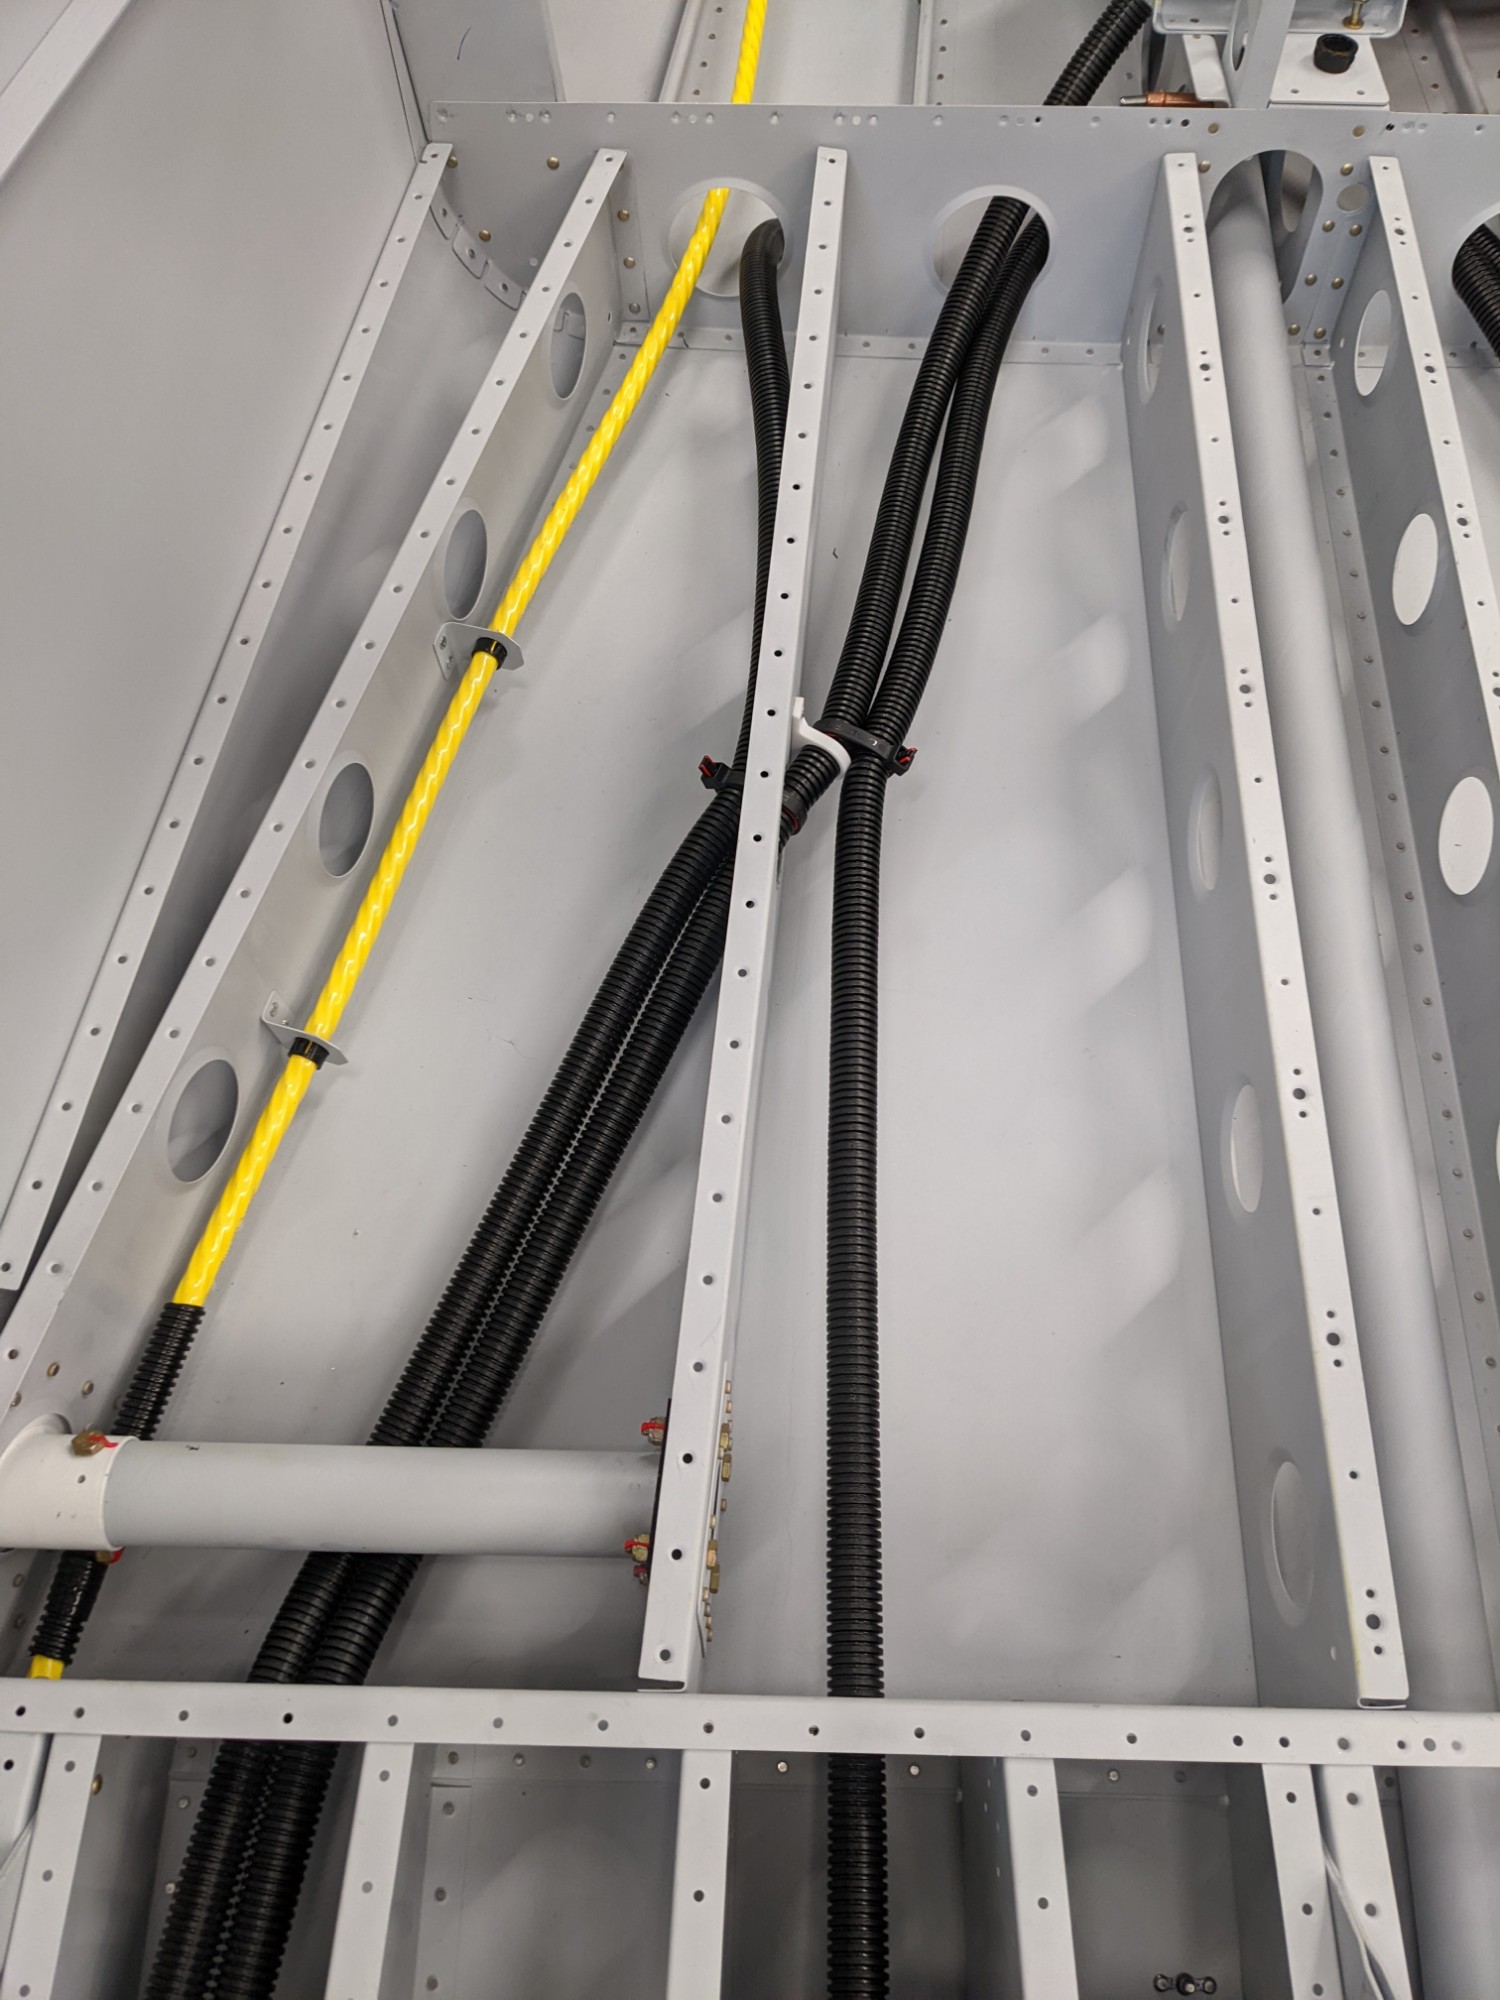
I 3d printed some additional zip-tie brackets to secure the conduits and wires that pass through the bulkhead into the tailcone (Onshape model, I adjusted sizes and printed different variants but didn’t keep each variant so you may need to adjust accordingly if you want to use these).
These are blind-riveted to the bulkhead. I also installed caterpillar grommets into the holes as added protection. The bracket on the top-left of the picture below is for securing the A/C hoses. I decided to run these into the tailcone on the right side (via the tunnel) to avoid protruding into the opening on the left (which I expect I’ll find myself climbing through in the future).