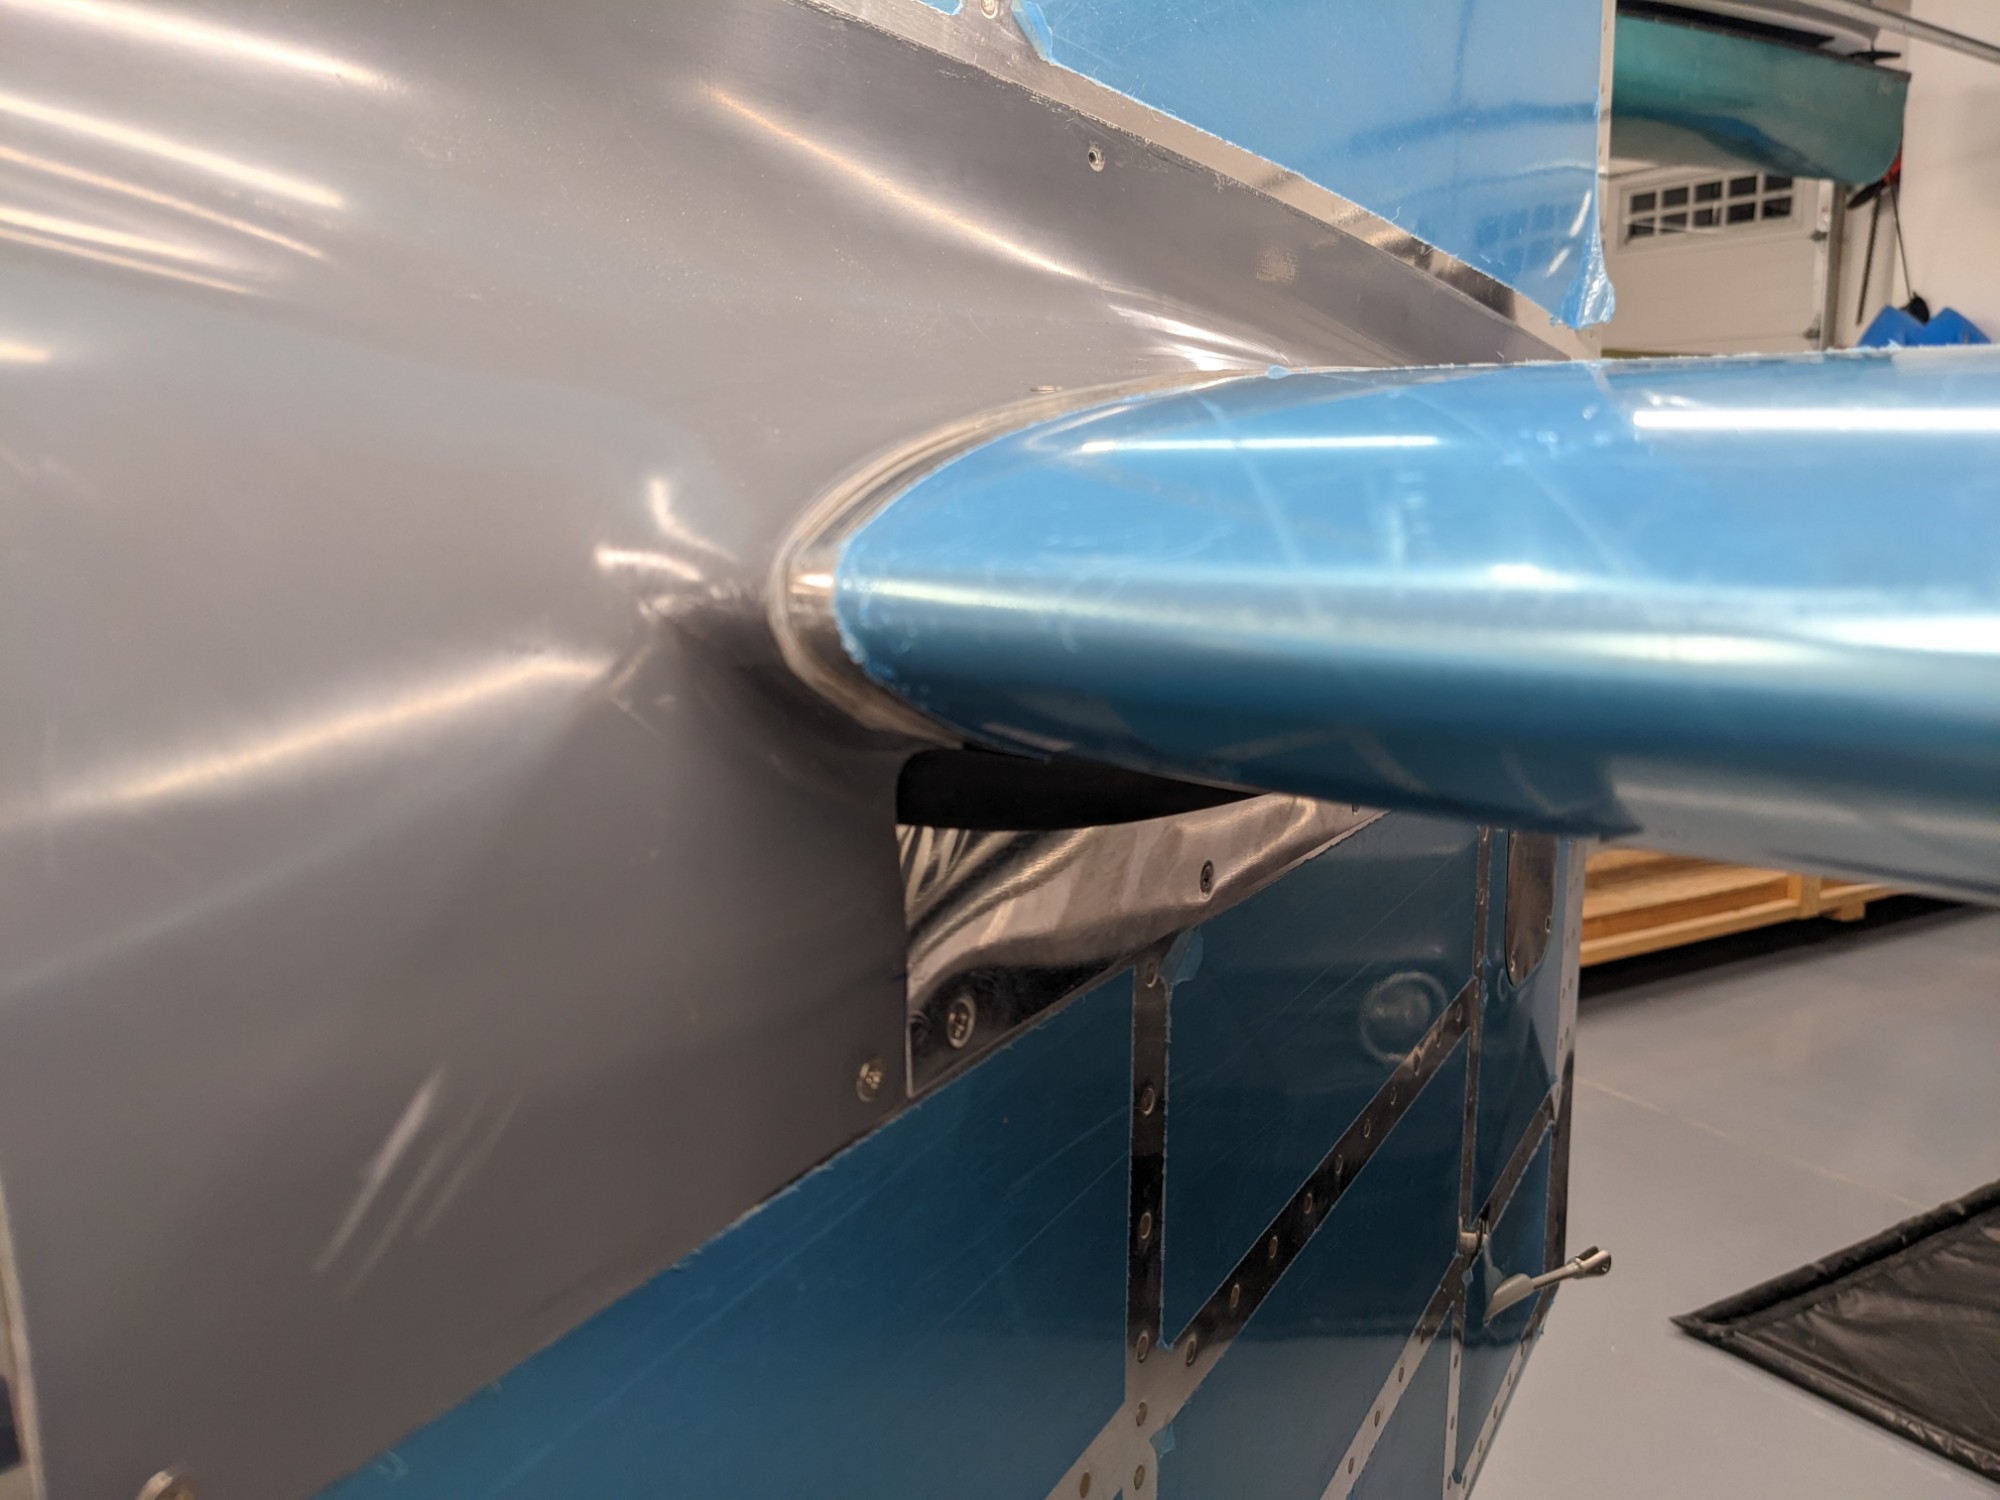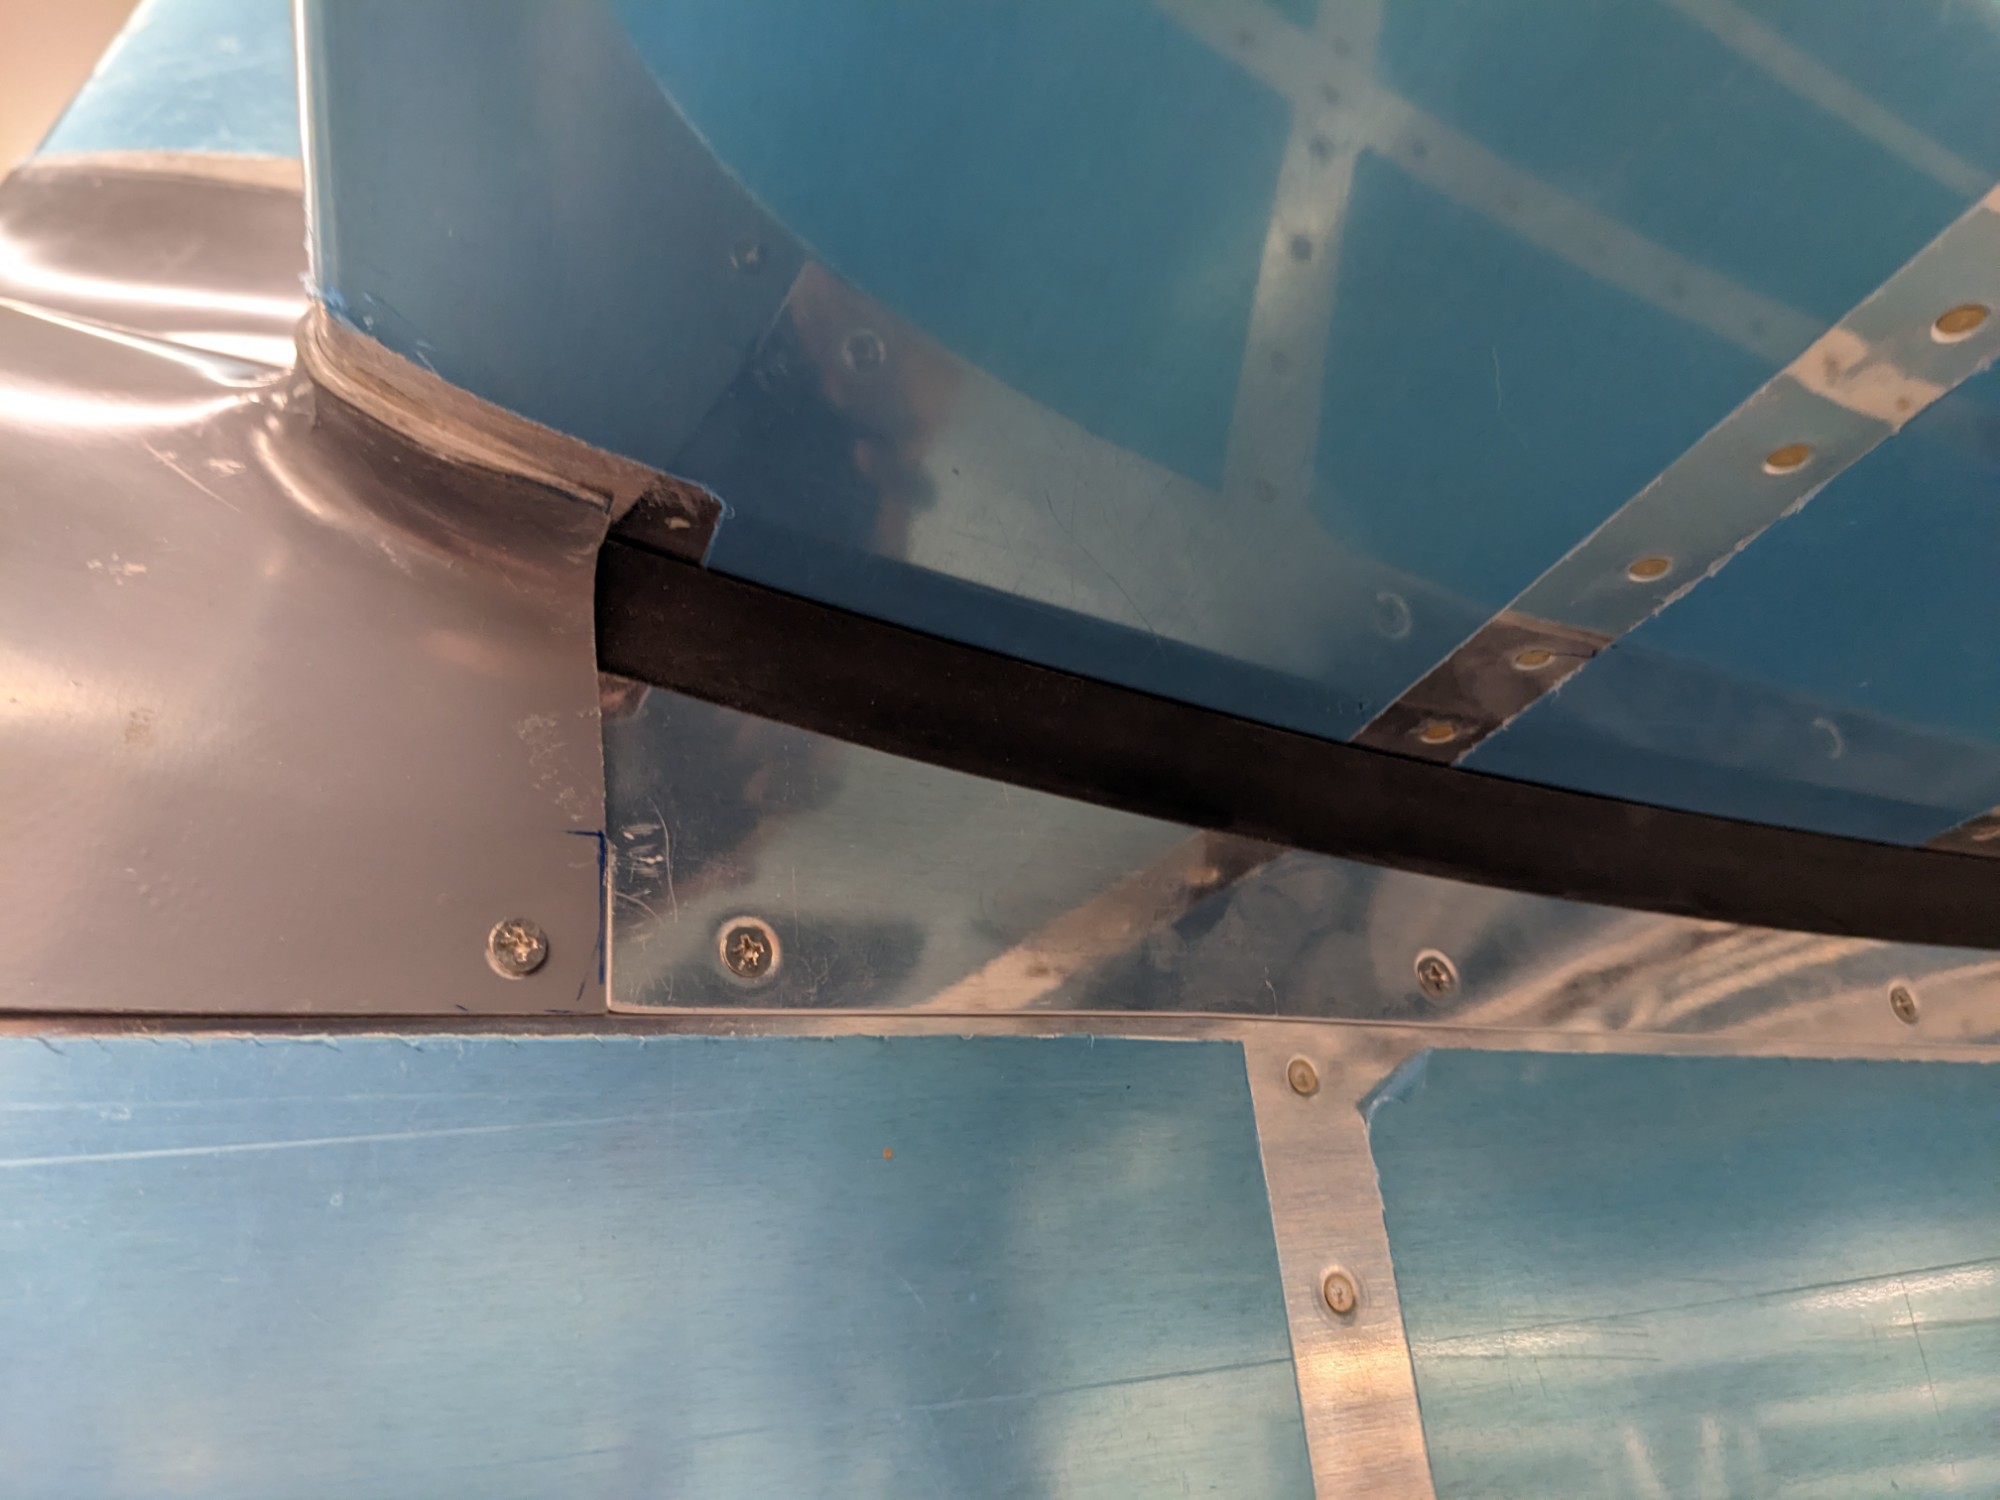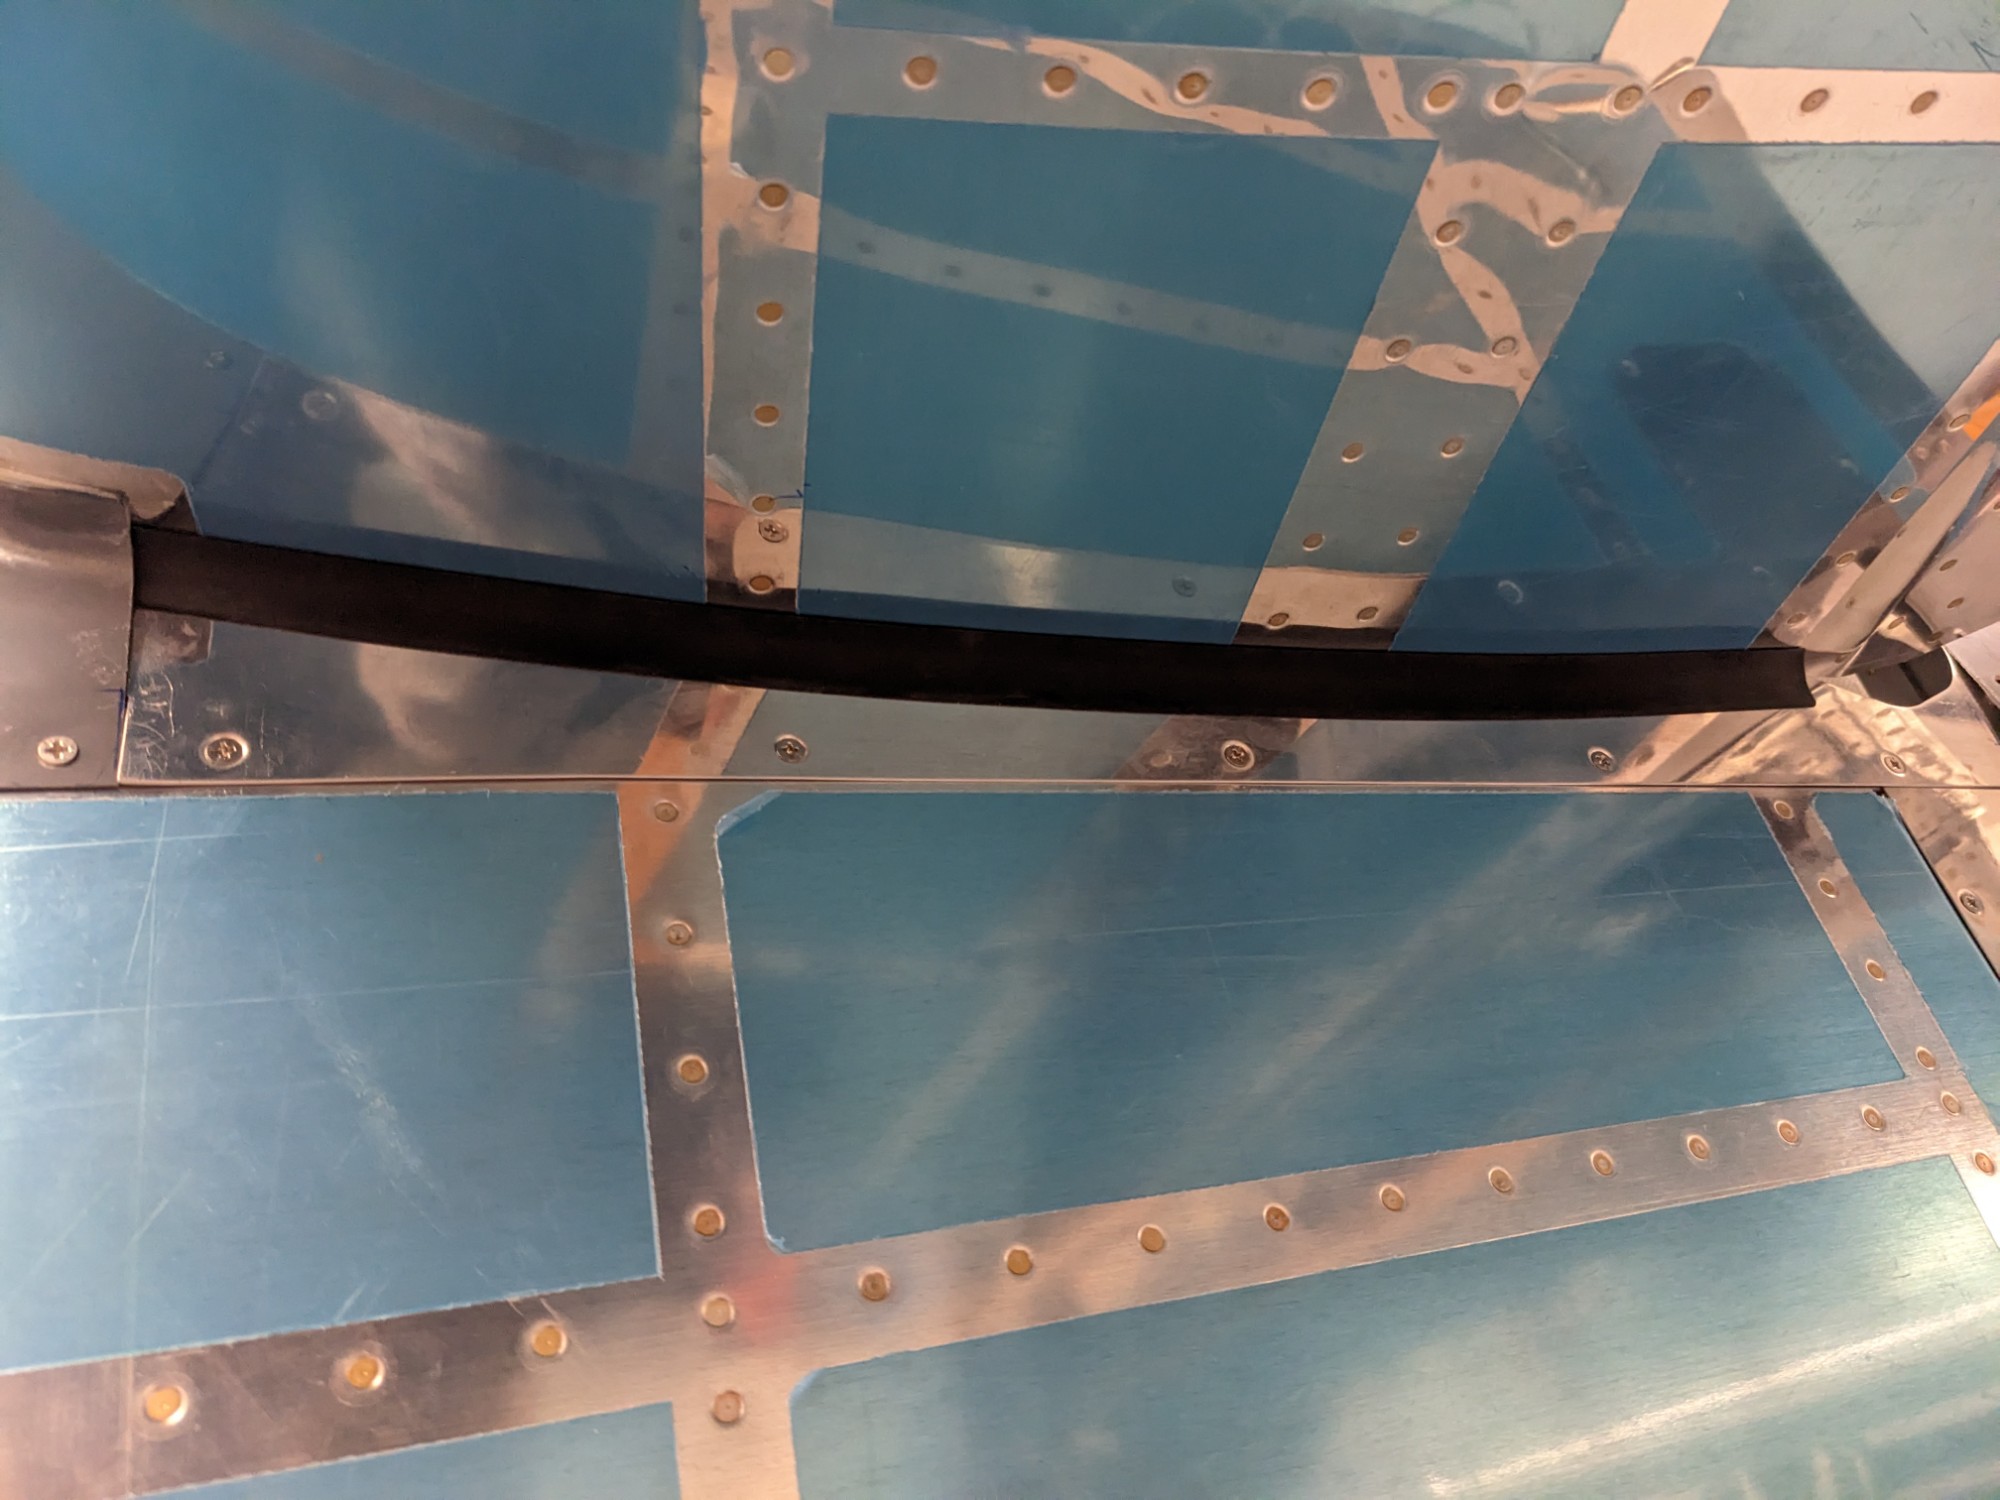
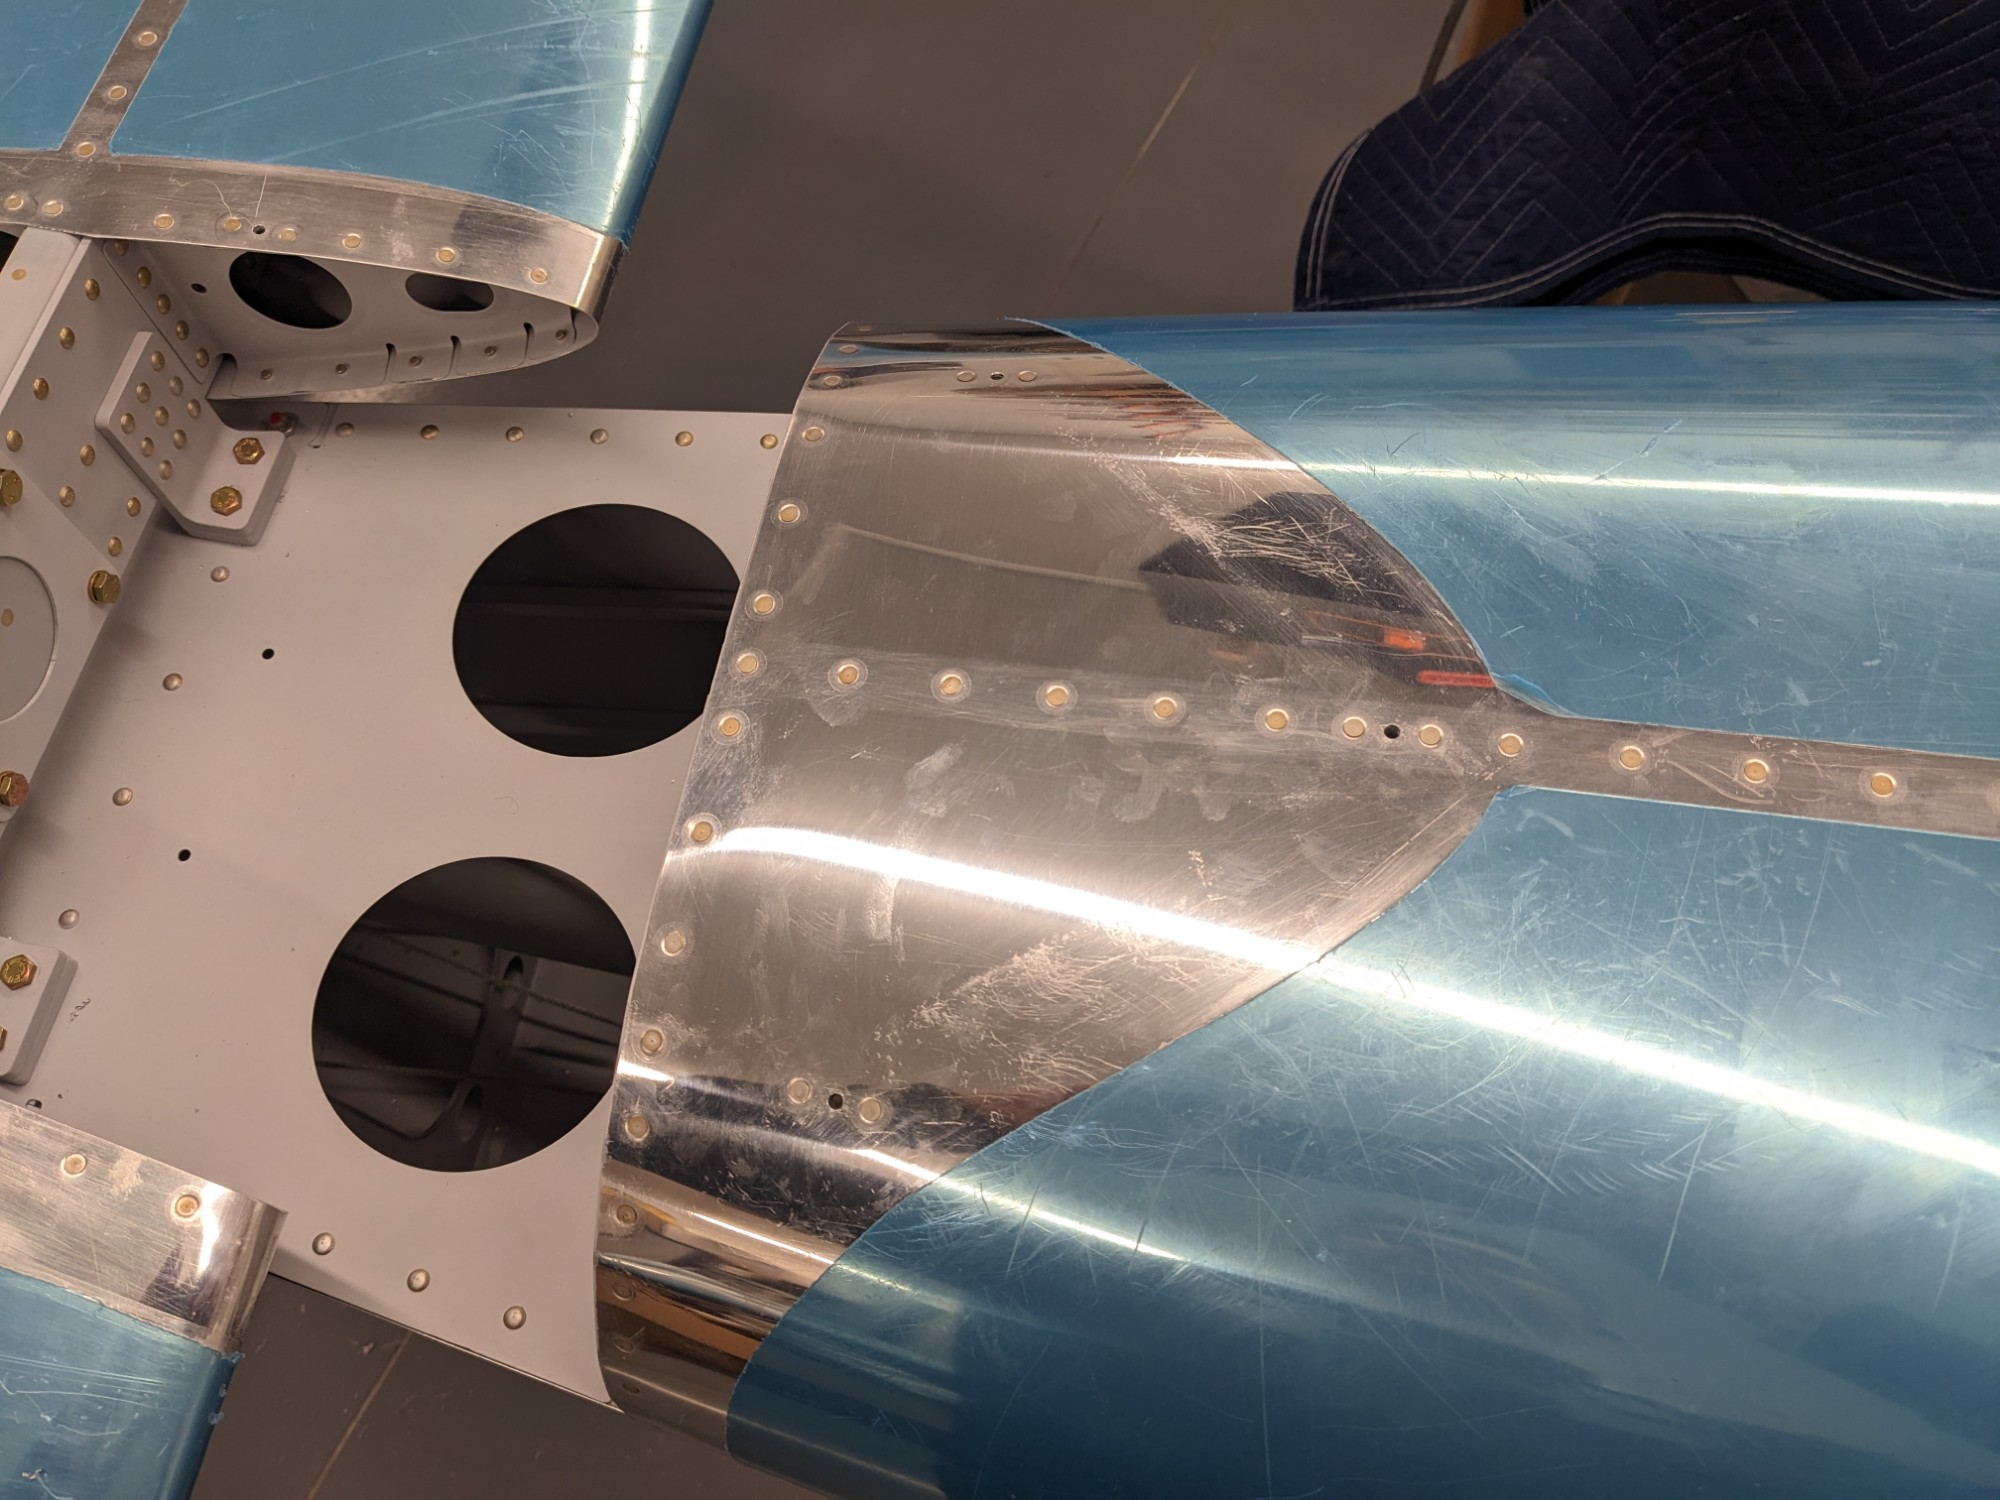
The gap under the lower portion of the horizontal stabilizer is fitted with aluminum gap fairings and a rubber seal. I deburred these, match-drilled the aft holes, and cut the rubber seals to length.

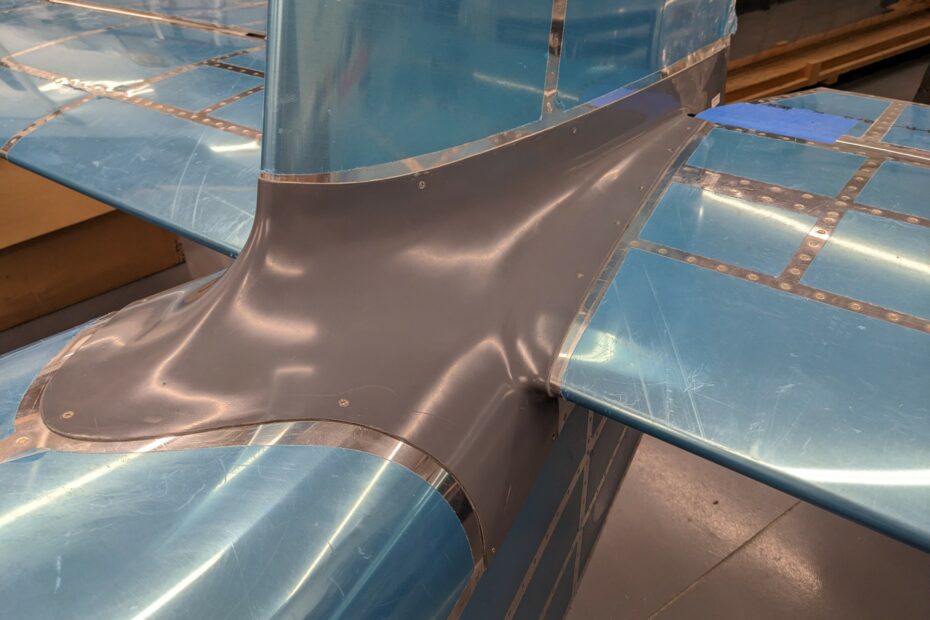
I didn’t have a 3/32″ strap duplicator so I had to wait for that to arrive before starting on drilling the holes in the empennage intersection fairing. The plans have you use a light shining through from the inside but the newer gel-coated fairings aren’t very transparent and there is no easy way to maneuver a light with the fairing in place.
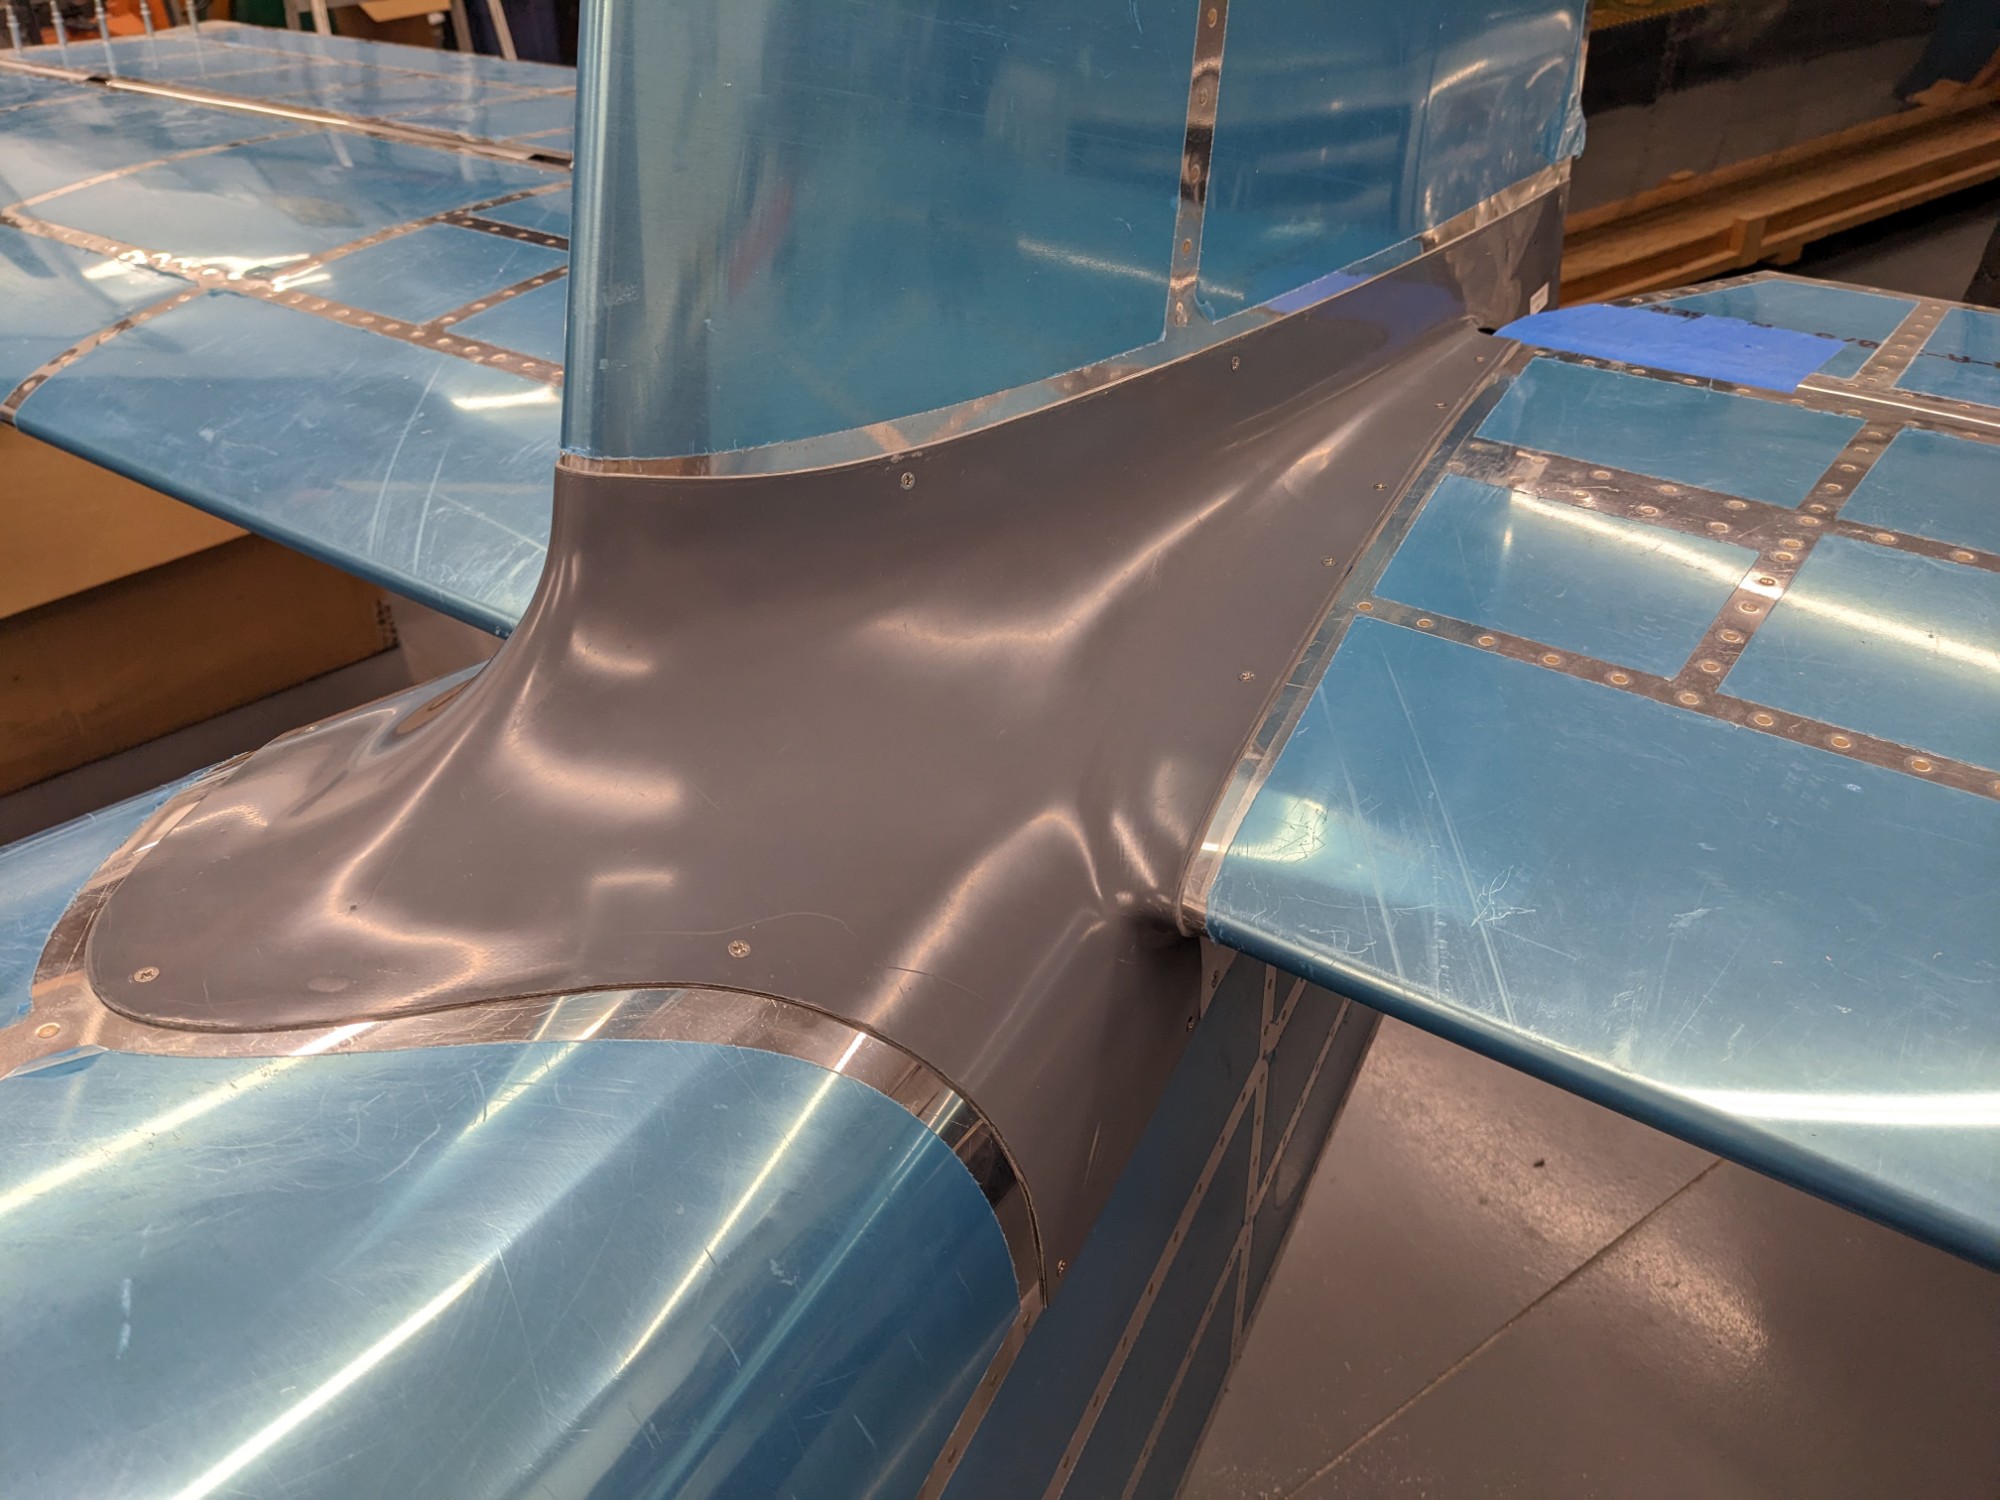
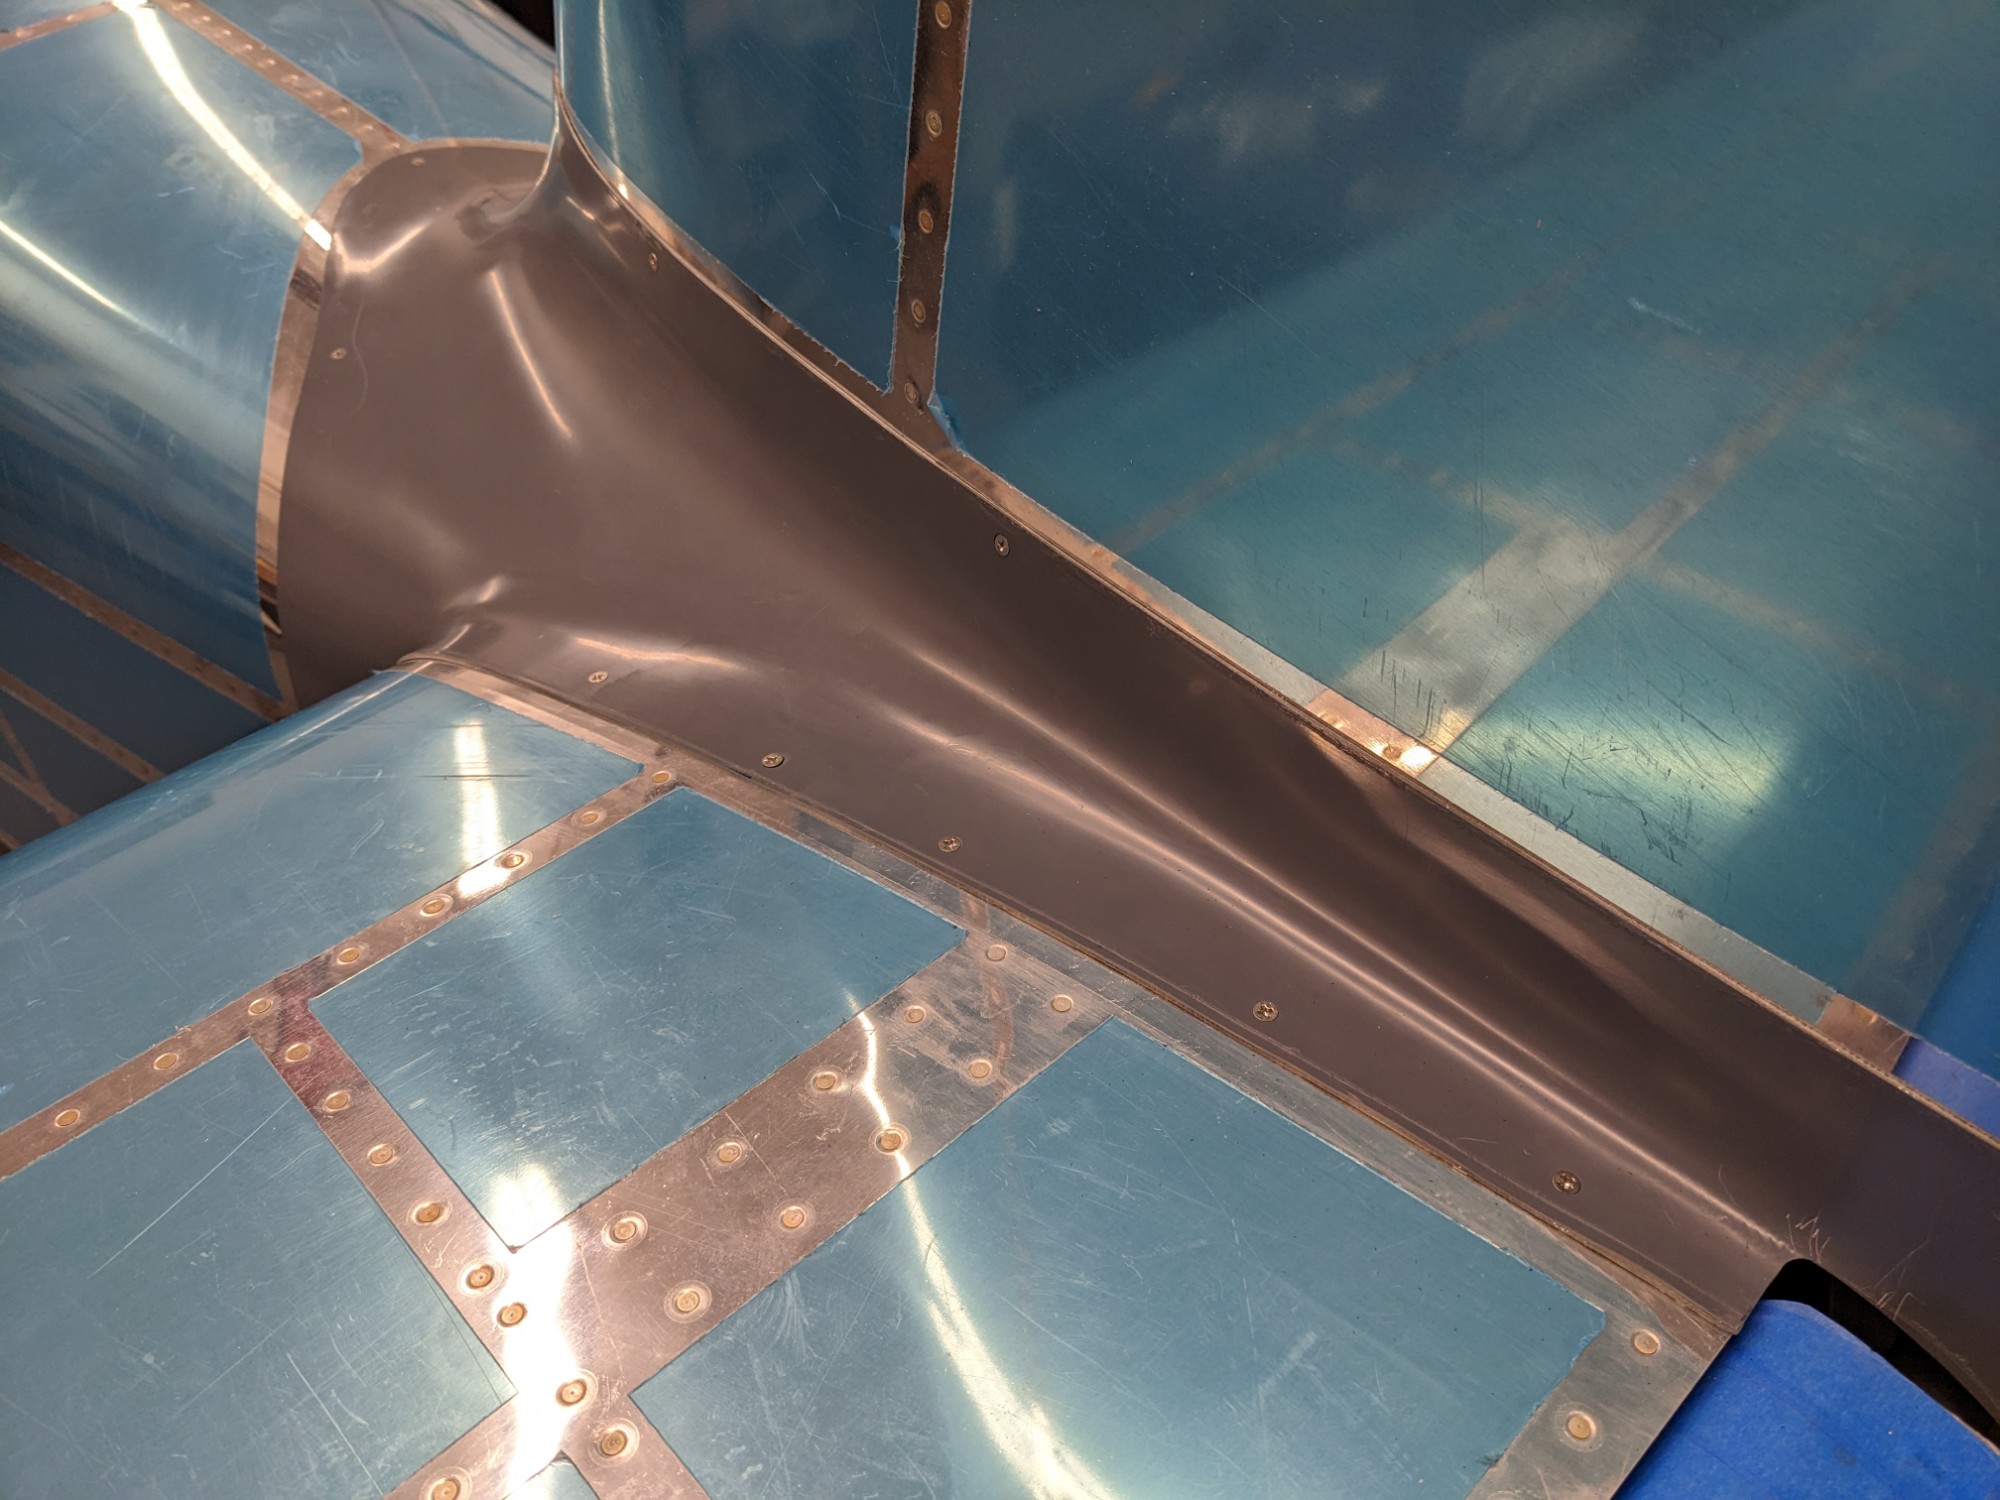
I established the general position by taping it into place and shaping the fairing with a heat gun. I found that setting the front position, then pulling back to the aft with slight downward pressure allowed me to get a reasonably close fit along all of the skin surfaces.
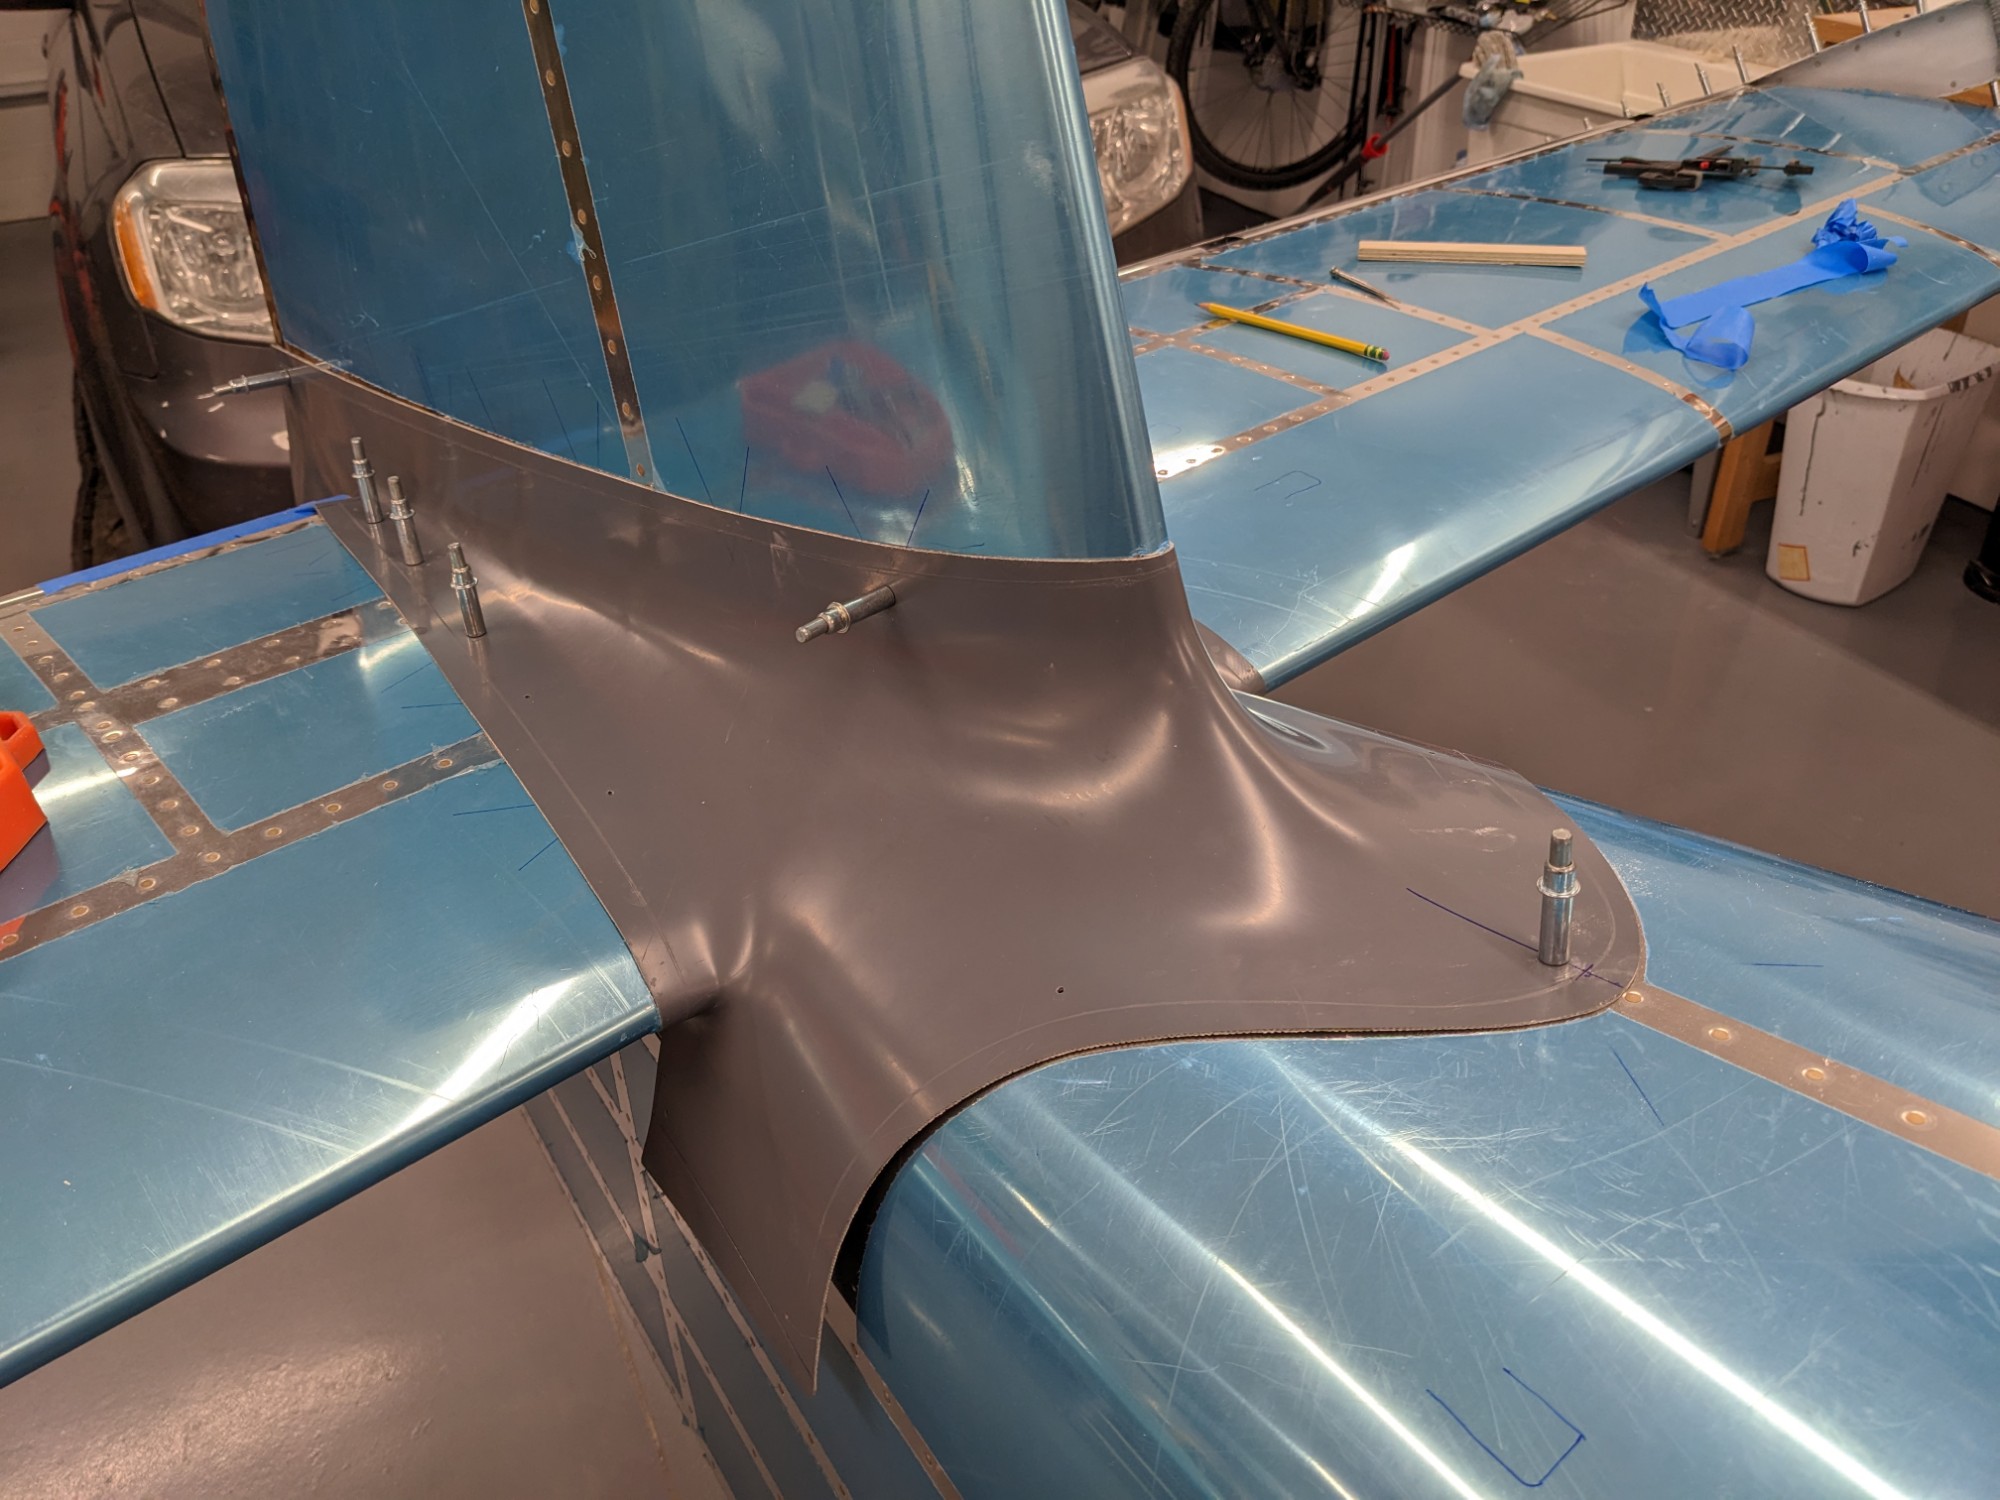
I did a bit more tweaking with the heat gun around the horizontal stabilizer and I match-drilled select holes from the forward to the aft. Others have indicated that it is easier to get a clean fit with fewer screws so I selected only the holes where I felt I needed a closer fit.
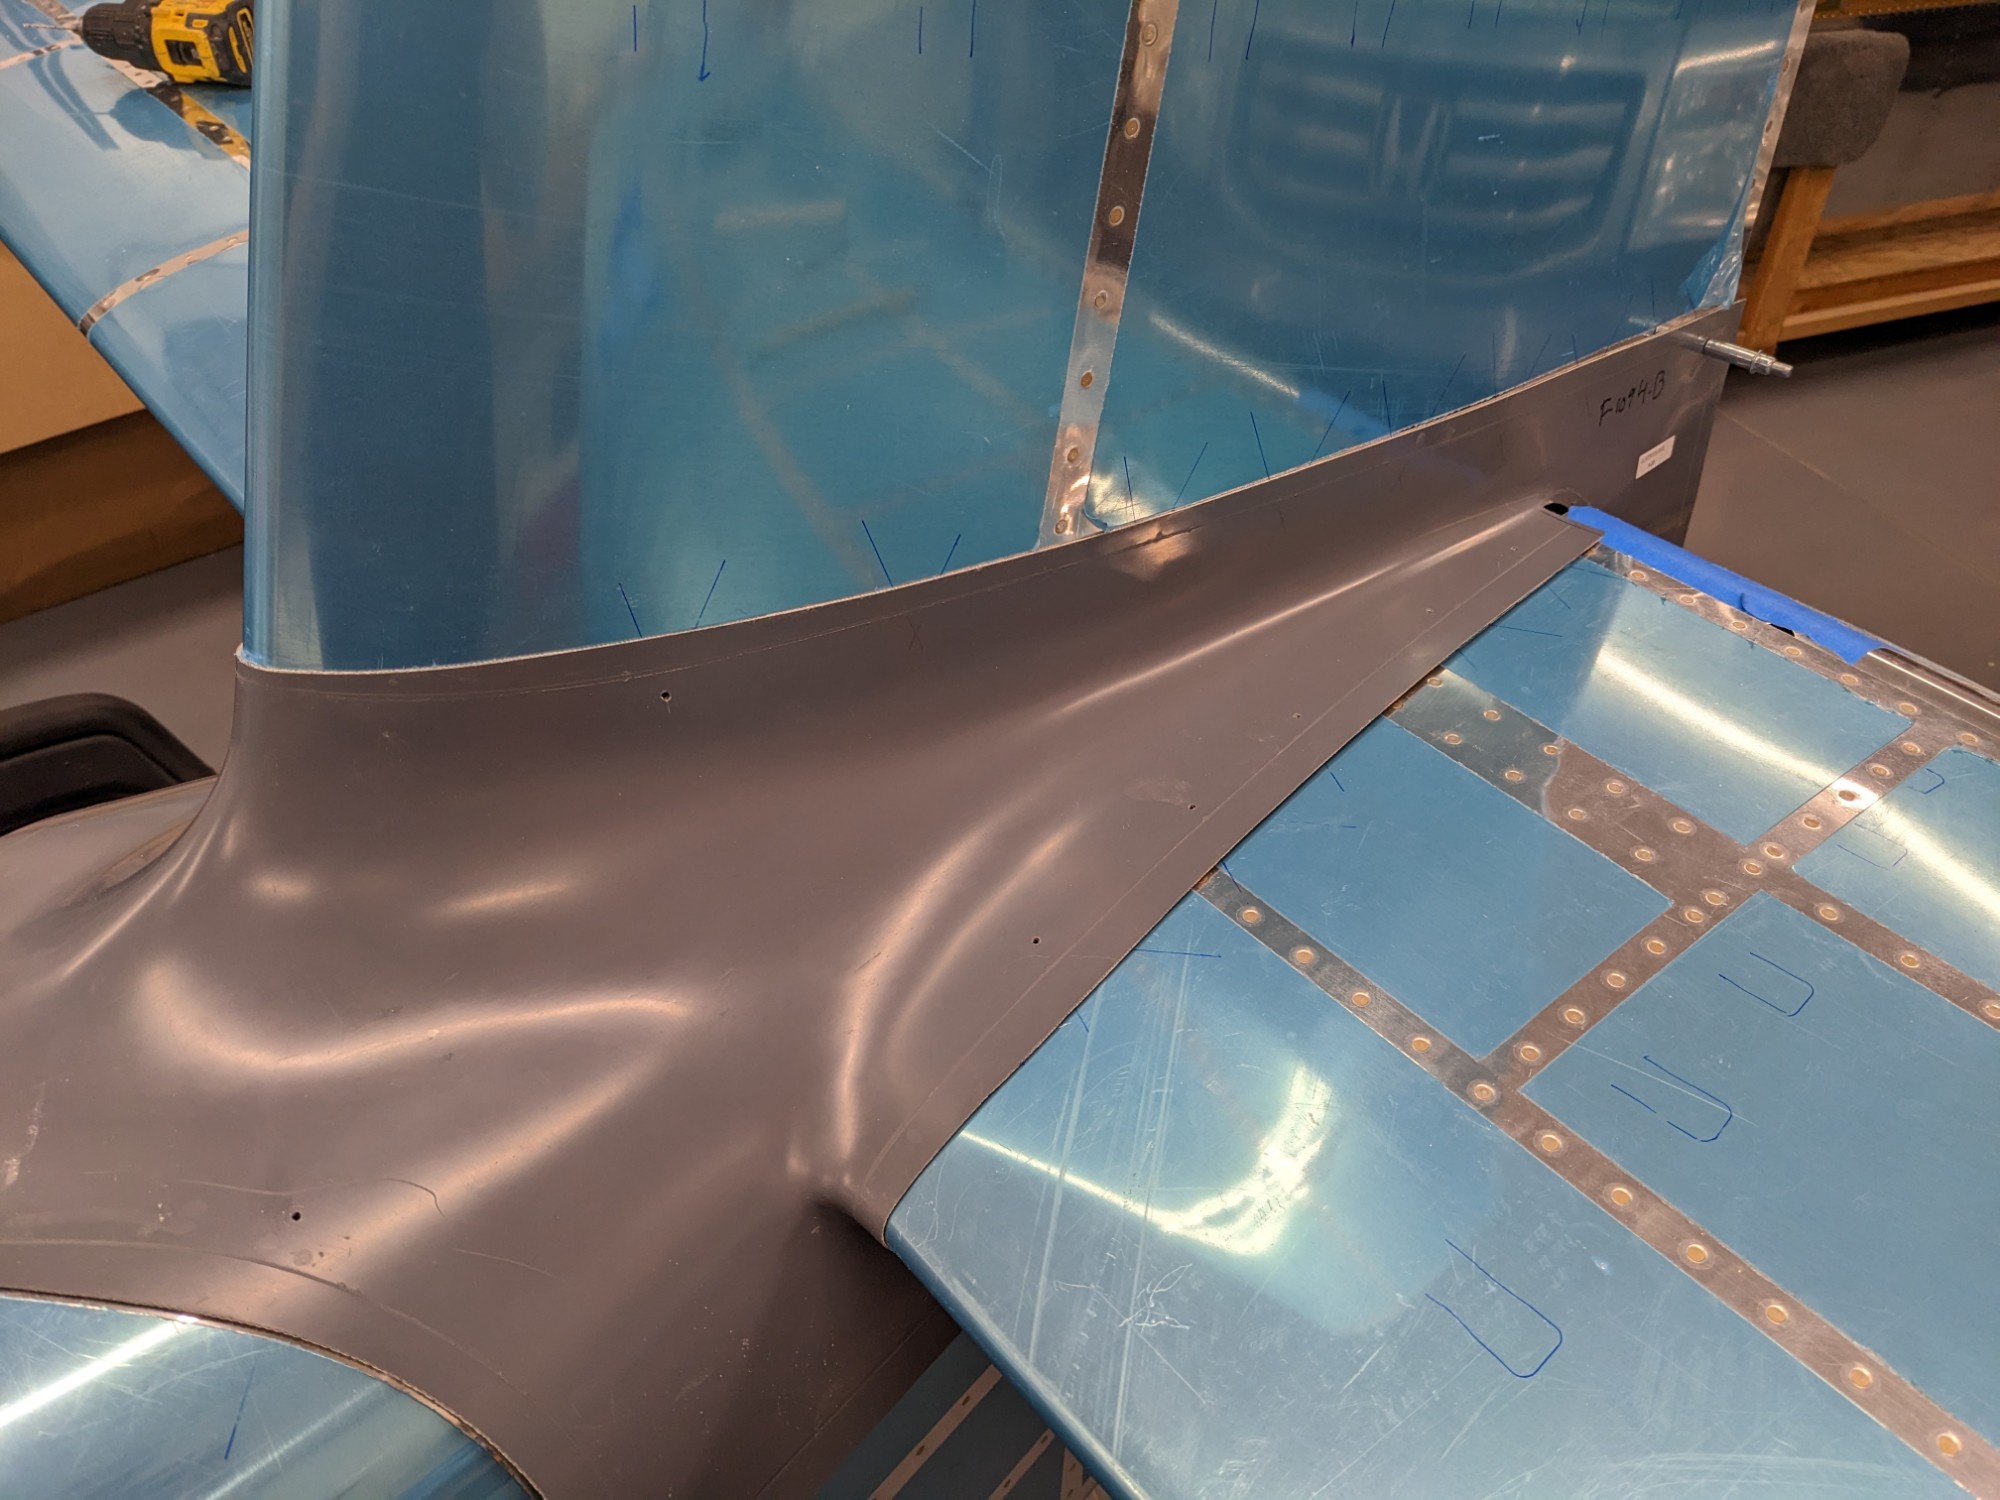
After getting the holes drilled (and doing more tweaking) I marked the edges for trimming. I trimmed with a Dremel and smoothed the edges with a file and sandpaper.
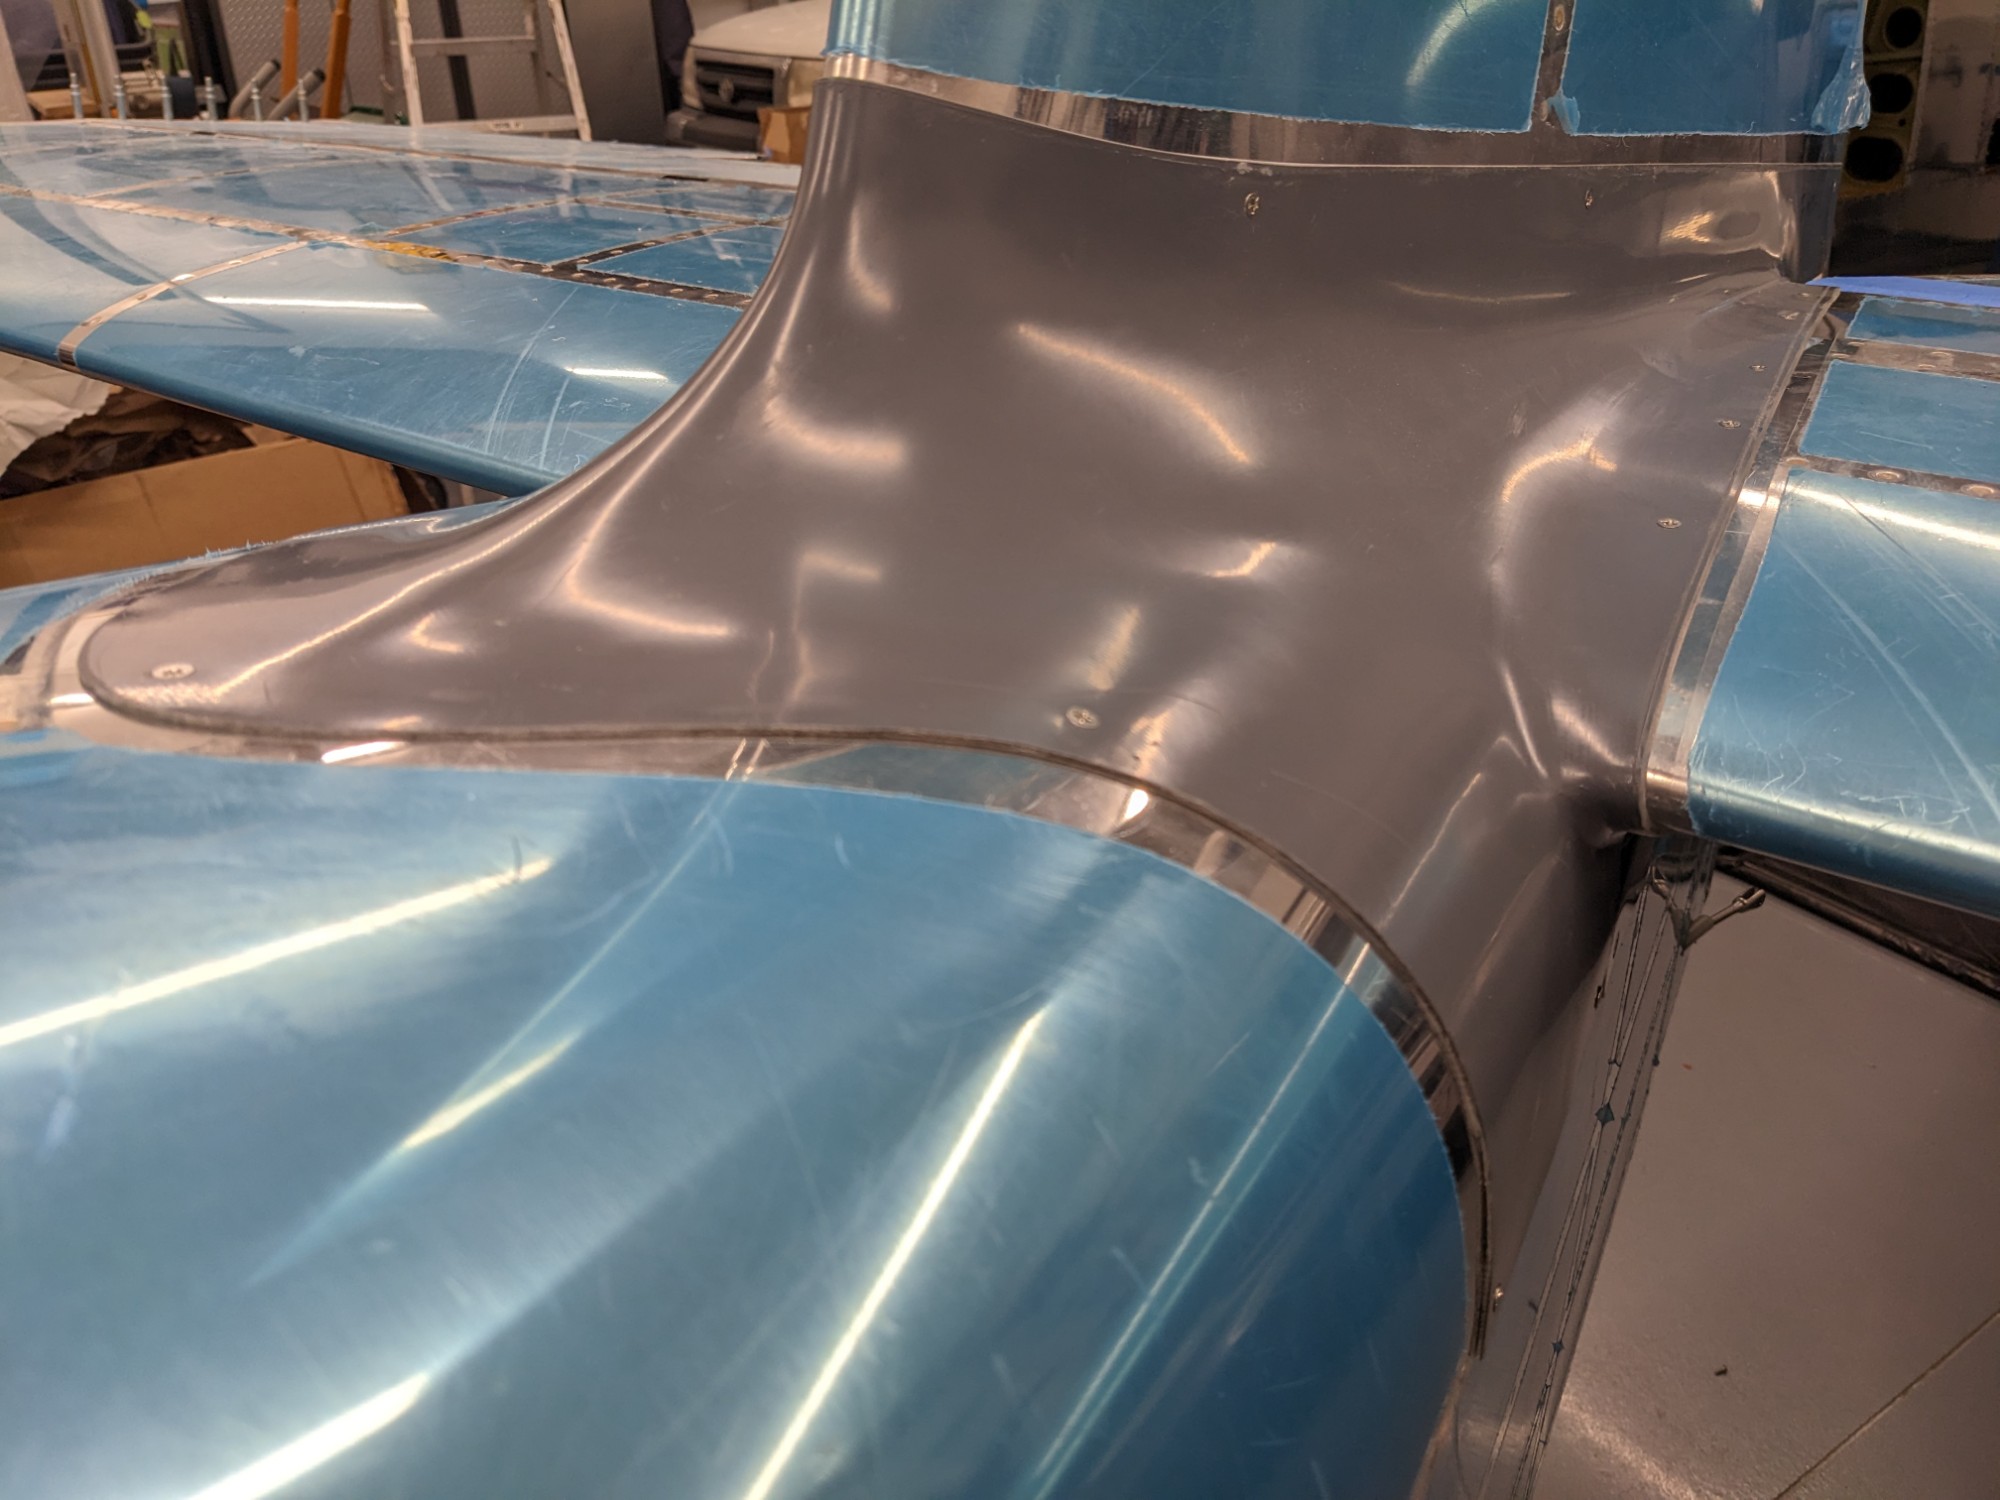
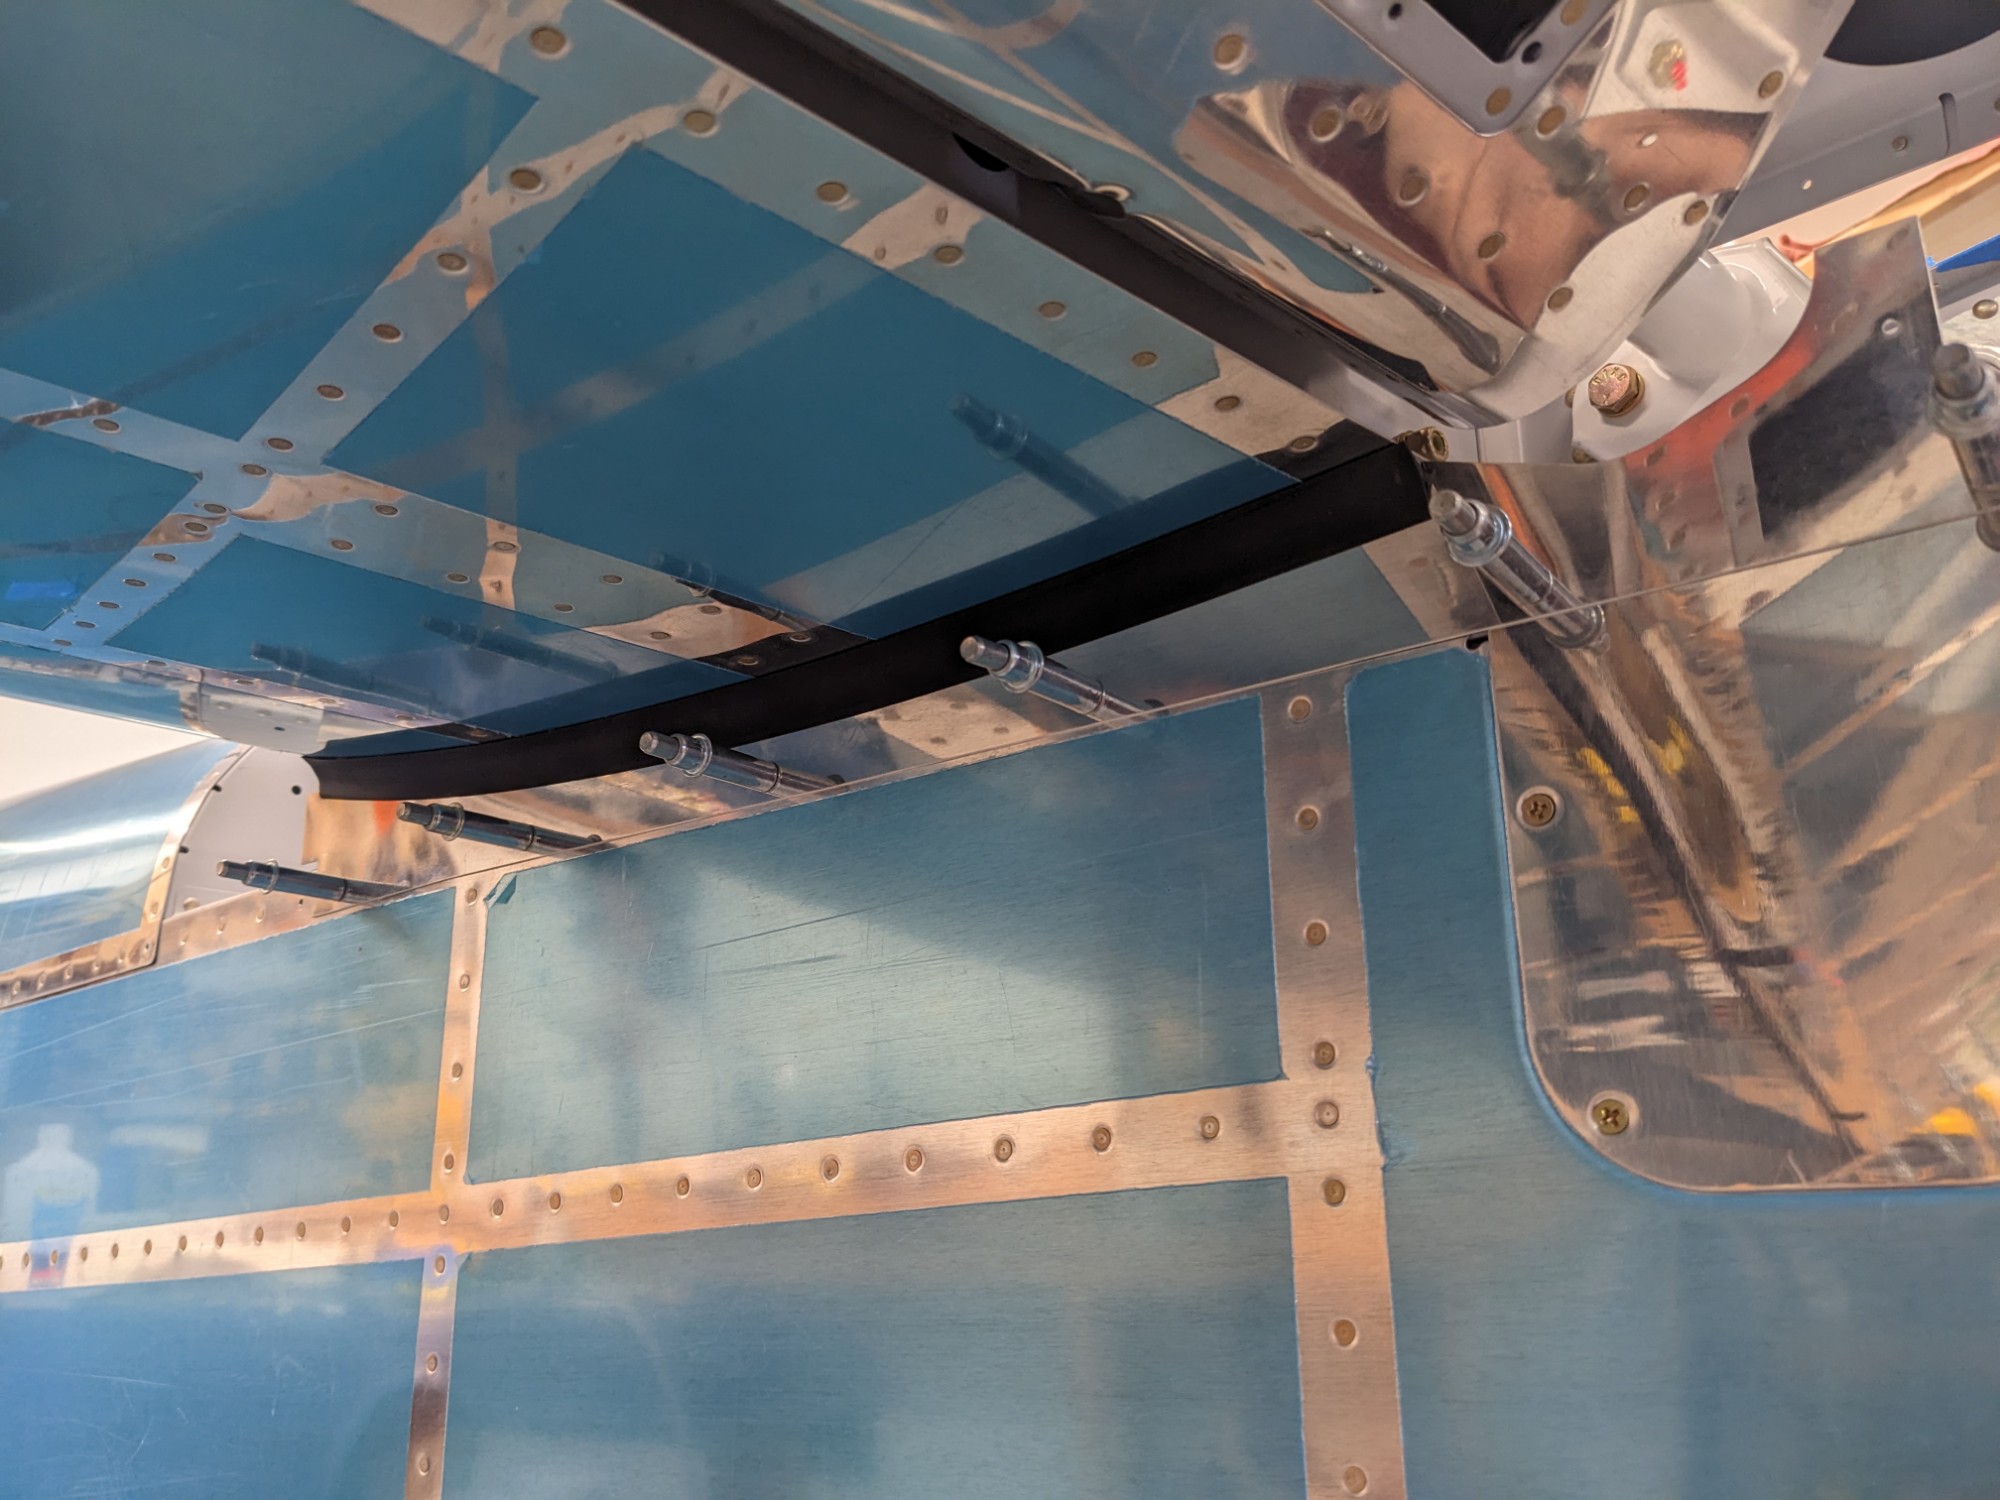
After a few more tweaks with the heat gun, I taped off the aluminum with a layer of packing tape, mixed up some epoxy and cabosil, and buttered the outer flange of the fairing with it.
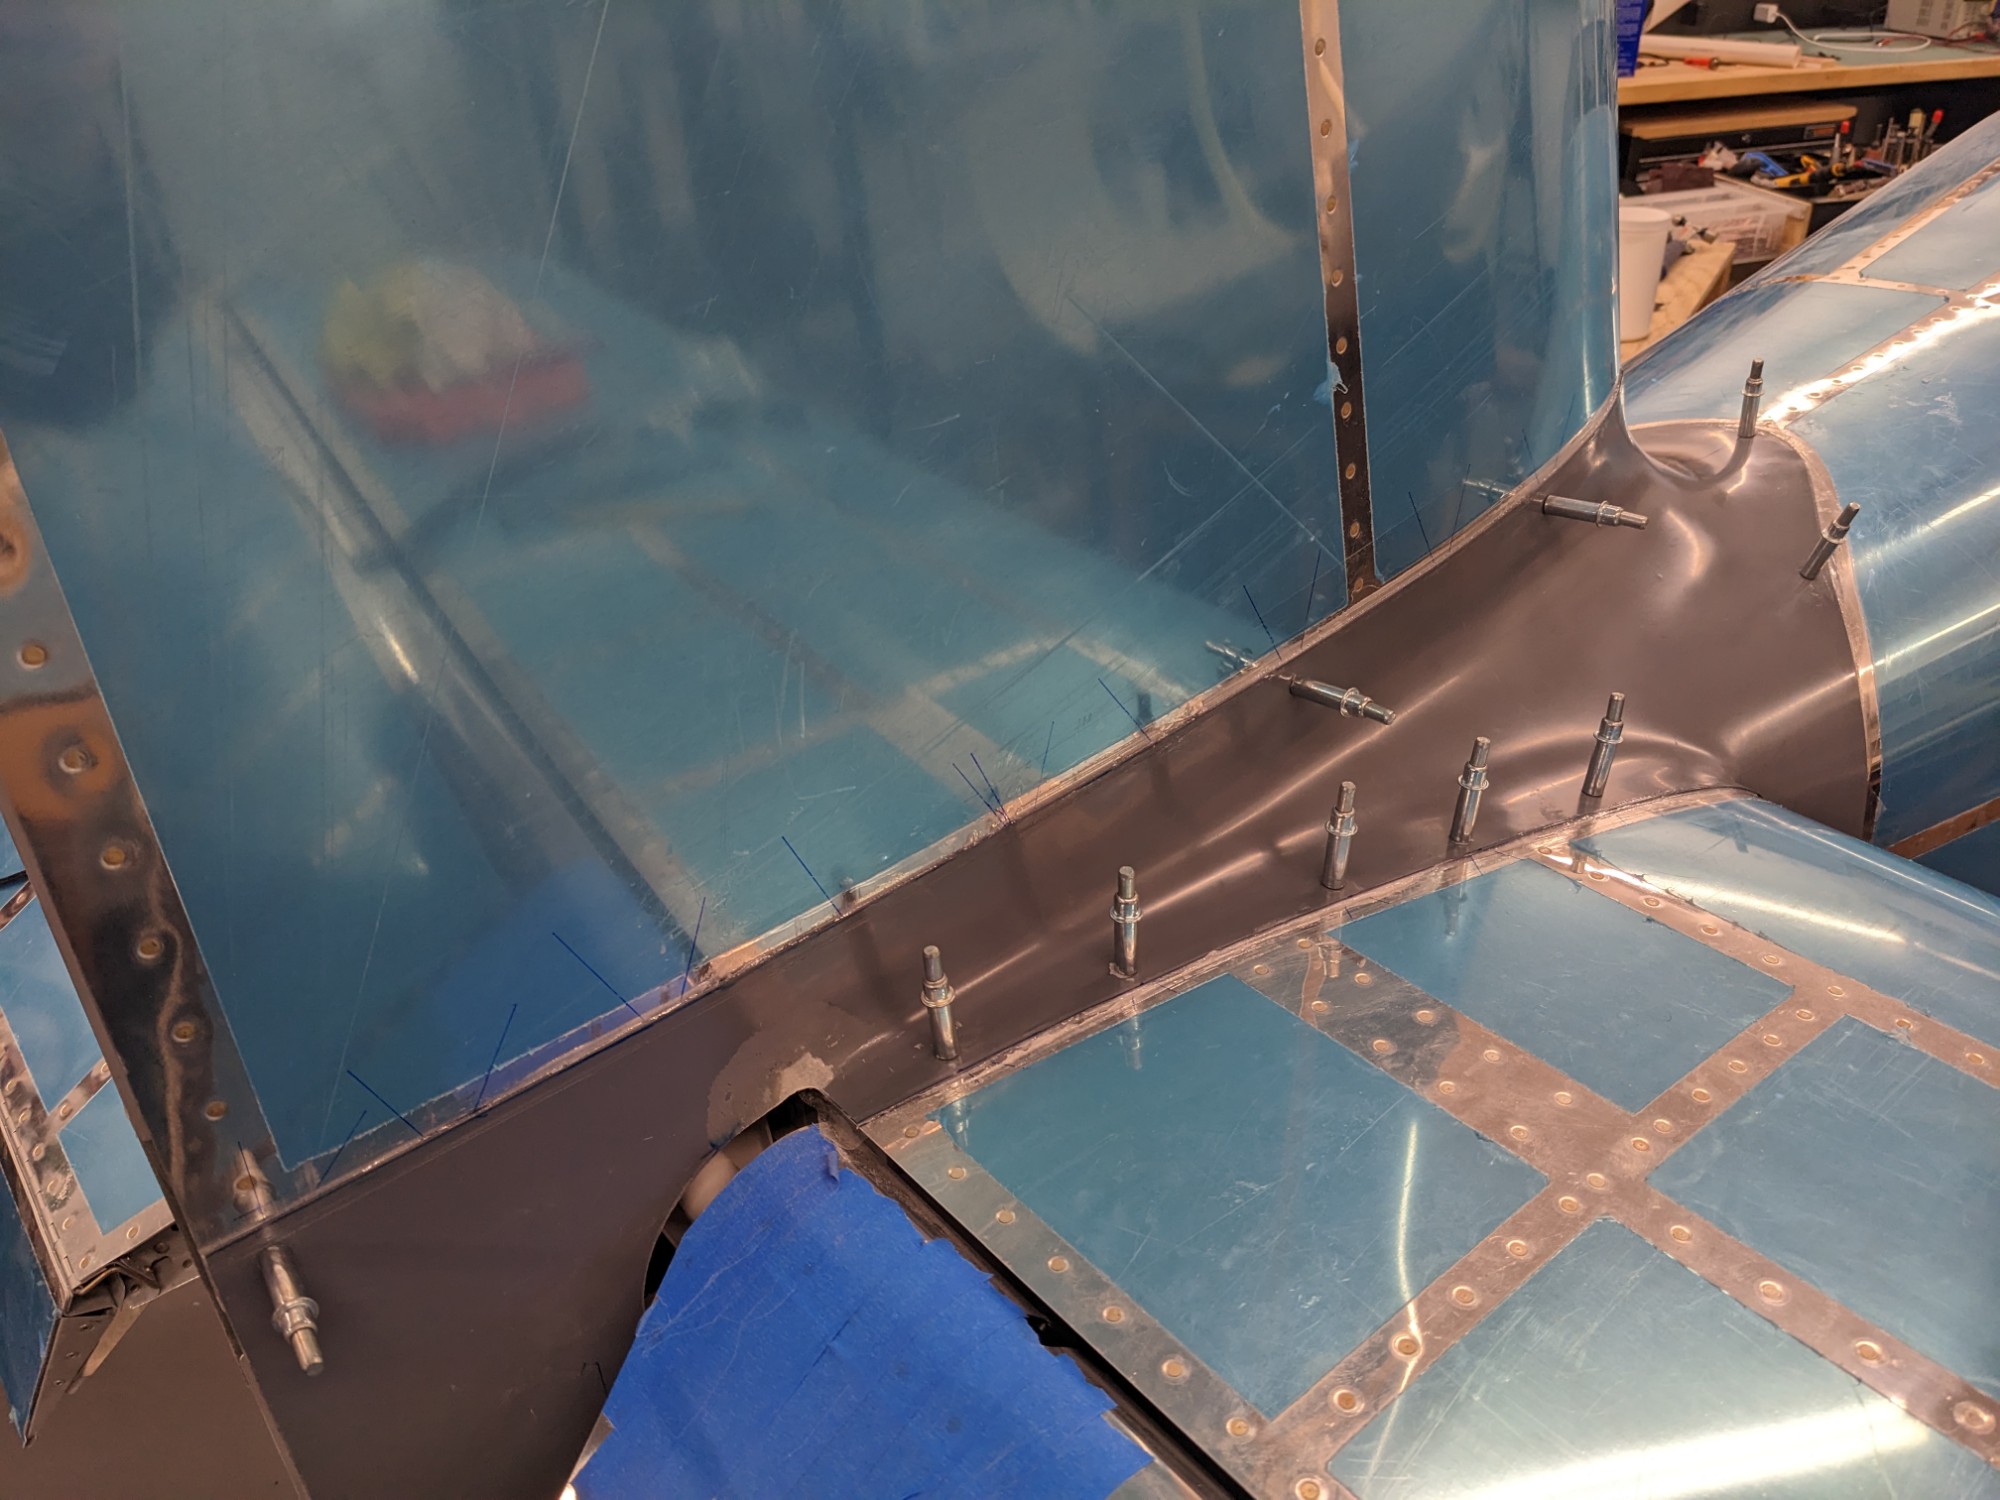
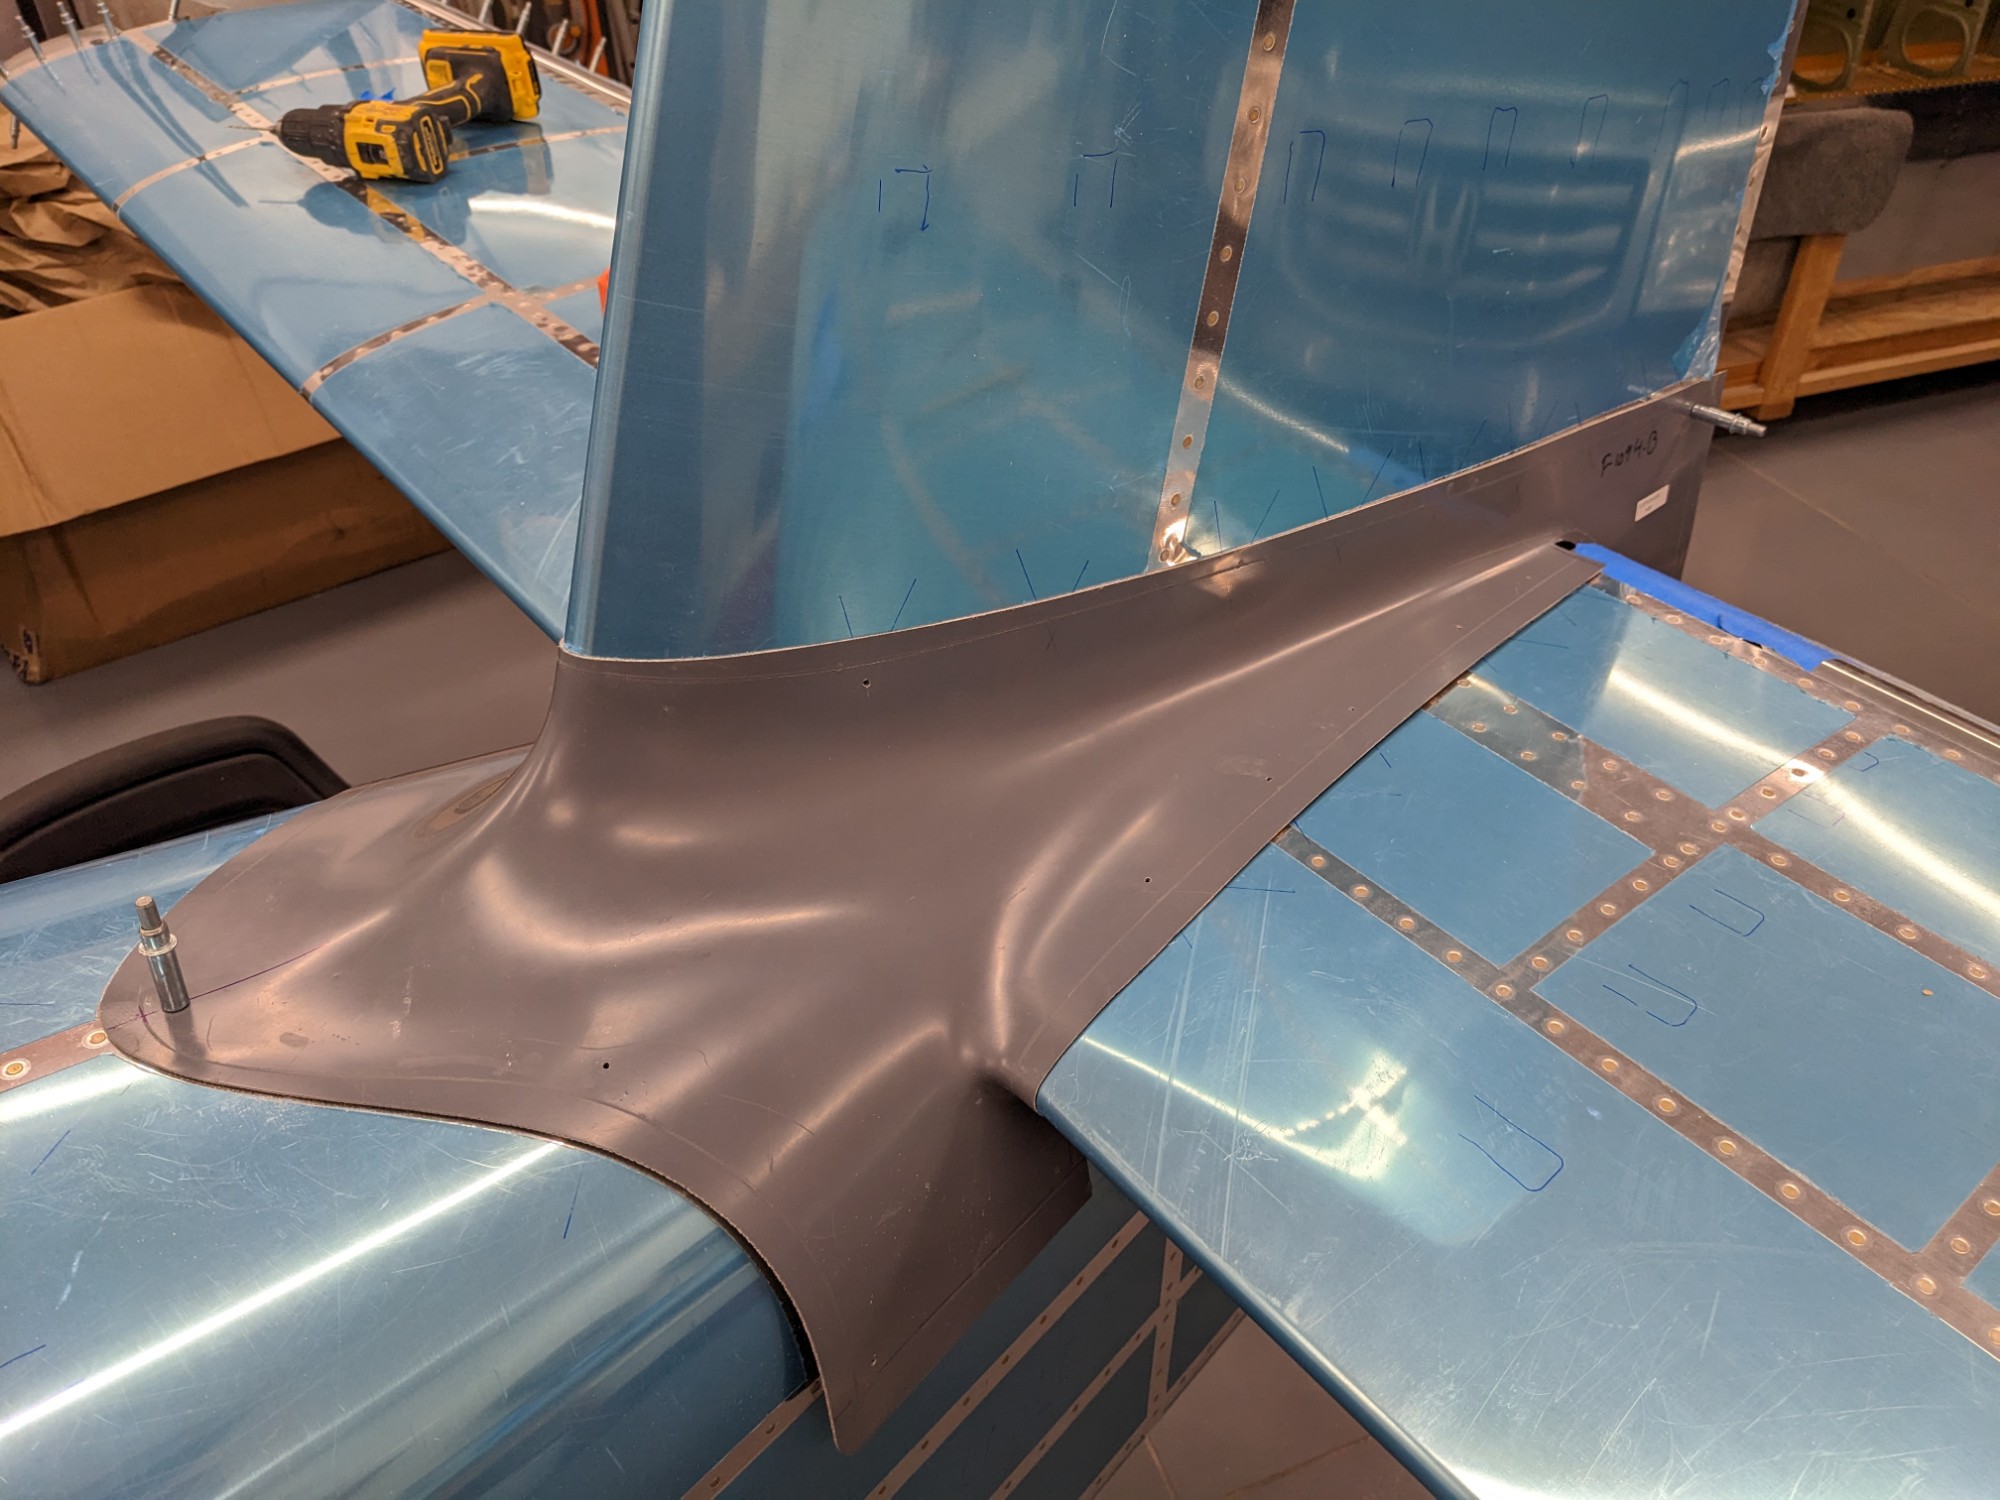
I then clecoed the fairing into place, squeezed out the extra epoxy, and left a small bead on the outside edge.
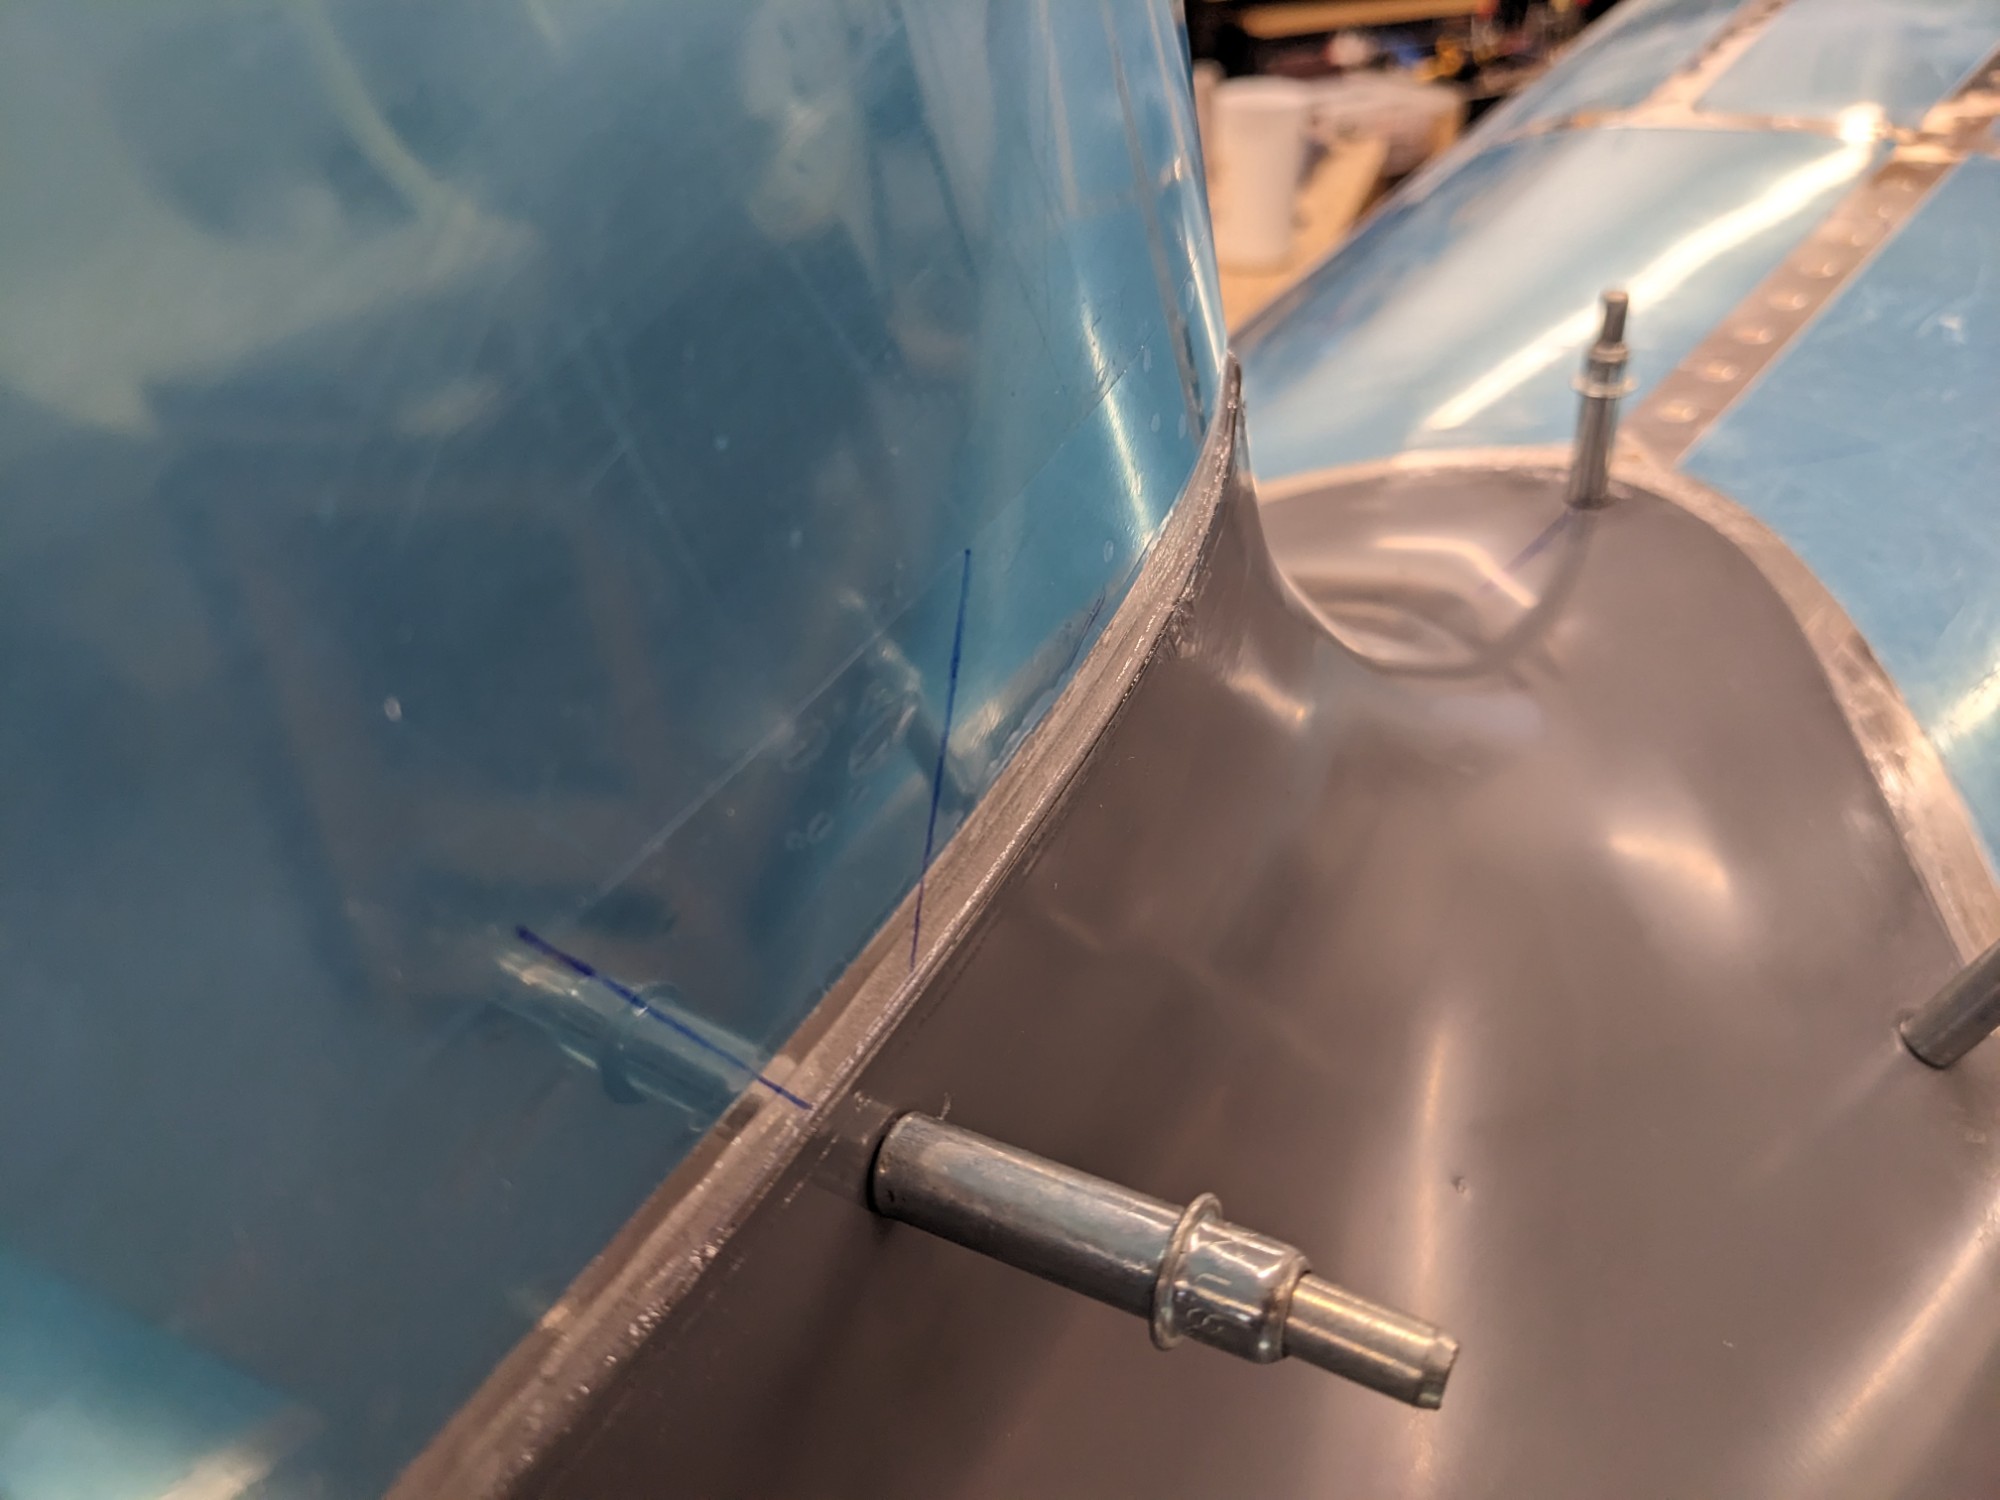
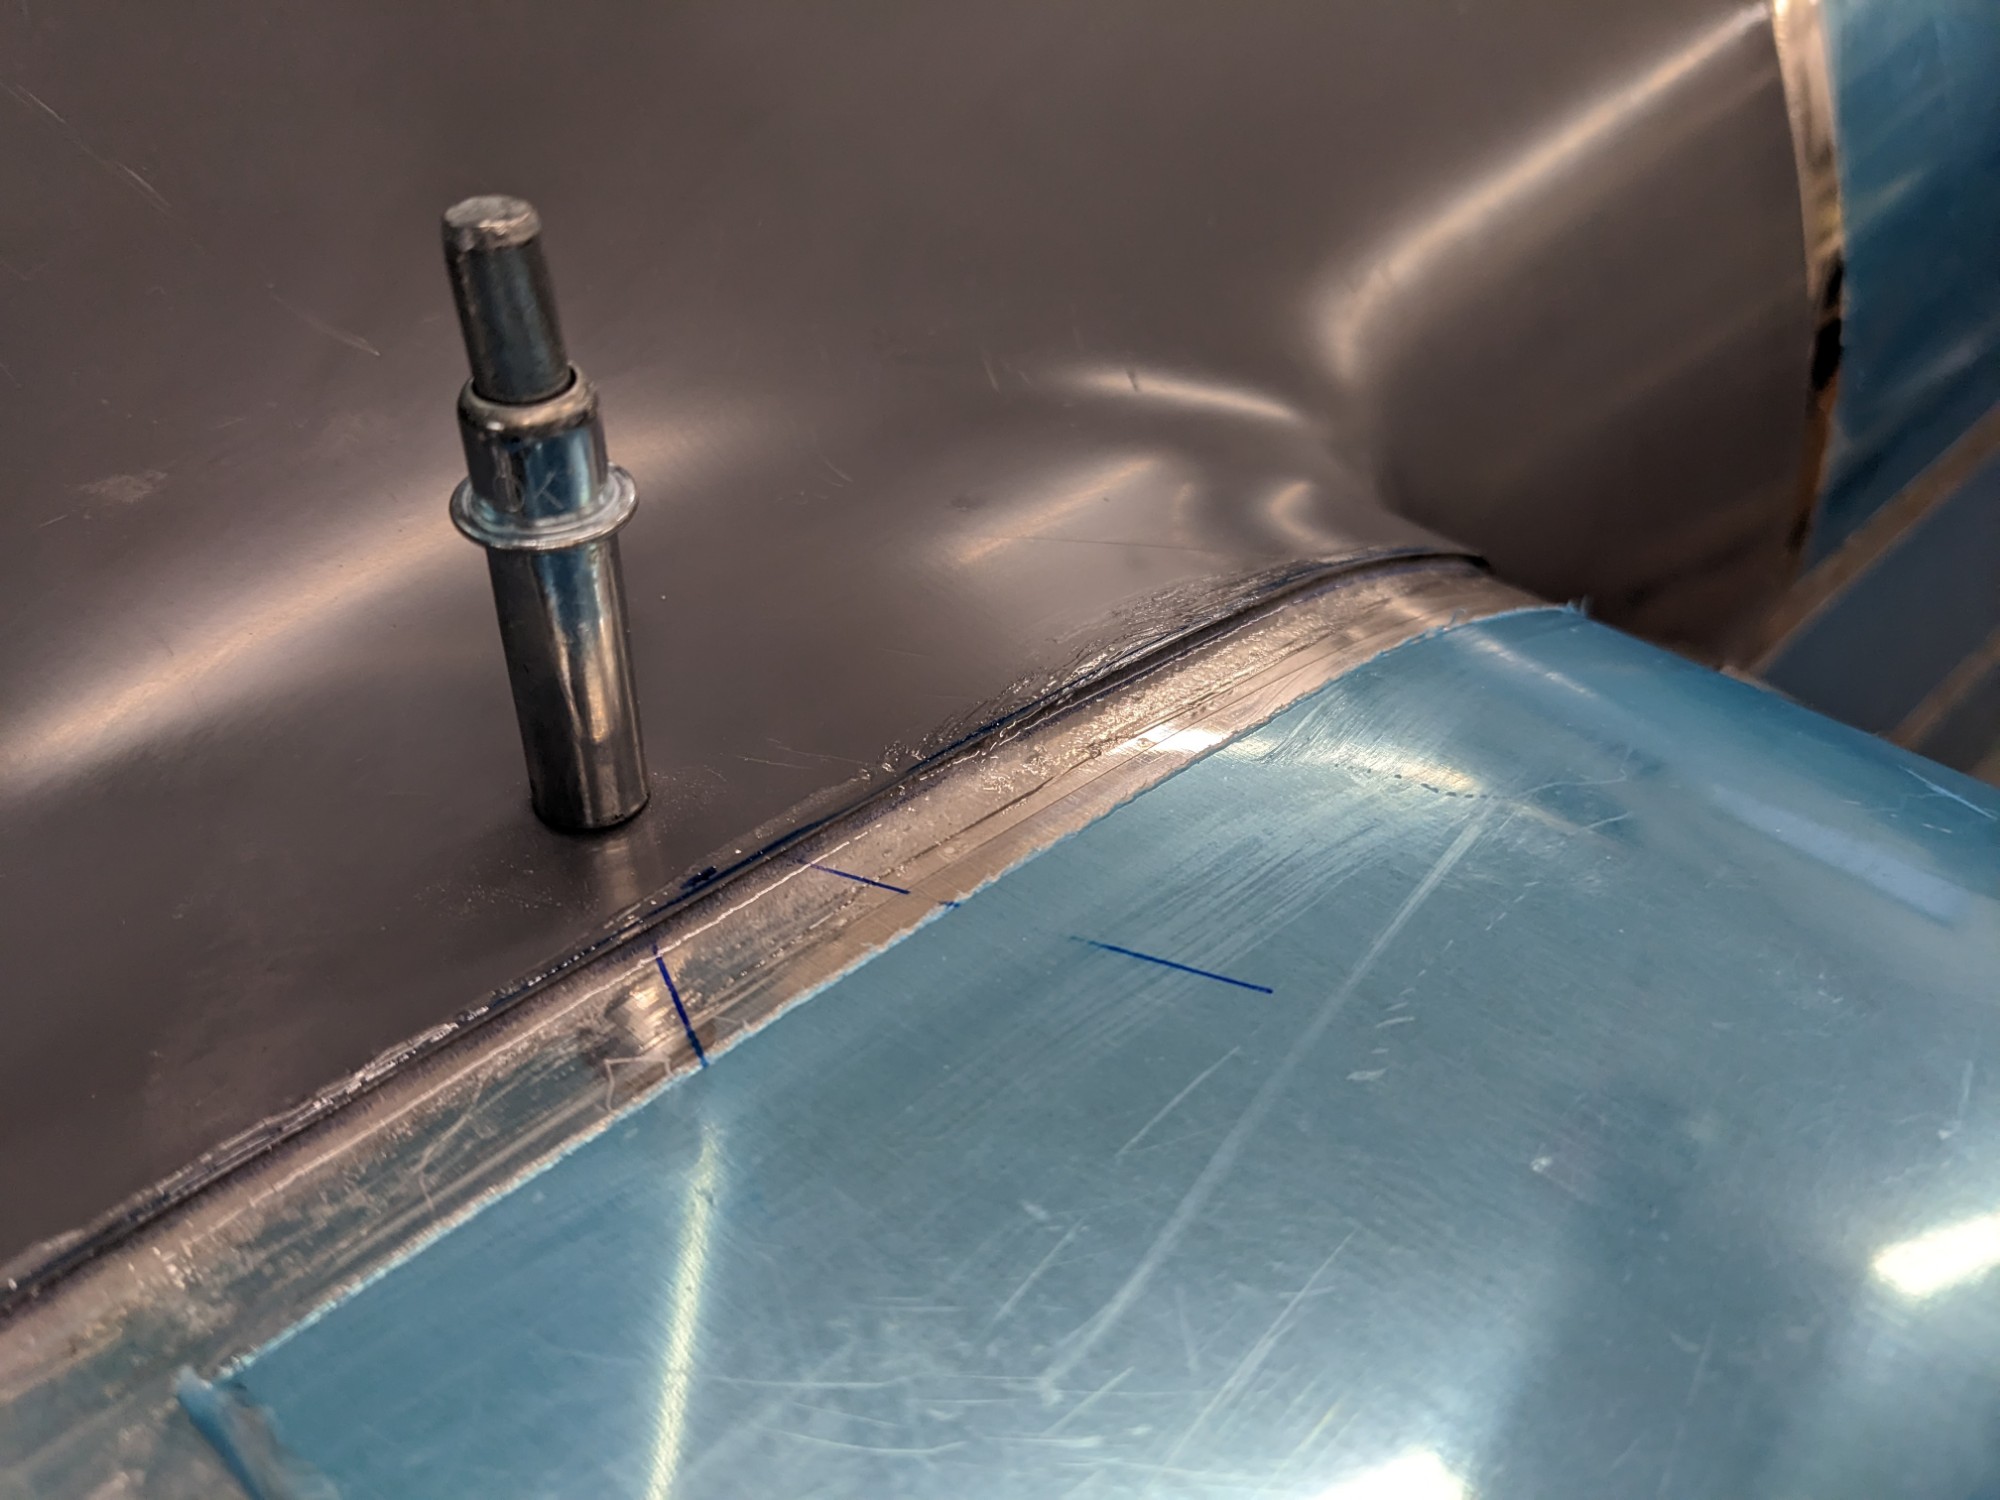

Once it cured I separated the fairing from the packing tape and lightly rounded the edge. This gave me a really clean fit against the skin around the entire edge.
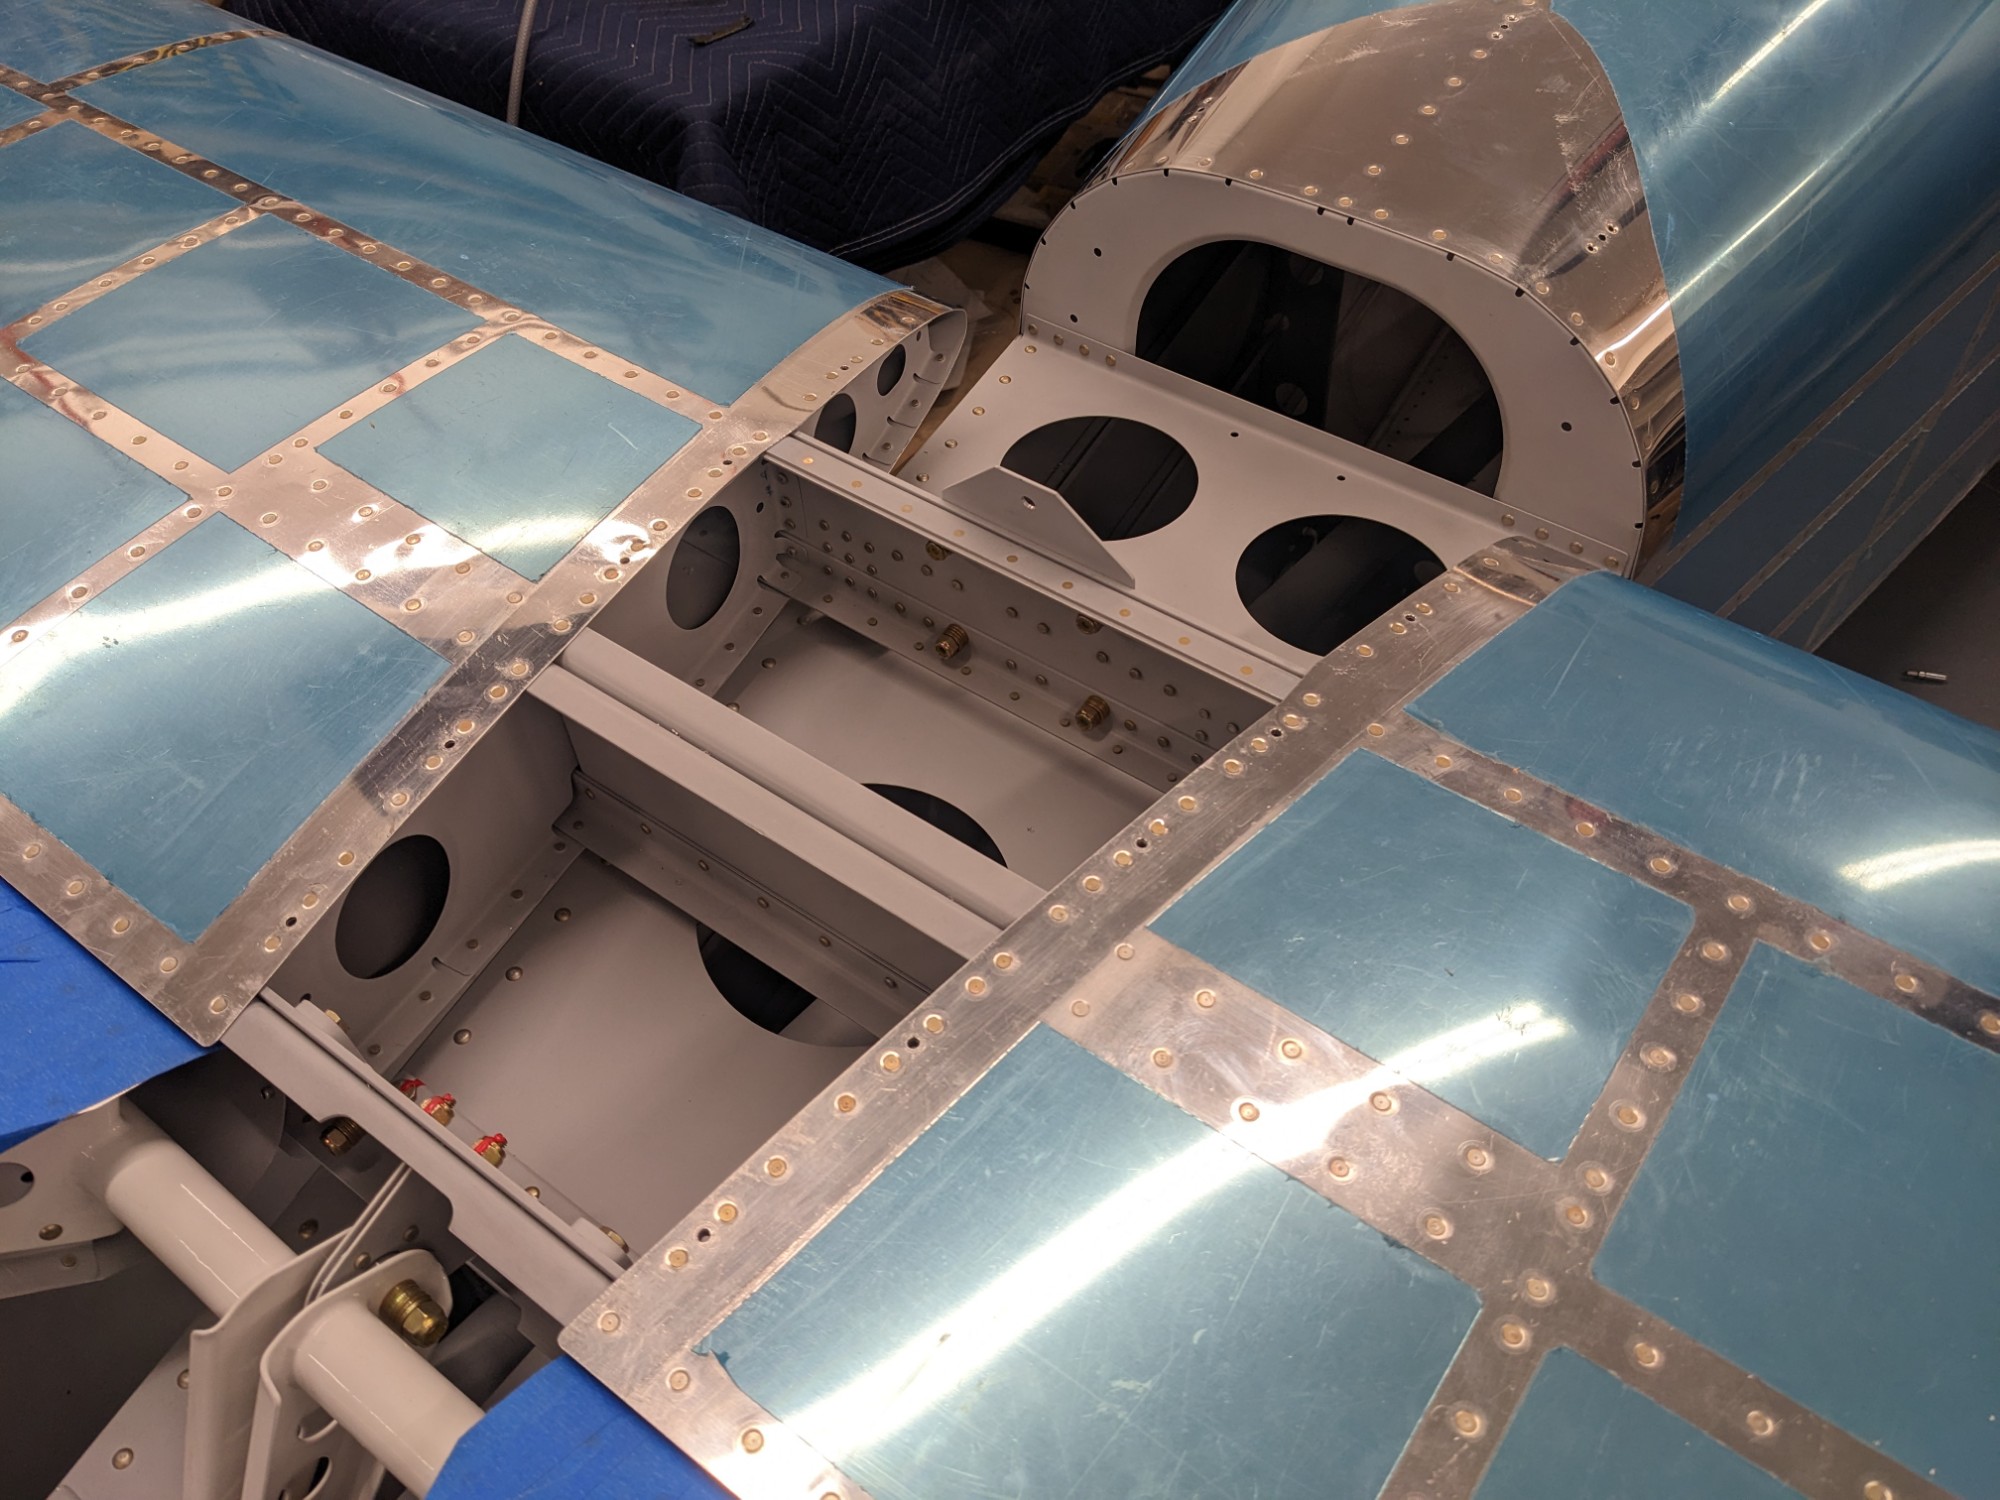
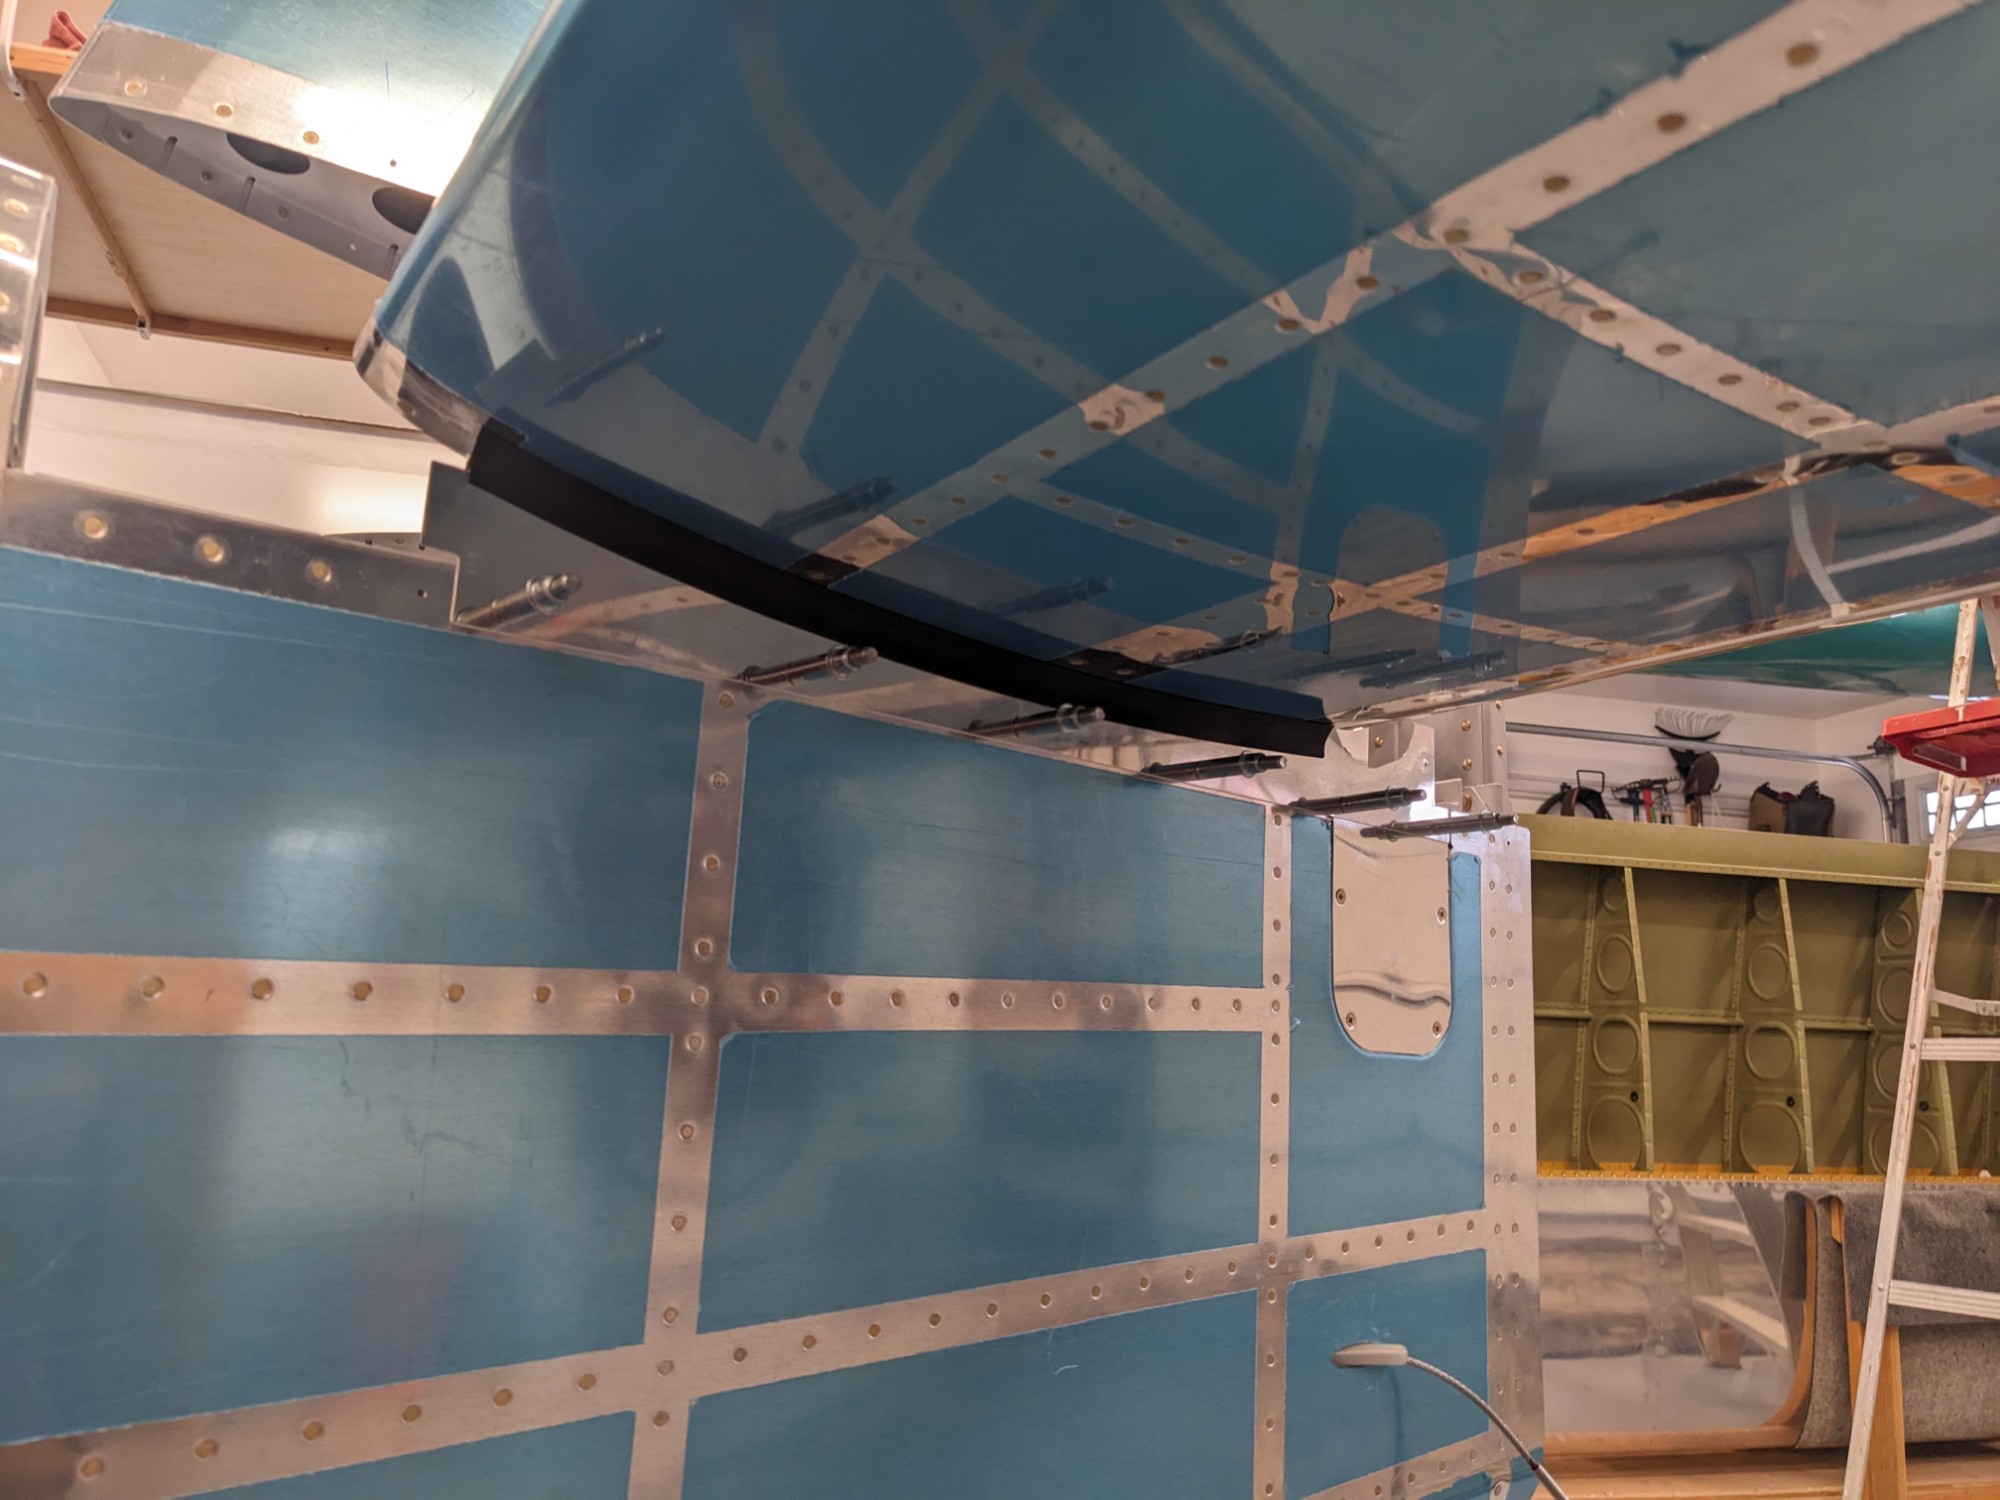
I then removed the vertical stabilizer and drilled the holes for nutplates. These were dimpled and riveted into place.
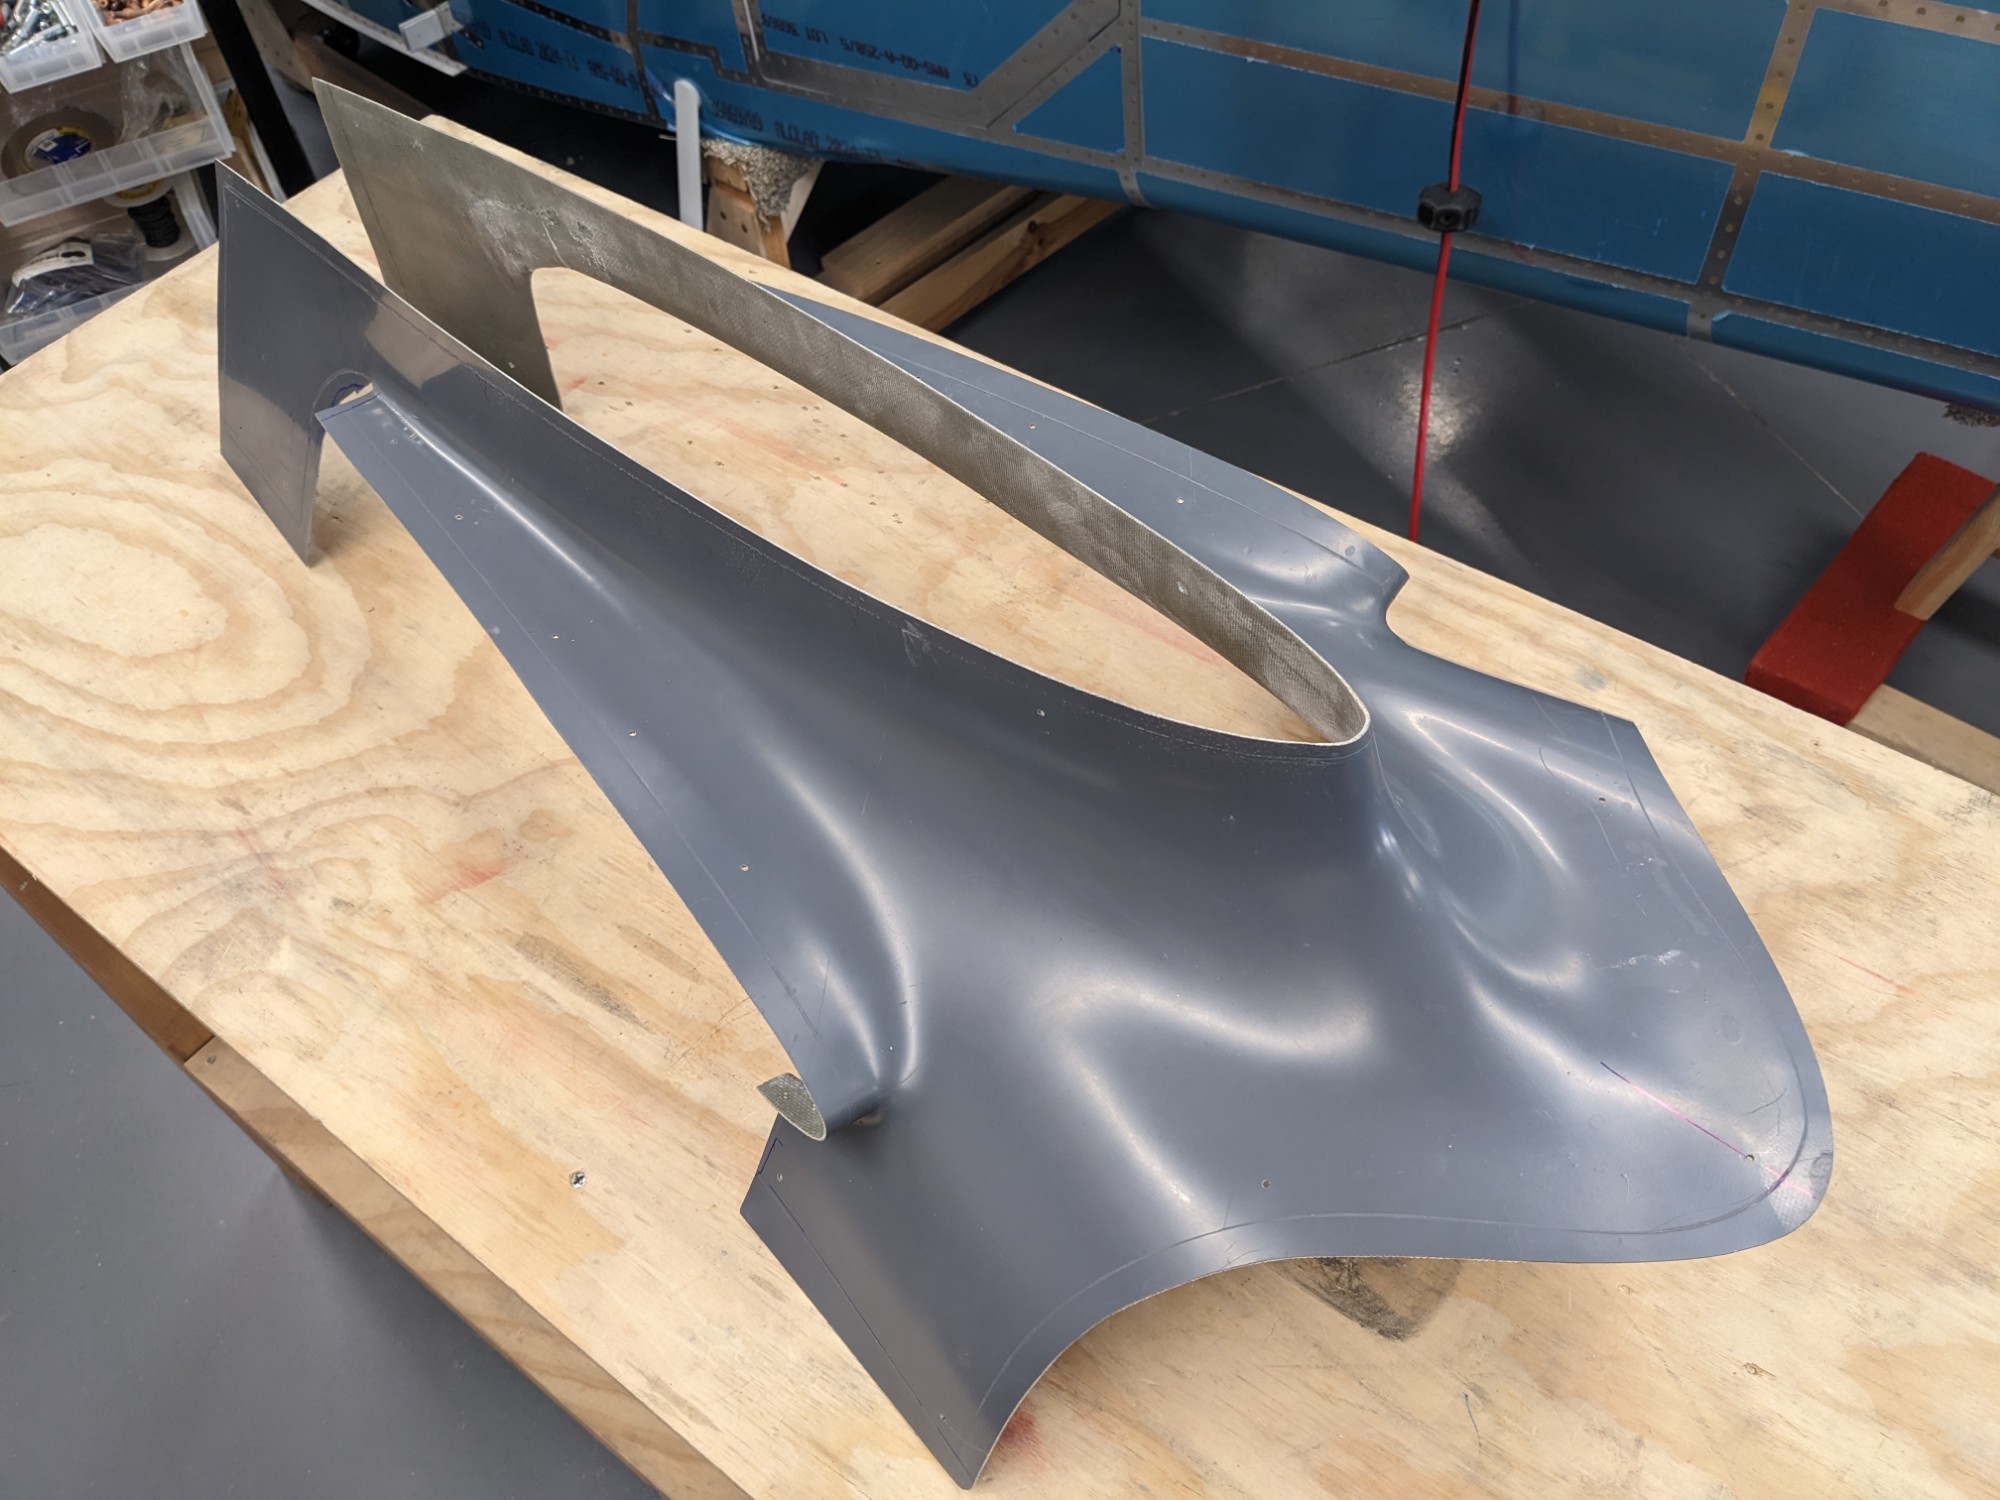
I then countersunk and tapped the longeron screw holes and dimpled the gap covers.
After priming the inside of the gap covers, and countersinking the fairing, I installed the fairing temporarily with the screws.
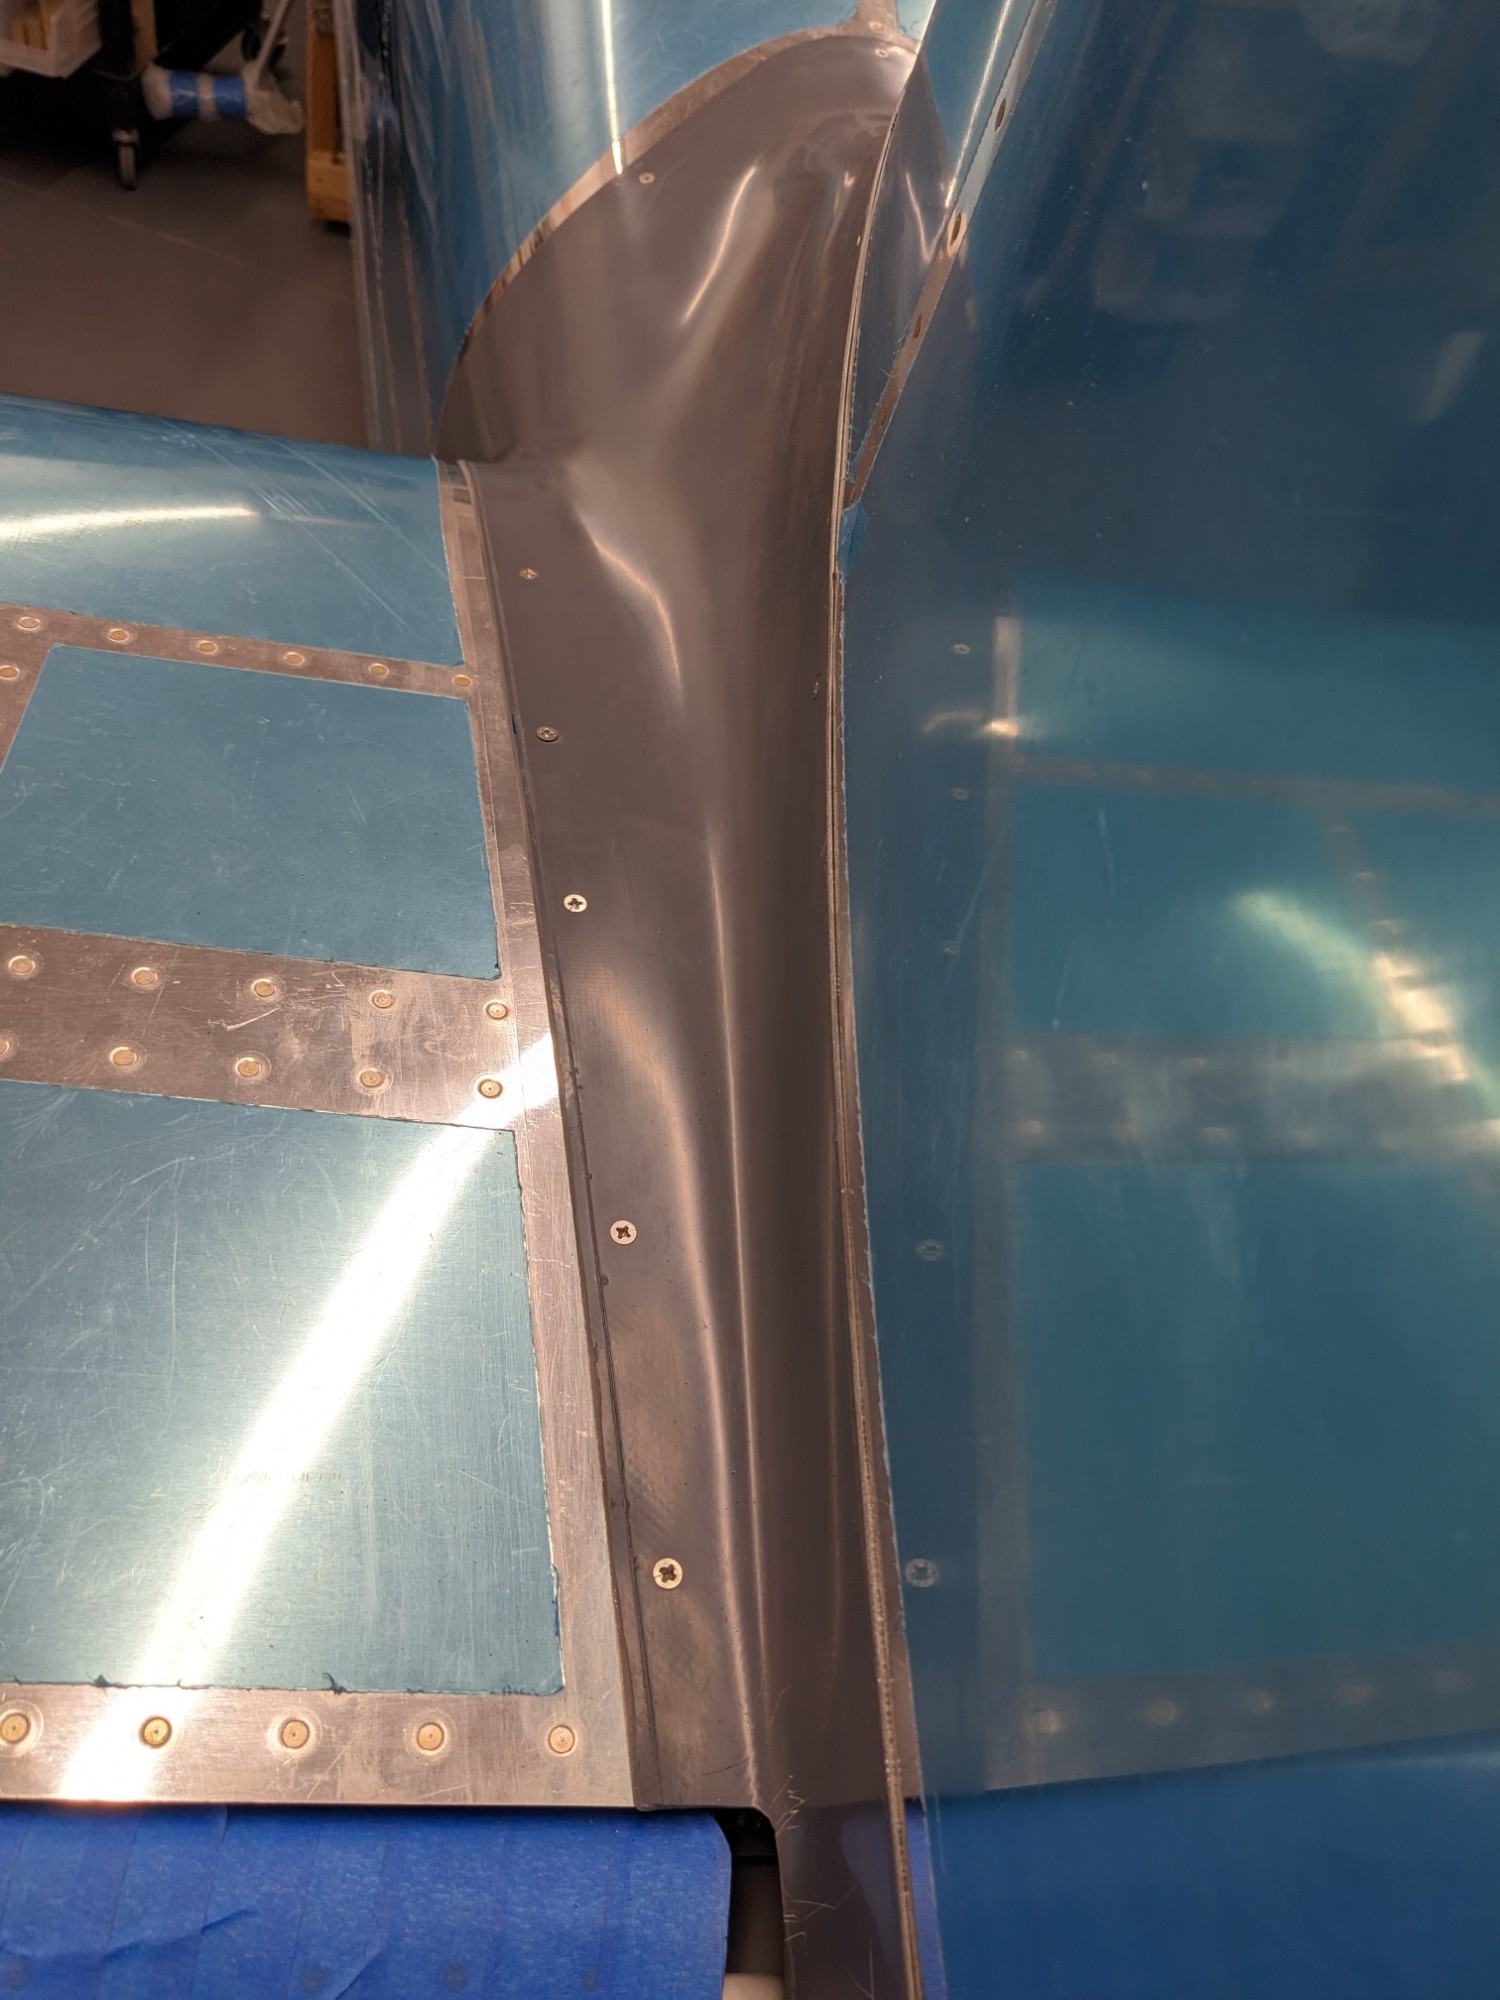
The fairing fits really well and sits tight against the skin.
I’ll have surface finishing to do, but otherwise, this fairing is pretty much done.